
Archery Blog
How to Tie a D-Loop on Your Bowstring: 7-Step Guide
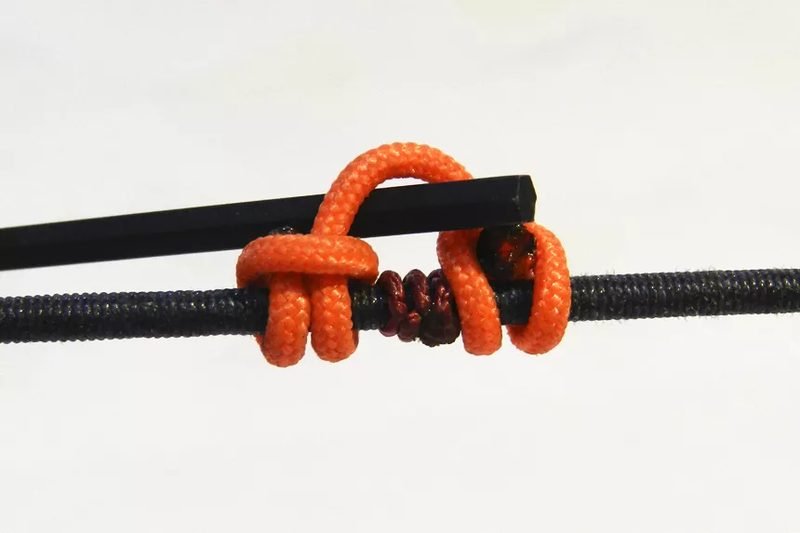
Aug
A misaligned D-loop costs more lost arrows and ruined scores than almost any other equipment issue. The knot itself is simple — most archers can tie one in under five minutes — but there’s more to it than just wrapping cord around a string. Get the size wrong and your release won’t seat cleanly. Place it off-center and every shot drifts the same direction. This guide covers the full installation process, the sizing logic that most YouTube videos skip, and the early warning signs that tell you it’s time to replace it.
What a D-Loop Does (and Why Release Shooters Need One)
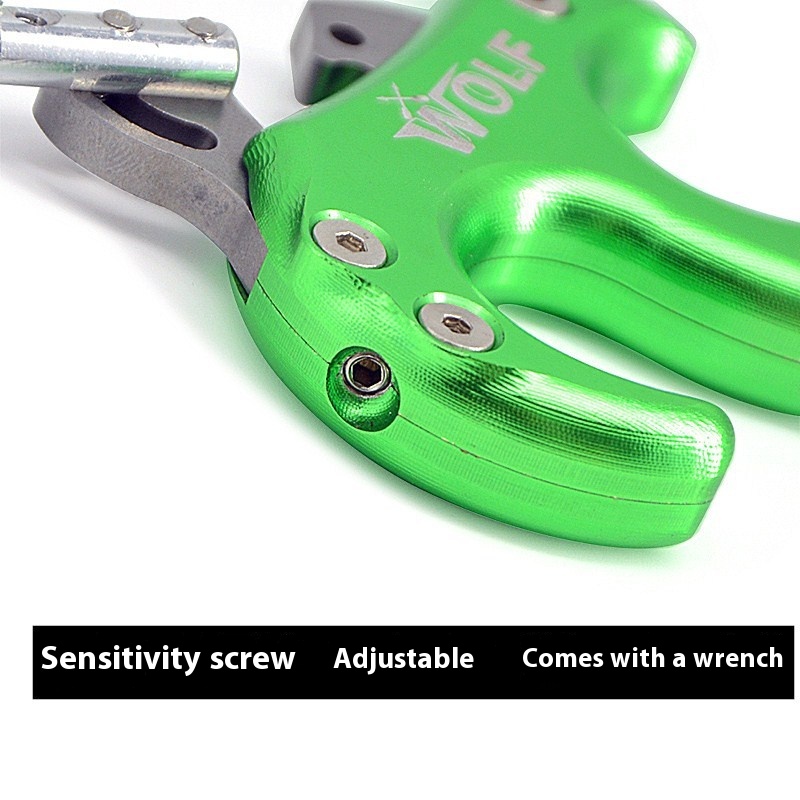
When you shoot a mechanical release aid — wrist strap, thumb trigger, or back-tension hinge — the release has to connect to the bowstring at a fixed, consistent point. Without a D-loop, the release jaws close directly on the string serving. That creates two problems: it eventually wears down the serving material, and it can introduce lateral torque into the shot depending on how the jaws sit.
A D-loop solves both. The cord sits between two girth hitch knots tied above and below the arrow nock, forming a small loop that the release hook fits cleanly inside. The loop can rotate slightly to accommodate the jaw angle, which makes your shots more consistent without demanding perfect jaw alignment every time. For compound bow shooters running a mechanical release, it’s not optional — it’s a fundamental part of how the bow is set up correctly.
Recurve archers and finger shooters don’t use D-loops. This guide is specifically for compound bow shooters using a mechanical release aid.
What You Need Before You Start
The material matters here. BCY #24 cord (2mm diameter) is the industry standard for D-loops and what most pro shops stock. It’s stiff enough to hold its shape under load but soft enough to seat cleanly when you tighten the knots. Thinner material like BCY #23 works but wears faster; paracord is too thick and too slippery to form a proper girth hitch.
Cut a piece about 4 to 4.25 inches long. That length accounts for the material consumed by both knots, leaving you a finished loop of roughly 5/8 inch internal measurement — the sweet spot for most wrist strap releases. You’ll also need a lighter to seal the cord ends, nocking pliers to tighten the knots firmly into place, and an arrow square to verify nocking point height after installation.
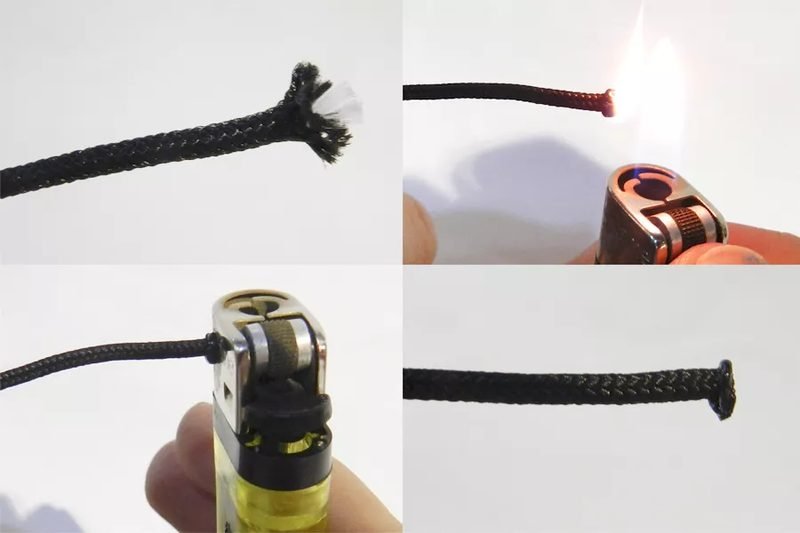
Burn each end of the cord until a firm ball forms. This seal is what keeps the knots locked in position under shot pressure.
How to Tie a D-Loop on Your Bowstring: 7 Steps
Before tying anything, confirm your nocking point is already set. The D-loop wraps around the string at that location — if you move the nocking point later, you’ll need to re-tie the entire loop. Most archers start at 90° (level) to the arrow rest and fine-tune from there.
Step 1 — Cut and seal the cord. Measure 4 to 4.25 inches of BCY #24 cord and cut cleanly with scissors or a blade. Burn each end with a lighter until a small, firm ball forms. Let the ends cool before proceeding — the ball shape is what locks each knot from pulling through once tightened.
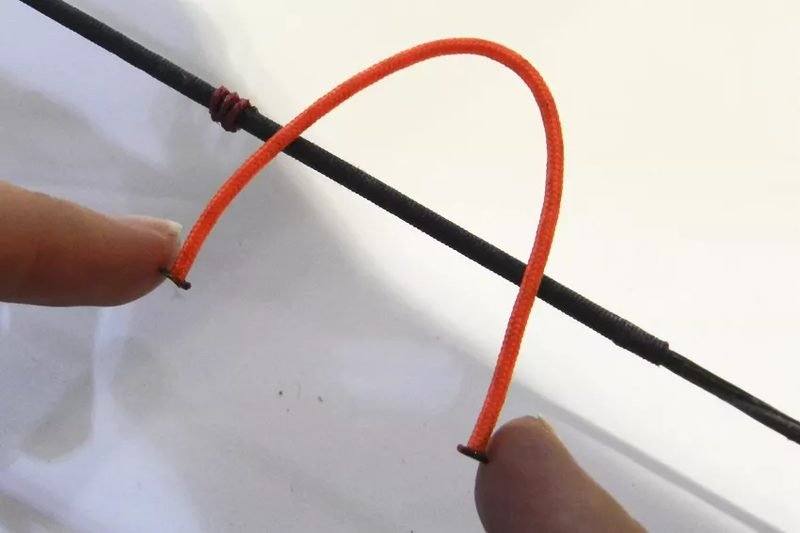
Thread the cord so it centers at your nocking point, with roughly equal length on each side before you begin wrapping.
Step 2 — Position at the nocking point. Hold the cord centered against the string at your nocking point, with equal length extending above and below. The arrow nock should sit against the string between the two points where the knots will go.
Step 3 — Tie the bottom knot. Take the lower end of the cord, wrap it around the string below the nocking point, then bring the tail back through the loop you’ve formed — this is the girth hitch. Don’t fully tighten yet; you need the top knot in place first so you can confirm the loop is centered before locking both down.
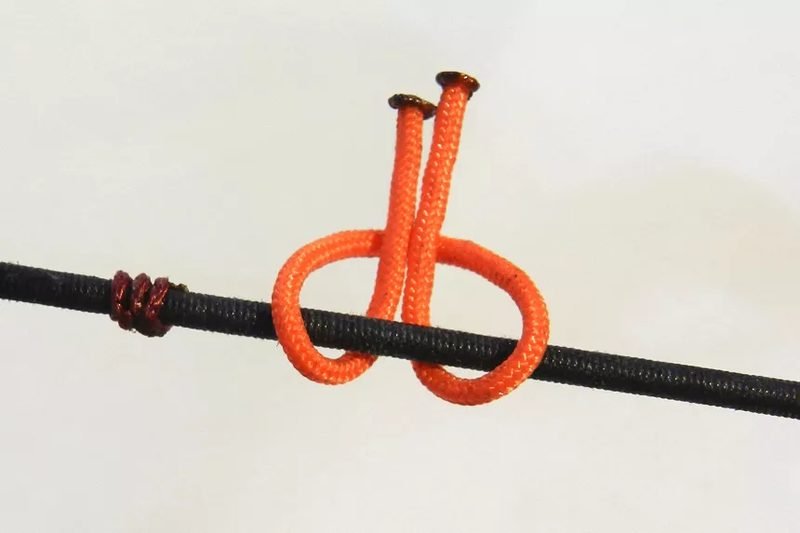
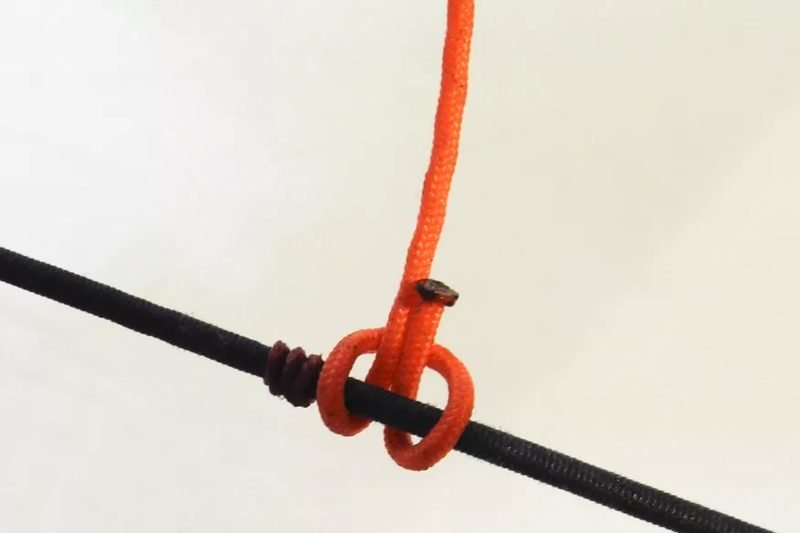
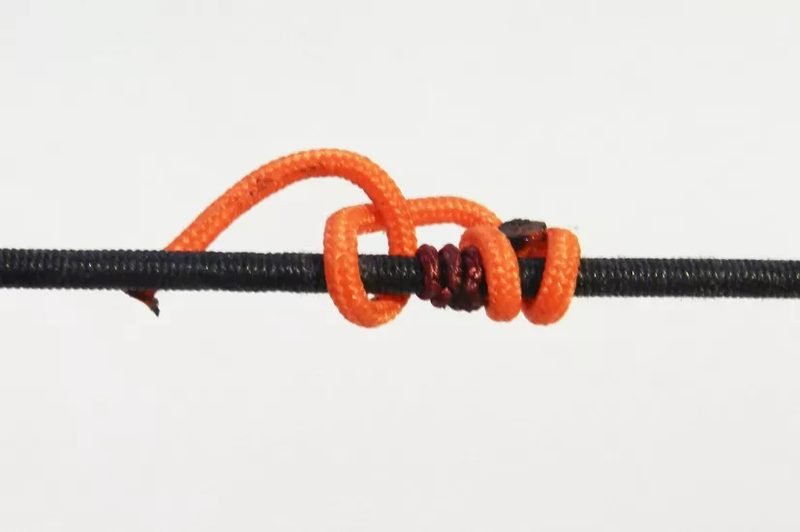
Both ends wrap around the string using girth hitch knots — one above and one below the nocking point. The D shape becomes visible once both are loosely in place.
Step 4 — Tie the top knot. Repeat the girth hitch on the upper end of the cord, above the nocking point. Now both knots are loosely in place with the D-loop sitting between them.
With both girth hitches loosely tied, check that the loop opening faces away from the riser before tightening.
Step 5 — Tighten both knots with nocking pliers. Use nocking pliers on each knot, working from both sides toward the string. Apply firm, even pressure — the ball-sealed ends should compress against the serving and lock in place. This is where most first-timers go wrong: hand-tightening is not enough. The knots need to be squeezed down so they can’t rotate under shot pressure.
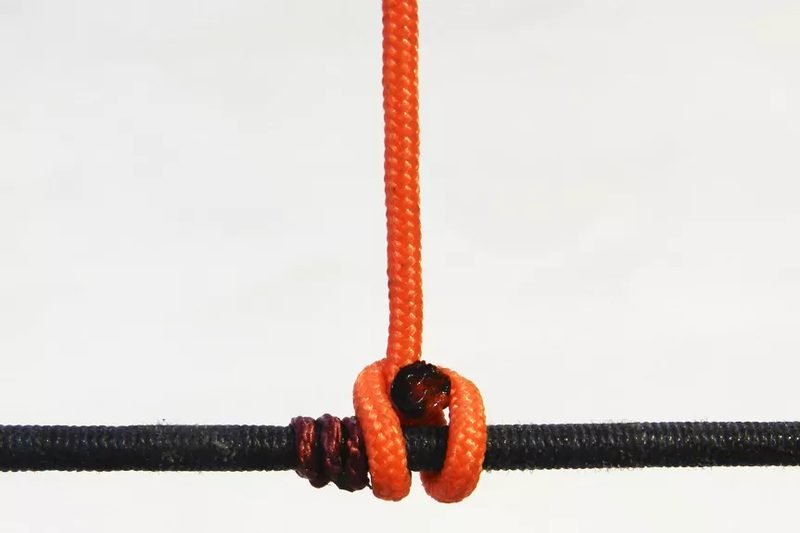
Nocking pliers give you the leverage to compress the knots firmly enough that they won’t rotate or walk under shot pressure.
Step 6 — Check alignment. The opening of the D should face away from the riser — toward the shooter. If the loop has twisted during tightening, loosen the knots slightly, rotate it back, and re-tighten. Getting this right now saves you from hunting down a mystery accuracy problem later.
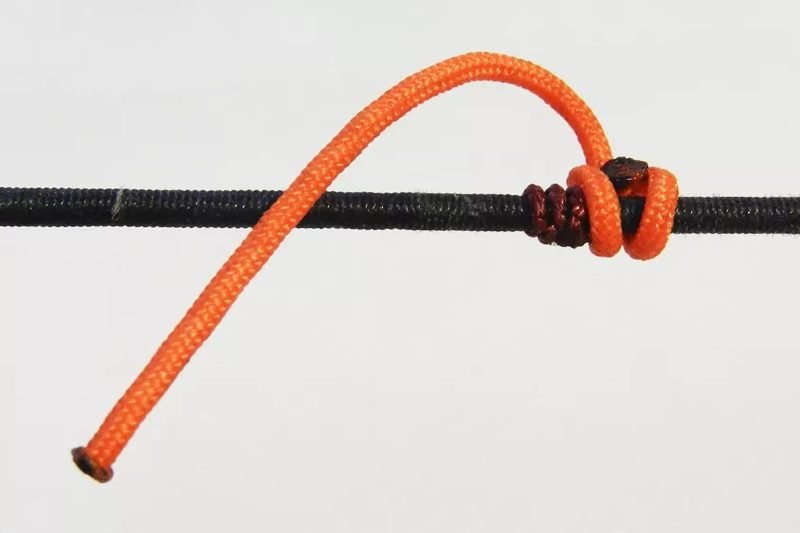
With both knots set, the loop should sit centered at the nocking point with the opening oriented toward the shooter.
Step 7 — Seat it. Clip your release aid to the loop and draw the bow to full draw several times without shooting. This settles the knots into their final position. A D-loop that hasn’t been seated will shift on your first few shots and throw off your zero.
After tightening both knots, draw the bow several times to seat the loop before your first shot.
D-Loop Size: How Long Should It Be?
The inside measurement of the loop — the distance between the two knots — determines whether your release aid seats cleanly. The right size depends on your release type:
- Wrist strap release: 5/8 inch (about 16mm) is the standard starting point for most hooks
- Thumb trigger or hinge release: 11/16 to 3/4 inch (17–19mm) to accommodate the larger hook head
- Minimum usable size: 1/2 inch — shorter than this and the release jaw can’t seat perpendicular to the string, which adds torque
- Maximum practical size: 7/8 inch — beyond this, the release moves around too much at anchor
The 4 to 4.25 inch starting length of BCY #24 cord typically produces a 5/8 inch loop after both knots are tightened. To get a slightly larger loop, start with 4.5 inches of cord. If your release is constantly unclipping at full draw or feels tight when seating, that’s a sizing issue — not technique. Re-tie with the correct cord length.
Where to Place the D-Loop on Your Bowstring
Nocking point height — how far above or below center the loop sits — directly affects arrow flight. Set it too low and your arrows kick upward at release. Too high and they dive. Most compound bow setups start with the nocking point 3/16 to 1/4 inch above center (above 90° to the arrow rest), then fine-tune through paper tuning or walk-back tuning.
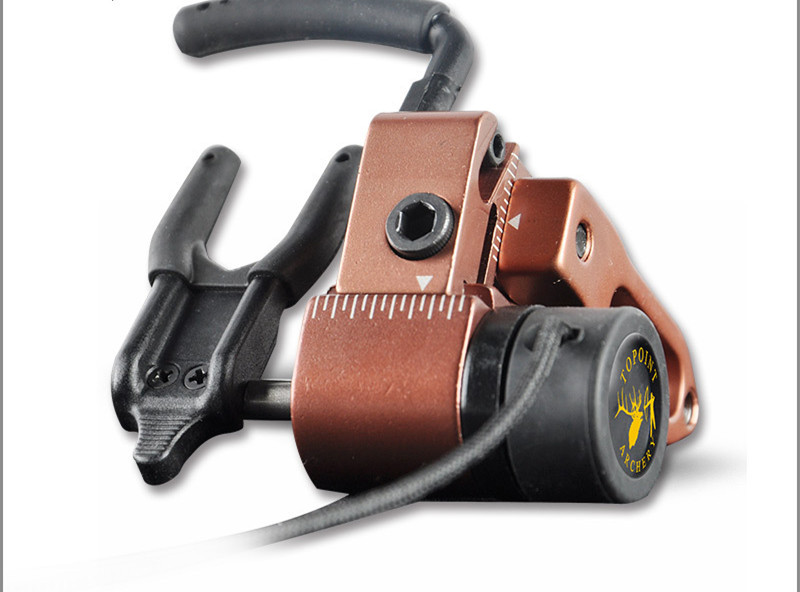
The practical rule: tie your D-loop at whatever nocking point height your bow manual specifies, or wherever your arrow rest manufacturer recommends. For drop-away rest setups, the launch angle matters more than with blade or containment rests — take an extra minute with the arrow square before locking in the loop position. If you later add a peep sight, verify that it aligns with your anchor point at the nocking point height you’ve already set.
The mistake archers make is tying the D-loop first and then worrying about nocking point height. Get the height right first. Moving the loop half an inch after the fact means re-tying both knots and re-tuning your rest.
Common Mistakes When Tying a D-Loop
The two most common problems are under-tightened knots and wrong cord material. Knots that haven’t been fully compressed with nocking pliers rotate under shot pressure — the loop gradually creeps sideways, and your groups open up before you figure out why. The fix is proper tool use, not just pulling the cord tighter by hand.
Wrong cord material causes the other common failure. If you’re using anything other than BCY #23 or #24 — paracord, generic braided line, whatever was in the shop drawer — expect faster wear and unpredictable knot behavior. BCY #24 costs almost nothing per D-loop length. There’s no good reason to substitute.
- Skipping the burn step: Unburned ends unravel under load. The ball seal is literally what keeps the knot from pulling through itself.
- Too-short loop: A release that won’t clip in cleanly or keeps unclipping at full draw means the loop is too small for that hook size — not a form problem.
- Not seating it: Draw the bow several times before your first shot. An unseated D-loop shifts on the first few shots and moves your zero.
- Skipping the arrow square: After installation, verify the nocking point height with an arrow square. Even a small shift during tying affects your arrow flight.
When to Replace Your D-Loop
A properly tied D-loop on BCY #24 cord typically holds up for 2,000 to 3,000 shots. Competitive archers who shoot daily may replace theirs every four to six weeks. Recreational shooters can often go a full season without needing to change it.
Replace it when you see visible fraying or flattening at either knot point, when the loop has rotated more than 30 degrees from its original position and won’t stay put after re-tightening, or when the inside diameter has stretched enough that your release feels loose at anchor. These problems don’t sneak up gradually — they tend to show up suddenly. Build a D-loop check into every pre-hunt or pre-tournament gear inspection.
Tying a new one takes five minutes once you’ve done it a few times, and cord costs almost nothing. It’s the cheapest maintenance task in your compound bow setup — and one of the highest-return ones. Most archers who replace their D-loop for the first time in a year are surprised at how much their groups tighten up.
Sources
- World Archery — Archery 101: How to Tie a D-Loop — Step-by-step photography and guide from World Archery, the sport’s international governing body.
- Lancaster Archery Supply — How to Tie a D-Loop — Equipment setup guide from the largest archery specialty retailer in the United States.
- 60X Custom Strings — Styles of D-Loops for Compound Bows — Technical breakdown of D-loop variations and cord material specifications from a leading custom bowstring manufacturer.
