
Archery Blog
Paper Tuning Chart: The Complete 4-Tear Fix Guide

May
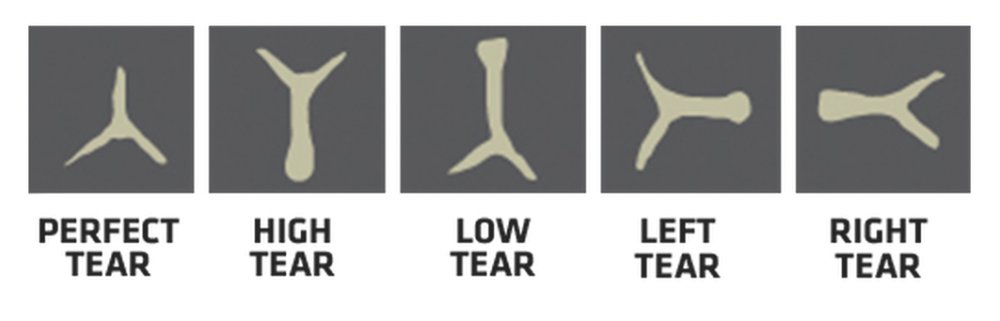
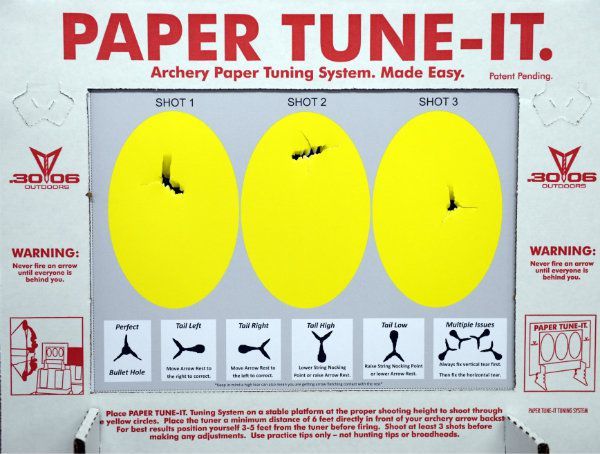
A perfect paper tuning chart shows a tear with a clean round hole and three sharp slices radiating out — nothing else. Every other tear shape on that chart points to one specific fault in your setup, and the fix is almost always faster than you’d think. This guide walks through the four tear patterns you’ll actually see at the paper, what each one means, and the exact adjustment to make before the next shot.
What the Paper Tuning Chart Actually Tells You
Paper tuning is a diagnostic shortcut. You shoot a single arrow through a sheet of butcher paper stretched in a frame about six feet in front of you, and the tear it leaves is a frozen snapshot of the arrow’s flight at that distance. If the back end of the arrow is yawing left when it punches the paper, the fletchings drag a tail to the left of the entry hole. If the nock end is sitting too high, the slice points up. The shape of the tear is the verdict.
The reason it works is simple: by the time an arrow is eight or ten yards downrange, the fletchings have started forcing the shaft to fly straight regardless of how it left the bow. Paper catches the arrow before that correction happens. A bow that looks accurate at twenty yards can still have a nock-left tear at six feet — and that tear will cost you broadhead accuracy the second you screw in a fixed blade.
The classic chart has five outcomes: perfect, high, low, left, and right. Most archers will only see one or two of these on a given bow, but knowing all four imperfect patterns means you can fix any of them without guessing.
How to Set Up a Paper Tuning Station
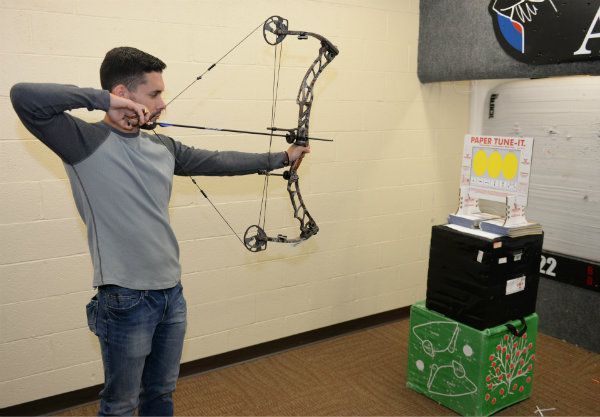
You need three things: a sheet of paper big enough that the arrow won’t miss it, a frame to hold the paper taut, and a backstop behind it that will fully stop the arrow. Cheap newspaper works, but butcher paper or craft paper tears cleaner and gives you a more readable pattern. Cardboard frames with a yellow oval insert (like the 30-06 Paper Tune-It) are popular because the contrast makes the tear easier to photograph and study.
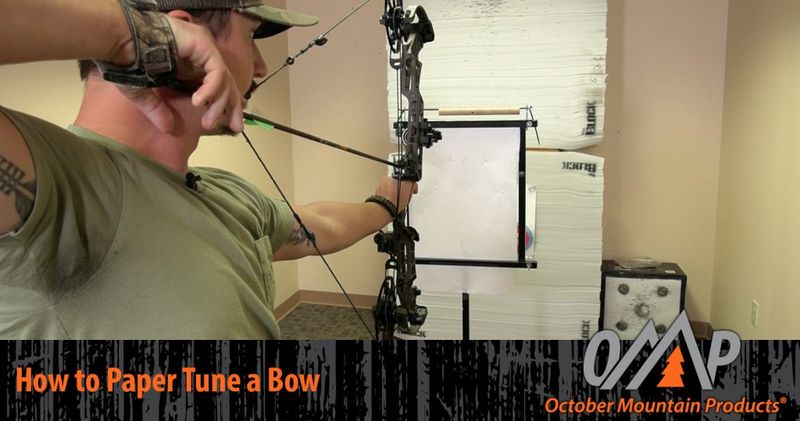
Set the paper frame so the center of the sheet is at your nose height when shooting from a standing posture. Position the backstop two to three feet behind the paper so the arrow can pass cleanly through without being deflected mid-flight. Stand four to six feet back from the paper — close enough that the fletchings haven’t corrected the flight, far enough that the broadhead clearance is safe.
Shoot field points only at this stage. Broadheads add their own steering and will mask the real flaw in your tune. Three shots is the minimum to call a tear pattern repeatable; one shot can lie to you if your form wavered.
The Perfect Bullet-Hole Tear
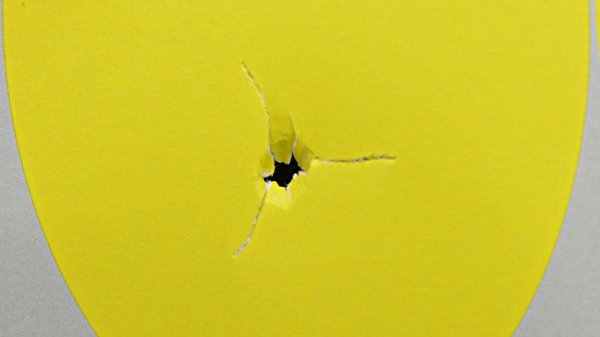
A clean bullet hole means the arrow flew nose-forward with the fletchings tracking directly behind the point. The tear is a round hole roughly the diameter of your shaft with three or four straight slices radiating out from it — one per fletching. No tail goes longer than another. No edge of the hole is ragged.
If your first three shots all print bullet holes, you’re done at the paper. Move to broadhead-tipped arrows at twenty yards and confirm group consistency. A truly tuned bow will print field tips and fixed broadheads to the same point of impact at twenty without further adjustment.
Nock High Tear: Raise the Rest or Lower the Nock
A nock-high tear is the most common imperfection on a freshly built compound. The fletching slice points upward — meaning the back of the arrow was traveling above the level of the point at the paper. The bow shot it like a ramp.
The fix is one of two adjustments, and you only do one at a time. Either lower the nocking point on the string by about 1/16 of an inch, or raise the arrow rest by the same amount. Most paper tuners prefer to move the rest because nocking points often involve crimping or tying serving knots that you don’t want to disturb mid-session. Raise the rest a single rotation of the elevation screw, then shoot another three-shot group. If the tear shrinks but is still angled high, move it again. If it flips to a nock-low tear, you went too far — back it off half a turn.
Nock-high tears that won’t budge after three or four rest adjustments usually point to a cam timing issue on hard-cam compound bows. If the top cam is rolling over earlier than the bottom, the string is rocking the nock upward at release no matter where you set your rest. Time the cams or take it to a shop with a draw board.
Nock Low Tear: Lower the Rest or Raise the Nock
A nock-low tear is the inverse — the slice from the fletching points downward, meaning the nock end of the arrow was sagging below the point as it crossed the paper. This is less common on compounds than nock-high tears but shows up regularly on bows that have been over-adjusted in the other direction.
Lower the arrow rest 1/16 inch and re-shoot. If you’ve already maxed out the rest’s downward travel, raise the nocking point instead. Again, only one variable at a time. The 1/16-inch rule is forgiving — a quarter-inch correction in one swing will usually overshoot and dump you into a nock-high pattern on the next shot, costing you an extra group to walk it back.
If you’ve adjusted the rest through its entire range and still see a nock-low tear, the arrow itself might be the issue. An arrow that’s significantly under-spined for your draw weight will paradox excessively and print a low tear even on a perfectly timed bow. Pull a chart, verify your spine, and consider a stiffer shaft.
Tail Left and Tail Right: The Horizontal Tear Fix
Horizontal tears tell you the arrow is yawing sideways — the back end of the shaft is drifting left or right of the point at impact. The fix is centershot adjustment on the arrow rest, not the nocking point. Lots of new tuners get this backwards and end up chasing a left tear by sliding their nocking point, which does nothing for lateral arrow flight.
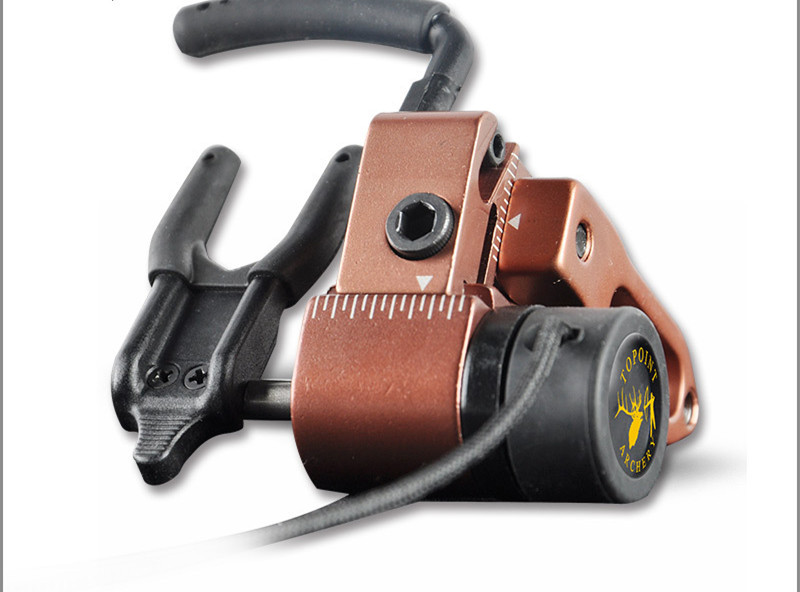
For a right-handed archer, a tail-left tear (slice pointing left of the hole) usually means the arrow rest is too far to the right of true centershot. Move the rest a small amount to the left — toward the riser — and re-shoot. A tail-right tear means move the rest to the right, away from the riser. Reverse both for left-handed archers.
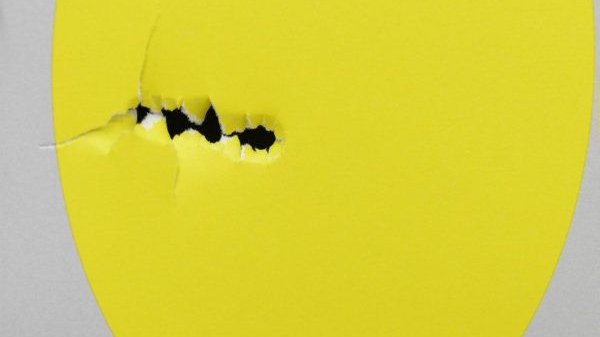
If the tear refuses to close after several rest moves in the correct direction, the arrow spine is almost certainly wrong for your setup. A weak arrow will tear left for a right-handed shooter no matter where you put the rest; a stiff arrow will tear right. Cross-reference your spine against an Easton or Gold Tip chart using your actual draw weight, draw length, point weight, and shaft cut length. The chart will tell you within a single spine value whether you need to go stiffer or softer.
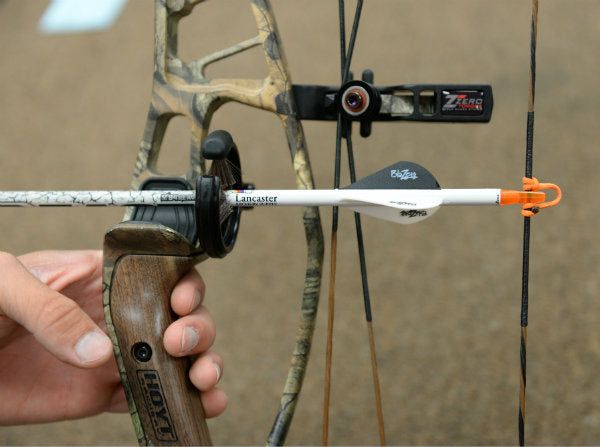
The Diagonal Tear: Two Problems at Once
Occasionally a tear comes back angled at 45 degrees — a nock-high-and-left tear, or nock-low-and-right. That means two faults are stacked on the same arrow. The order matters: always fix the vertical component first. Raise or lower the rest until the tear is purely horizontal, then move the rest left or right to close the lateral tear.
If you try to chase the diagonal in one move, you’ll change two variables simultaneously and have no way to know which adjustment did what. Bow tuning is a one-variable-at-a-time discipline. Restraint pays off.
Watch Lancaster Archery’s Paper Tuning Walkthrough
Lancaster Archery Supply put out a short walkthrough that covers the actual paper setup and the read on each tear pattern. It’s worth watching once before your first session — seeing the tears in motion clears up a lot of the confusion about which way a slice is actually pointing.
Common Paper Tuning Mistakes That Hide the Real Problem
The most expensive mistake in paper tuning is bad form masquerading as bad equipment. If you torque the grip on one shot and not the next, the bow will print different tears on every arrow and you’ll spend an hour adjusting equipment that wasn’t out of tune to begin with. Before you touch a rest screw, shoot a baseline group of three to five arrows and look for repeatability. If every arrow tears differently, your form is the variable — not the bow.
Another trap is shooting too close. At four feet, even a properly tuned bow can throw an ugly tear because the arrow hasn’t recovered from the initial nock travel. Six to eight feet is the sweet spot. Shoot further than that and the fletchings will mask the truth in the other direction — you’ll see clean tears on a bow that’s actually out of tune.
Watch your peep sight too. A peep that rotates a few degrees off center under load will tilt the string contact and skew the tear without any change to your rest. If your tears look consistent except for one outlier, take a hard look at the peep before you blame the arrow.
Three Shots, Same Tear: The Confirmation Rule
Never adjust on a single shot. The standard at most pro shops is three identical tears in a row before you change a thing. A single outlier can come from grip torque, a poor release, a wrist rotation, or a partial peep clearance — none of which are equipment problems. Three repeating tears is the floor for diagnosis. If you can stack five identical tears, you’ve found a real fault and the next adjustment will move all five together.
Use a fresh sheet for each group so old tears don’t bleed into the new pattern. Some tuners poke holes through old sheets and reuse them, but at twenty cents a sheet, fresh paper is a cheap insurance policy against misreading a faded tear.
After the Paper: Where Tuning Goes Next
A bullet hole on paper is the start of bow tuning, not the end. The next steps are bare-shaft tuning at twenty yards (a fletched arrow and a bare shaft should print to the same group), walk-back tuning to confirm your sight is following the arrow at distance, and finally broadhead tuning with the same fixed blades you plan to hunt with. Every additional test exposes faults the paper missed — spine issues become obvious at fifty yards, rest contact problems show up on bare shafts, and a high-front-shoulder release will scatter broadheads even with a perfect paper read.
For a deeper look at how arrow spine selection affects every tuning stage, our arrow spine chart explained walks through reading the manufacturer numbers. If you’re still working out your nocking point and D-loop hardware, the D-loop and nocking point setup guide covers the install and adjustment process that feeds directly into a clean paper tune. And if you suspect your rest itself is the issue, the arrow rest comparison breaks down which rest types are easiest to micro-adjust through a paper tuning session.
One More Honest Read
The truth most pro shops won’t tell you is that paper tuning has limits. It cannot fix poor form, it cannot rescue a badly under-spined arrow, and it cannot replace the diagnostic value of watching an arrow group at fifty yards. What it does is shorten the early tuning loop from hours to about thirty minutes — and that alone makes it the first step worth doing on any new bow build, string change, or major rest swap. Get the paper read right, and the rest of your tune gets shorter.
Sources
- Lancaster Archery Supply — Paper Tuning 101 — Pro-shop walkthrough with photo references for each tear pattern.
- Easton Archery — Introduction to Tuning (PDF) — Manufacturer tuning guide including paper tuning section and spine charts.
- October Mountain Products — How to Paper Tune a Compound Bow — Beginner-focused step-by-step with the GoldTip tear chart.
- Field & Stream — How to Paper Tune a Compound Bow — Hunting-focused tuning advice from a bowhunting publication.
Browse archery bows, arrows, and accessories at the Archery Supplier shop →
