Archery Blog
Paper Tuning a Compound Bow: How to Read Every Tear
Jun
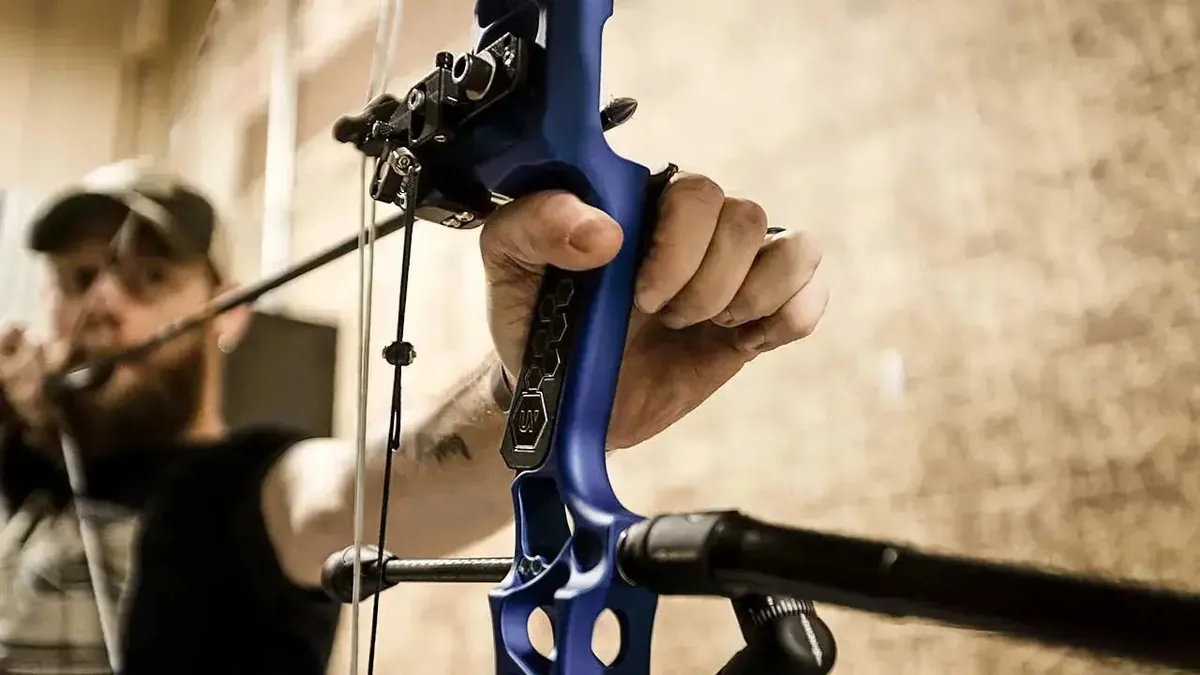
A field point and a broadhead can hit six inches apart at 40 yards for one reason: the arrow is leaving the bow crooked. You can’t see it at full speed, but a sheet of kraft paper freezes that first 8 feet of flight into a tear you can actually read. Paper tuning a compound bow is the cheapest diagnostic in archery — a frame, a stack of newsprint, and ten minutes will tell you more about your setup than a $400 sight ever will.
What Paper Tuning a Compound Bow Actually Tells You
When you shoot through paper, the broadhead end and the nock end of the arrow punch the sheet at slightly different moments. If the shaft is dead straight at that instant, the fletching follows the point through the same hole and you get a clean round opening — what tuners call a bullet hole. If the back of the arrow is kicking high, low, or to one side, the vanes tear the paper in that direction and leave you a tail.
That tail is a snapshot of arrow flight, not a verdict on your shooting alone. It captures nocking point height, rest position, arrow spine, and even the way your release hand torques the string. The skill isn’t punching a perfect hole on shot one — it’s learning to read what the paper is telling you and changing one variable at a time until the tail disappears.

The goal: a clean round bullet hole with no tails. The point and vanes passed through the same opening.
Setting Up a Paper Tuning Station
You don’t need a pro shop. A simple wooden frame holding a sheet of newsprint at chest height works perfectly. Clamp the paper so it’s taut but free to tear, leave a few feet of open air behind it, and put a backstop or target about 6 feet beyond that so the arrow buries safely after it passes through.
Stand 6 to 8 feet from the paper. That distance matters: too close and the arrow hasn’t recovered from the cycle off the rest; too far and it has already corrected itself, hiding a problem that still ruins broadhead flight downrange. Most pro shops settle on roughly 2 yards.
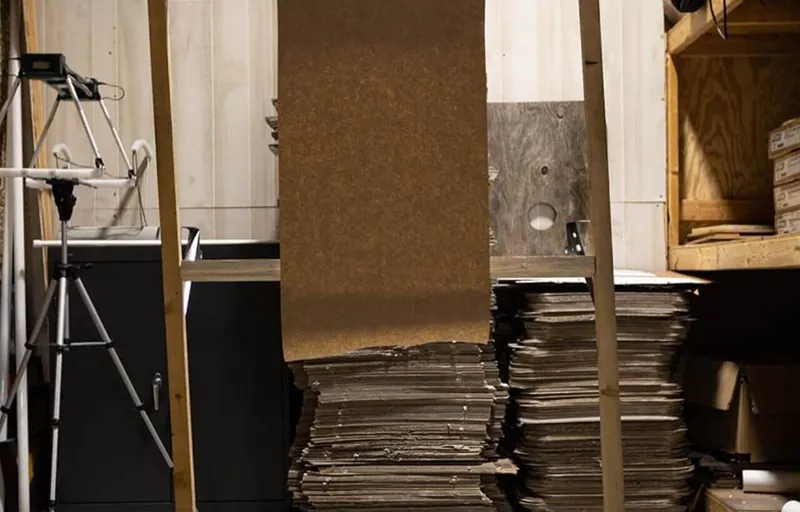
A DIY frame holding kraft paper at chest height — all the station you actually need.
Before any of this, make sure the basics are square. Your nocking point should be set, your D-loop tied cleanly, and your rest roughly centered so the arrow points straight down the centerline of the riser. Paper tuning is for fine corrections, not for fixing a bow that was never set up.
How to Shoot the Test and Read the Tear
Form is everything here. A flinch, a punched trigger, or an inconsistent anchor will print a tear that has nothing to do with your equipment. Draw smoothly, settle into your anchor, and execute a clean back-tension release straight through the paper.
Shoot three arrows before you change anything. One tear is an anecdote; three matching tears are data. If all three rip the same direction, the bow is talking. If they scatter randomly, the shooter is the variable — slow down and shoot a few more until the pattern is repeatable.
Lancaster Archery Supply walks through a quick, practical paper tuning session.
There are really only five results you’ll ever see: a clean bullet hole, a nock-high tear, a nock-low tear, a nock-left tear, or a nock-right tear. The name always refers to where the back of the arrow is kicking, because the tail of the tear is torn by the fletching. Diagonal tears are just a vertical and a horizontal problem stacked together — fix the up-and-down first and the diagonal usually collapses into a simple side tear.
Fixing a Nock-High or Nock-Low Tear
Vertical tears are your first job, every time. A nock-high tear — the tail pointing up — is the most common result on a fresh setup, and it usually means the nocking point or the rest needs a small move. The fix follows one rule: chase the tear with your rest, or move the nocking point away from it.
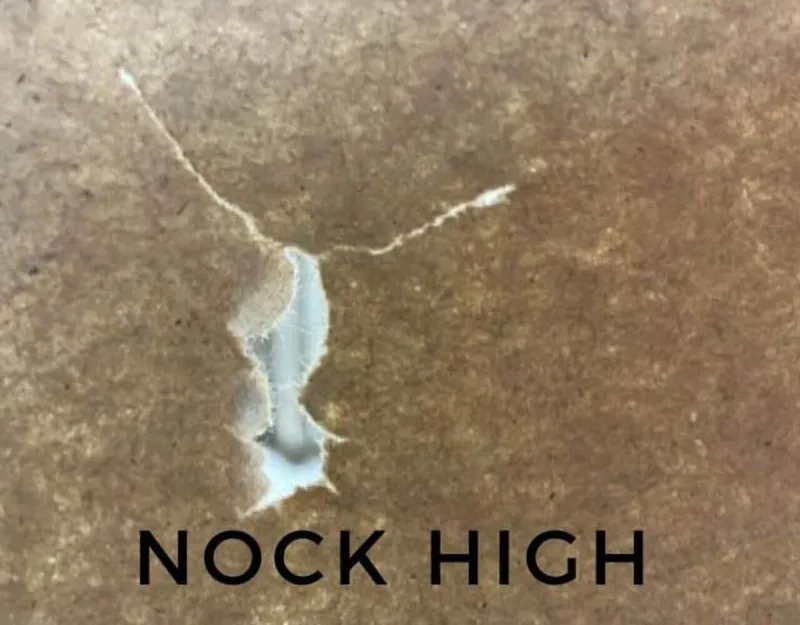
For a nock-high tear, lower your nocking point slightly or raise the arrow rest about 1/16 of an inch. For a nock-low tear, do the opposite — raise the nocking point or drop the rest the same amount. Move in tiny increments; a sixteenth of an inch is a lot at the rest. Re-shoot your three arrows after every change and watch the tail shrink.

A stubborn vertical tear that won’t close no matter how you move the rest is often a cam timing or sync issue on a dual-cam bow, not a rest problem. That’s the point to stop guessing and put the bow in a press — or hand it to a shop with a draw board.
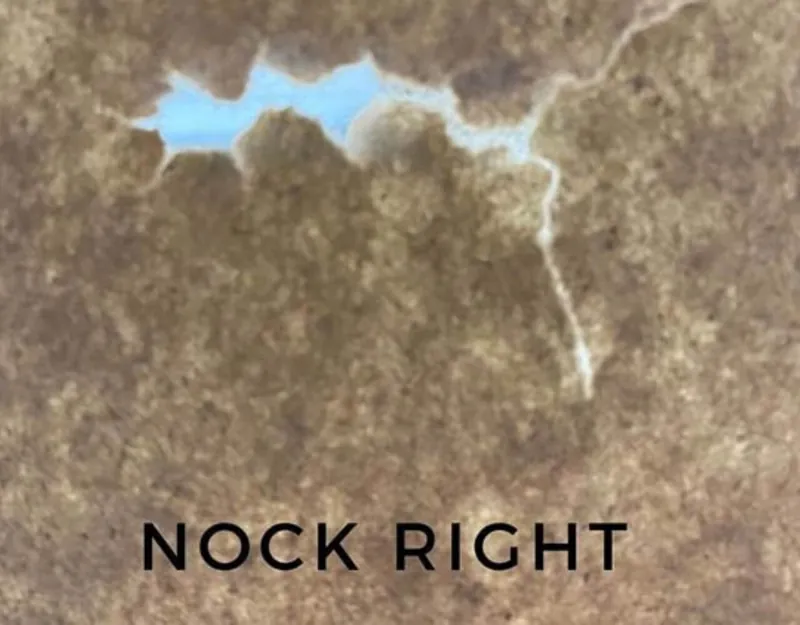
Fixing a Nock-Left or Nock-Right Tear
Once the tear is clean up and down, deal with the sideways tail. Horizontal tears point to rest windage or an arrow spine that doesn’t match your draw weight. For a right-handed shooter, the standard correction is simple: move the rest in the direction the tail is tearing — but only after the vertical is solved, or you’ll be fixing a moving target.
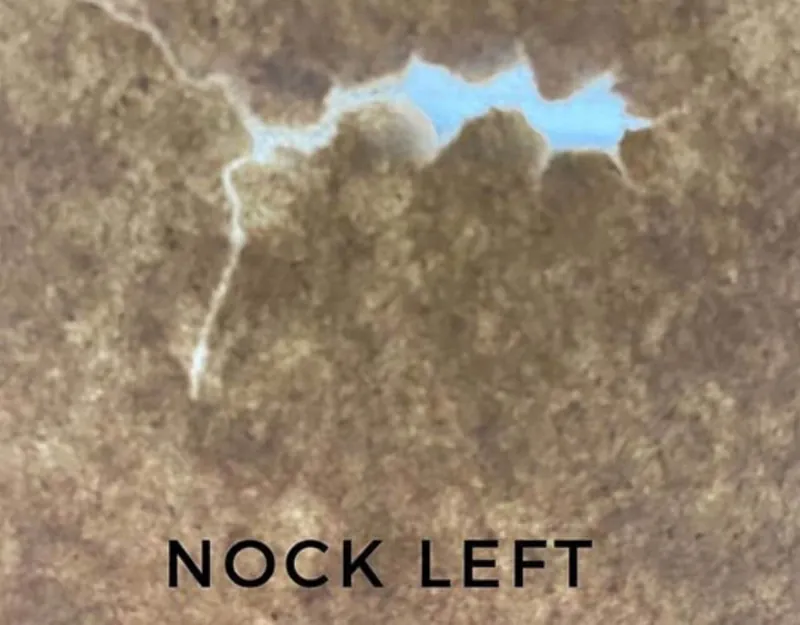
A nock-left tear on a right-handed bow generally means moving the rest left a hair; a nock-right tear means nudging it right. Adjust in increments of about 1/32 of an inch — windage is far more sensitive than elevation. If you run out of rest travel before the tear closes, the message isn’t “adjust more,” it’s “your arrow spine is wrong.” An arrow too weak for your poundage will always tear nock-left for a righty no matter where the rest sits.
This is where a quality rest earns its keep. A full-containment rest is forgiving for hunting, but a drop-away gives total fletching clearance and a finer window for windage corrections — which is exactly what you want when you’re chasing the last bit of a horizontal tear.
Vertical Before Horizontal: The Order That Saves Hours
The single most common mistake I see is people chasing a diagonal tear by tweaking windage and elevation at the same time. Don’t. A vane that clips the rest on the way out can fake a horizontal tear that vanishes the instant your vertical is clean. Solve up-and-down completely, confirm a flat tear, and only then touch windage.
The same logic applies to your test order overall: confirm form, then vertical, then horizontal, then re-confirm all three. Tuning is a loop, not a checklist you run once. Most bows that “won’t tune” are simply being adjusted in the wrong sequence.
When the Tear Won’t Disappear
Sometimes you do everything right and still can’t punch a clean hole. Three culprits cover almost every case. The first is vane contact — strip the fletching off one arrow, mark the shaft with lipstick or foot powder, and shoot it to see where it’s hitting the rest or cable. The second is spine: an arrow mismatched to your draw weight and length will fight every rest adjustment you make. The third is cam lean or timing on the bow itself, which no amount of rest movement will overcome.
If you suspect spine, this is the moment to check your arrow spine against your setup before blaming anything else. A correctly spined arrow with a clean release wants to fly straight — your job is just to stop fighting it.
Paper Tuning vs Bare-Shaft and Walk-Back Tuning
Paper tuning is the fastest first pass, but it isn’t the whole picture. It reads flight at close range, which means a bow that prints a perfect bullet hole at 8 feet can still throw broadheads at 50 yards. That’s why serious tuners follow paper with a second method. Bare-shaft tuning compares unfletched and fletched arrows at distance and exposes problems paper can hide, while walk-back tuning verifies your rest centershot across the full range of yardages.
Think of paper tuning as triage. It gets you 90 percent of the way in ten minutes and tells you whether anything is badly wrong. The last 10 percent — the part that puts broadheads in the same hole as field points — usually comes from bare-shaft or a broadhead tune afterward.
Frequently Asked Questions
How far should I stand from the paper? Six to eight feet, roughly 2 yards. Closer than that and the arrow is still recovering off the rest; farther and it may have already self-corrected, masking a tear that still matters downrange.
What does a perfect paper tune look like? A clean round hole — the “bullet hole” — with three small slits from the vanes radiating evenly around it and no directional tail. That means the point and fletching passed through the same opening.
Do I fix left-right or up-down first? Always vertical first. Vane clearance issues can create false horizontal tears, so a nock-high or nock-low tear must be eliminated before you trust any side-to-side reading.
Can a bad release cause a tear? Absolutely. Punching the trigger or torquing the grip prints tears that look like equipment problems. Shoot three arrows and only trust a tear that repeats.
Is paper tuning enough by itself? For close-range and most hunting setups, a clean paper tune gets you flying well. For long-range accuracy and matched broadhead-to-field-point impact, follow it with bare-shaft or walk-back tuning.
Get One Clean Hole, Then Trust It
The archers who never seem to fight their gear aren’t lucky — they read the paper, change one thing, and shoot again. Tape your three best tears to the wall of your shop as a reference, set your nocking point and rest with a locator and a sixteenth-inch of patience, and you’ll spend deer season trusting your arrows instead of guessing. Once you can read a tear at a glance, every other tuning method gets easier. Start with paper, get your clean hole, and build from there.
Sources
- Lancaster Archery Supply — Paper Tuning 101 — Step-by-step paper tuning demonstration from a major archery retailer.
- Field & Stream — How to Paper Tune Your Bow — Editorial guide on reading tears and adjusting nocking point and rest.
- Gold Tip Arrows — How to Paper Tune Your Arrow — Manufacturer reference on tear patterns and corrections.
- Extreme Outfitters — Paper Tuning a Compound Bow (Pro Shop Guide) — Pro-shop walkthrough including the vertical-before-horizontal rule.