Archery Blog
Recurve Bow for Beginners: 7 Essential Setup Steps
Apr
Setting up a recurve bow for beginners doesn’t need to be complicated, but getting each step right makes a real difference in accuracy and safety. Whether you just bought your first takedown recurve or you’re still deciding, this guide walks you through seven practical setup steps so you can start shooting with confidence.

What Makes Recurve Bows Ideal for Beginners
Recurve bows are the most popular choice for new archers, and with good reason. Their three-piece takedown design — a riser plus two removable limbs — means you can swap limbs as your strength grows without buying an entirely new bow. That alone saves hundreds of dollars over your first year.
The simplicity of quiver types and accessories available for recurves also keeps the learning curve manageable. Unlike compound bows with their cams, cables, and let-off systems, recurve bows teach you to rely on your own muscles and form. Organizations like USA Archery recommend recurves for first-time archers because they build a solid shooting foundation that transfers to any bow style later.
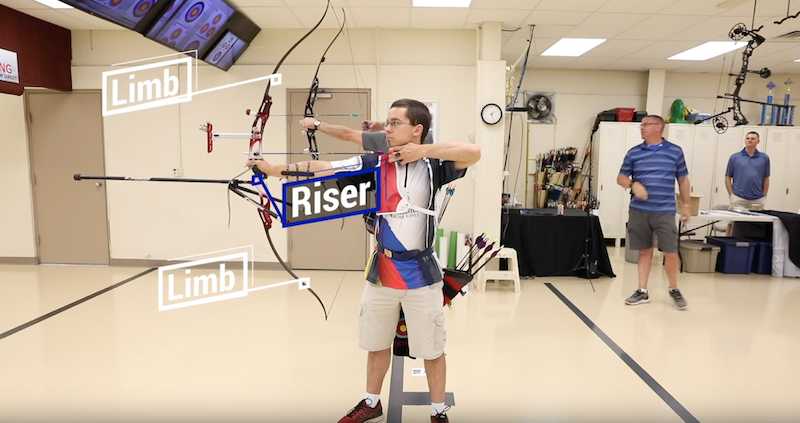
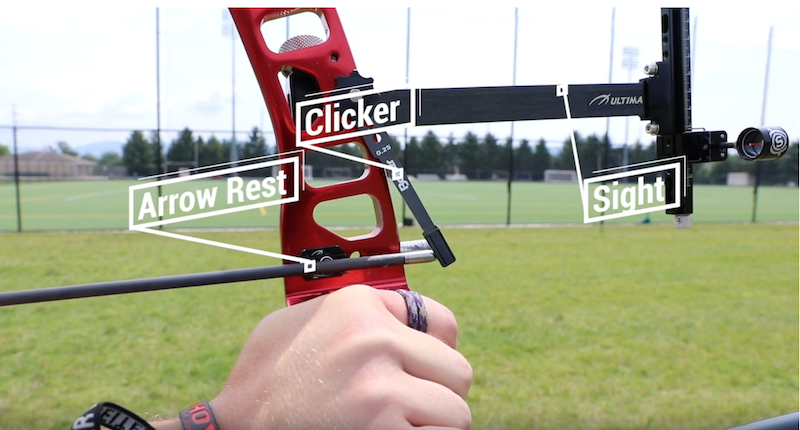
Every recurve bow breaks down into key recurve bow parts: the riser (center section you grip), upper and lower limbs (which store energy when drawn), the bowstring, an arrow rest, and a nocking point. Understanding these parts before assembly helps you troubleshoot issues faster and communicate clearly at your local pro shop.
Step 1 – Choose the Right Draw Weight
Your recurve bow draw weight determines how hard you pull the string at full draw. Picking too heavy a draw weight is the single most common beginner mistake — it wrecks your form, causes fatigue, and makes shooting miserable within minutes.
Here are practical starting points:
- Youth archers (under 14): 10–20 lbs
- Teen and smaller-frame adults: 20–28 lbs
- Average adult men: 25–35 lbs
- Experienced or larger-frame adults: 30–40 lbs
If you can’t hold the bow at full draw for 10 seconds without shaking, the weight is too high. Drop down. You can always move up later by swapping limbs — that’s the beauty of a takedown recurve. Measure your draw length first, since it affects the actual weight you pull at full draw.
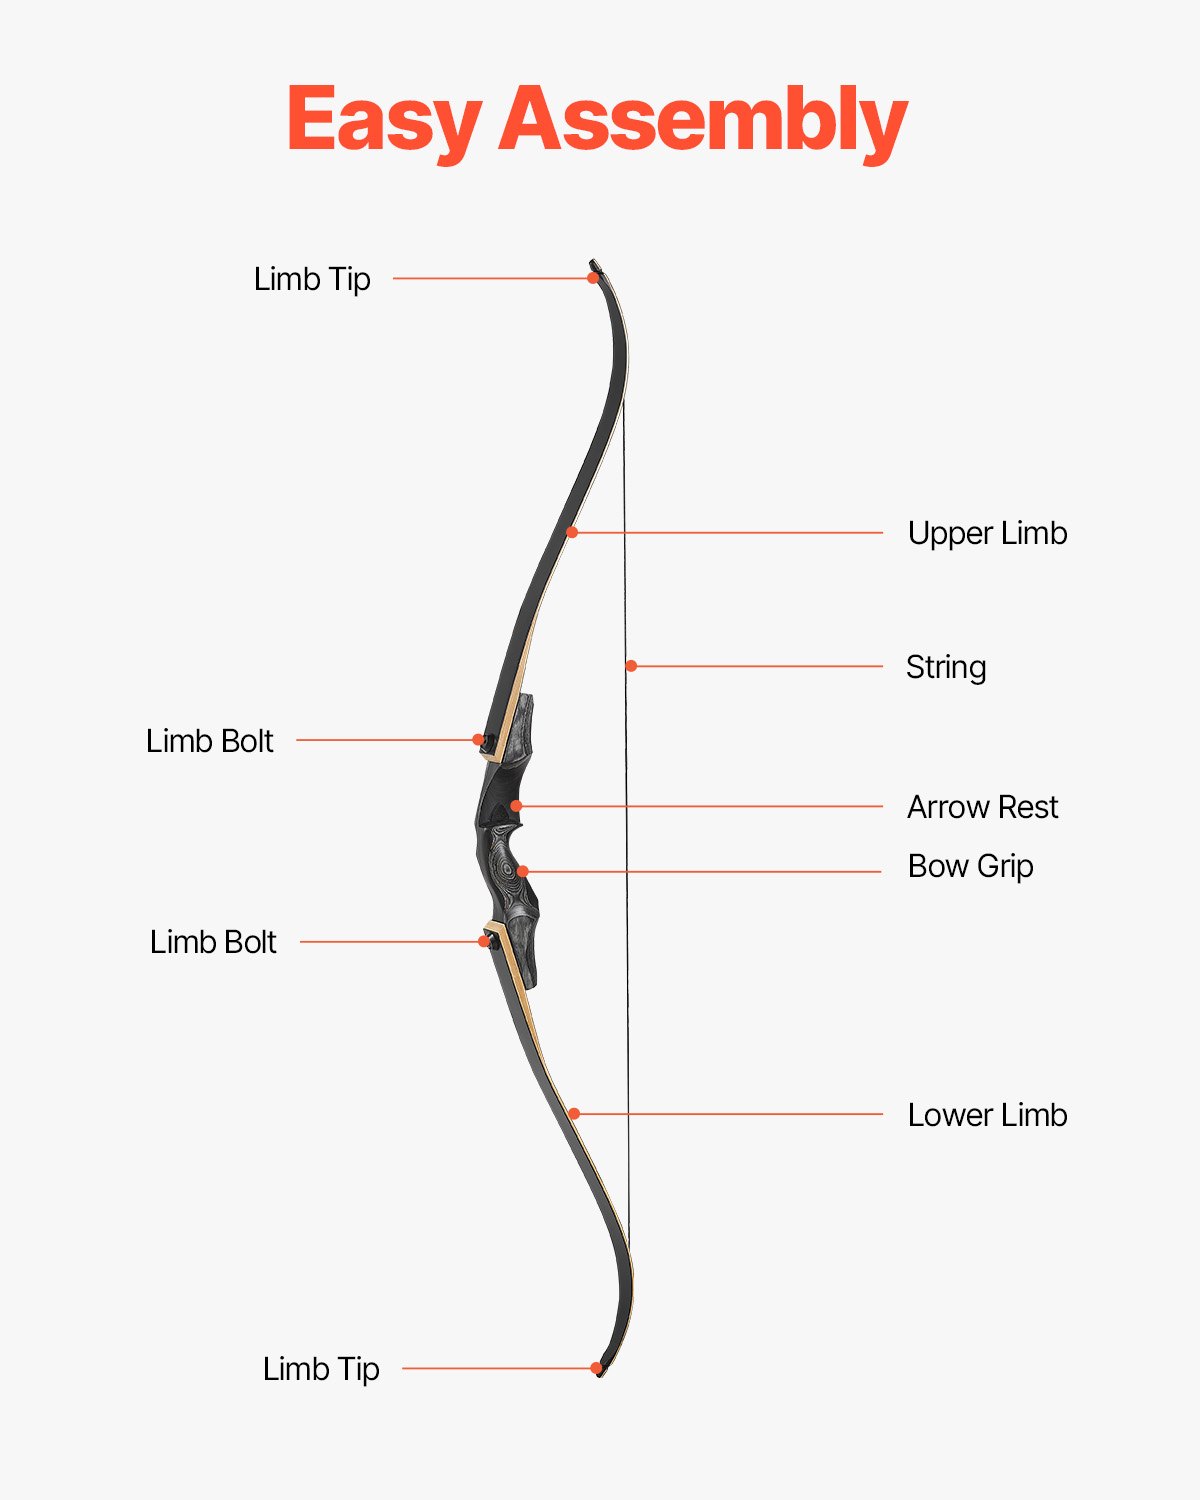
Step 2 – Assemble Your Recurve Bow Correctly
Assembly is straightforward once you’ve done it a few times, but rushing through it can damage your limbs or leave something dangerously loose.
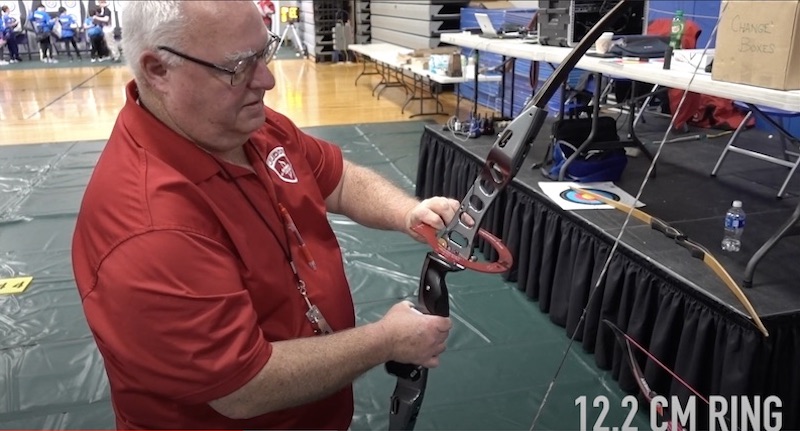
- Attach the limbs to the riser. Match the top limb (usually marked) to the top pocket and the bottom limb to the bottom. Slide them in firmly and tighten any limb bolts with the Allen key included with your bow.
- String the bow with a bow stringer. Never “step-through” string a recurve — it twists the limbs unevenly and can crack them. Loop the string over both limb tips, step on the stringer cord, and lift the riser to flex the limbs while sliding the top loop into place.
- Check that the string sits squarely in both limb tip grooves. A misaligned string is a safety hazard.
After stringing, give the bow a visual inspection. Look down the string from the top limb tip to confirm the string tracks straight down the center of both limbs. If it veers left or right, check your limb alignment screws.
Step 3 – Set Your Brace Height
Recurve bow brace height is the distance from the deepest part of the grip (the throat) to the bowstring when the bow is strung but not drawn. It controls how long the arrow stays on the string during the shot, which directly affects arrow speed, noise level, and forgiveness.
Most recurve bows have a recommended brace height range printed on the limbs or listed in the manual. Typical ranges:
- 62-inch bows: 7.5–8.25 inches
- 66-inch bows: 8–8.75 inches
- 68-inch bows: 8.25–9 inches
- 70-inch bows: 8.5–9.25 inches
Measure brace height with a bow square (T-square). If it’s too low, add twists to your bowstring to shorten it — each full twist raises brace height by roughly 1/8 inch. If it’s too high, untwist the string. Start at the low end of the recommended range and shoot groups. Move up in small increments until you find the height that produces the quietest shot with the best arrow flight.
Keep a spare string on hand so you’re never stuck at the range with a frayed one. According to World Archery, checking your bowstring condition before each session is a basic safety habit every archer should maintain.
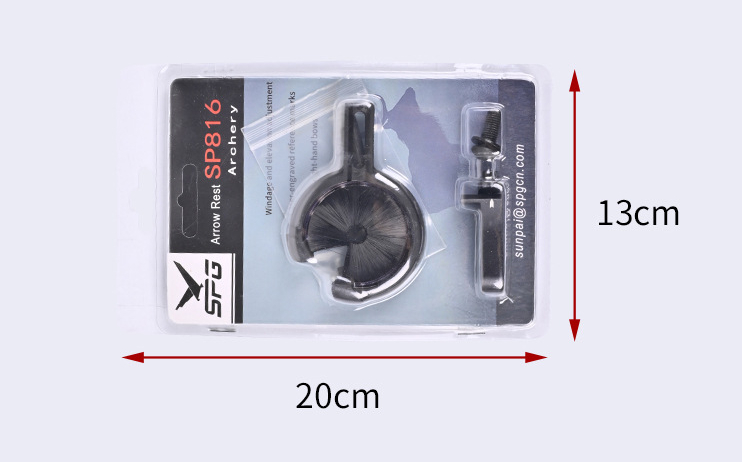
Step 4 – Attach and Adjust the Arrow Rest
The recurve bow arrow rest holds your arrow in position on the riser while you draw and release. For beginners, a simple stick-on plastic rest or a magnetic rest works well. More advanced archers move to plunger-and-rest combos for finer tuning.
To install a stick-on rest:
- Clean the riser area above the shelf with rubbing alcohol.
- Peel the adhesive backing and position the rest so the arrow support arm sits just above the shelf, aligned with the plunger hole.
- Press firmly and let the adhesive set for a few hours before shooting.
Once installed, nock an arrow and check that it sits level or with the point angled very slightly downward. The rest’s horizontal position matters too — the arrow should point slightly outside the bowstring’s centerline for a clean release. You’ll fine-tune this during paper tuning later, but getting it close now prevents wild arrow flight from the start.
Step 5 – Set the Nocking Point
The nocking point is a small metal crimp or tied thread on your bowstring that marks exactly where your arrow clips on every single time. Without one, your arrows will leave the string at slightly different heights each shot, scattering your groups vertically.
To set a basic nocking point:
- Clip a bow square onto the string and rest it on the arrow rest.
- Position the nocking point so the bottom of the arrow nock sits about 1/8 to 1/4 inch above the square’s 90-degree mark.
- Crimp the nock set with nocking pliers, or tie a brass nock in place with serving thread.
For a detailed walkthrough with measurements and tuning adjustments, check out our full nocking point setup guide. Getting this right eliminates one of the biggest sources of vertical inconsistency for new archers.
Step 6 – Install and Adjust Your Sight
Not every beginner needs a sight — barebow and traditional archers shoot without one — but if you want consistent accuracy at known distances, a sight makes a massive difference.
Installing a recurve sight:
- Mount the sight bracket to the riser’s sight holes using the provided screws and an Allen wrench.
- Set the aperture (sight pin) to the center of its vertical and horizontal adjustment range. This gives you room to move in any direction during sighting in.
- Shoot three arrows at 10 meters to establish a starting group.
- Follow the arrow. If your arrows hit left of center, move the sight pin left. If they hit low, move the pin down. This is the opposite of what feels intuitive, so remember: chase the arrows with the pin.
Start at short distances (10–15 meters) and work outward once you’re grouping consistently. Resist the urge to adjust after every single arrow — shoot sets of three or six before making changes.
Step 7 – Master Your Shooting Form
All the gear in the world won’t help if your form falls apart. Good recurve shooting form is built on a repeatable sequence: stance, grip, hook, draw, anchor, aim, release, and follow-through. Here’s what matters most for beginners learning how to set up a recurve bow and shoot it properly.
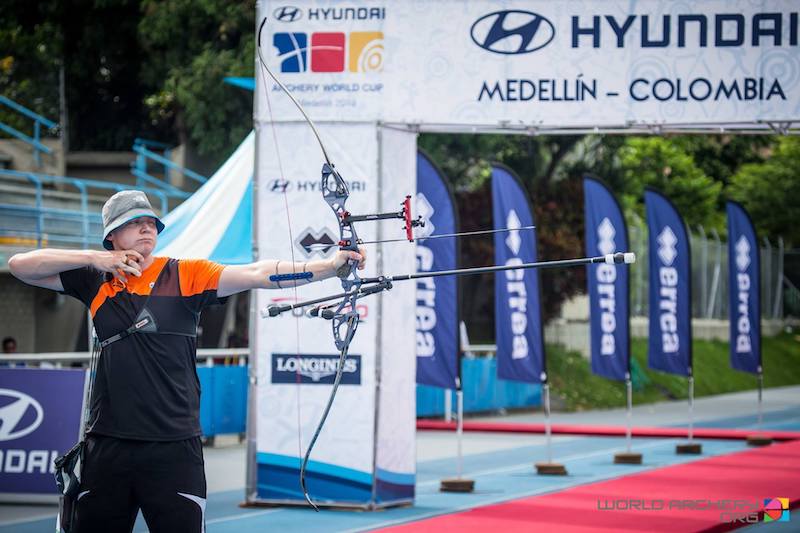
Stance: Stand with your feet shoulder-width apart, perpendicular to the target. An even stance works best for beginners — both toe tips on a line pointing at the target.
Grip: Place the bow’s grip in the web between your thumb and index finger. Keep your fingers relaxed — don’t wrap them around the riser. A death grip causes torque, which throws arrows left or right.
Draw and anchor: Pull the string with three fingers (index above the arrow, middle and ring below). Draw to a consistent anchor point on your face — most recurve archers anchor with the string touching the corner of their mouth and the tip of their nose. The same anchor every time is what gives you vertical consistency.
Release: Don’t pluck the string. Simply relax your fingers and let the string roll off. Keep your bow arm up and your draw hand moving backward along your jawline after the release. That follow-through prevents you from dropping the bow arm early, which sends arrows low.
Watch this walkthrough for a visual breakdown of the full process:
For additional drills and techniques, the Start Archery beginner guide has structured practice routines that build muscle memory quickly.
Common Beginner Mistakes to Avoid
After coaching hundreds of new archers, these are the errors that keep coming up:
- Too much draw weight. Already said it, saying it again. If you’re shaking at full draw, you can’t aim. Drop the poundage.
- Gripping the bow too tightly. A relaxed hand lets the bow react naturally. Use a finger sling so the bow doesn’t hit the ground when you open your hand.
- Inconsistent anchor point. If your hand lands in a different spot on your face each shot, your arrows will scatter. Pick a reference (string on nose tip, finger under jawbone) and stick with it.
- Sky drawing. Never draw the bow with the arrow pointed upward above 45 degrees. If the string slips, the arrow goes airborne. Always draw at or slightly below target level.
- Ignoring brace height. A bow that slaps your forearm on every shot usually has brace height set too low. Add twists to the string and the problem typically goes away.
- Shooting worn equipment. Frayed strings snap. Cracked nocks shatter. Inspect your gear before every session. Replacing a $5 string is cheaper than a trip to the ER.
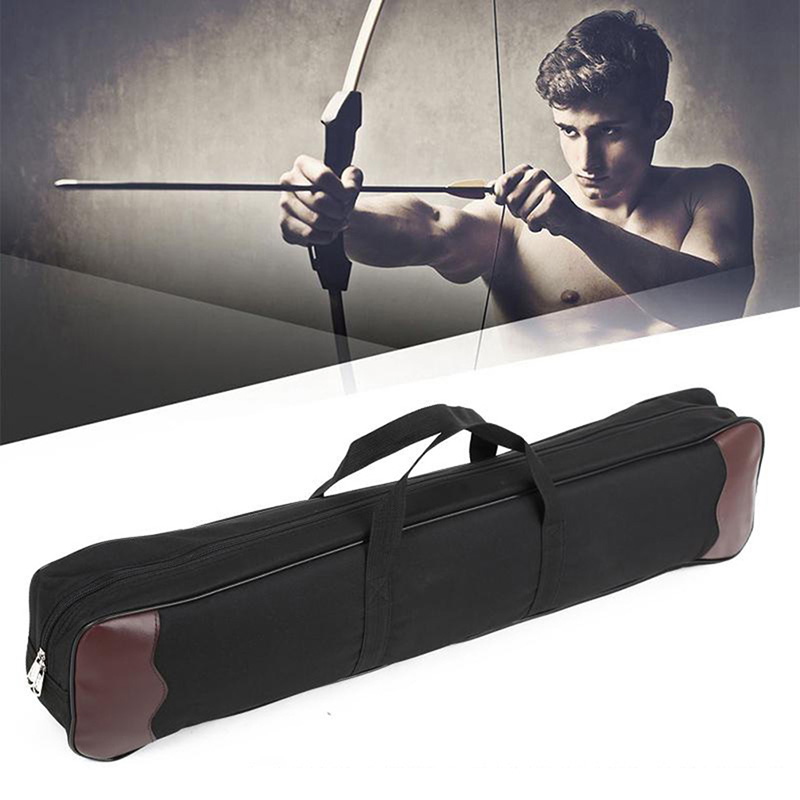
Protecting your gear when you’re not shooting matters too. A padded carry case keeps your riser and limbs safe during transport and storage.
Sources
- World Archery – Learn Archery
- USA Archery – Beginner Resources
- Start Archery – Beginner’s Kit Guide
- Archery 360 – Basics for Setting Up Olympic Recurves
- Archery 360 – Form Tips for Beginners