Archery Blog
Draw Length Measurement: How to Find Your True Fit
Jul
Ask ten archers what limits their accuracy and most will point to arrows, sights, or their release. Very few will name the one specification that quietly governs every shot they take: draw length. Get it wrong by even half an inch and your anchor point drifts, your bow arm stiffens, and your groups open up no matter how much you practice. Get it right and the bow suddenly feels like it was built around your body. This guide walks through draw length measurement from first principles — what it actually means, how to measure it reliably, and how to confirm it on a real compound bow.
What Draw Length Actually Measures
Draw length is the distance from the nocking point on the string to the pivot point of the bow grip, plus one and three-quarter inches, when the bow is at full draw. That extra 1.75 inches is a standardized offset built into the industry definition (AMO/ATA standard), so the number you quote to a pro shop already accounts for it. In plain terms, it is how far back you pull the string when your form is correct and repeatable.
On a compound bow this number is not a suggestion — it is a hard mechanical setting. The cams stop rotating at a fixed point, creating the “wall” you feel at full draw. That wall has to land exactly where your anchor point naturally sits. On a recurve or longbow, draw length is more fluid because there is no wall, but it still dictates your arrow length and the poundage you actually pull. Either way, the measurement starts with your body, not the bow.
The Wingspan Method: Your Starting Number
The fastest way to estimate draw length needs nothing but a wall and a tape measure. Stand with your back to the wall and stretch both arms out to your sides, palms forward, forming a T. Keep your posture relaxed — do not strain to reach farther, because that inflates the number and leaves you overdrawn. Have a helper measure the distance from the tip of one middle finger to the tip of the other. This is your wingspan, and for most people it is very close to your height.
Now take that wingspan in inches and divide by 2.5. If your fingertip-to-fingertip span is 70 inches, your estimated draw length is 28 inches. This formula is remarkably reliable across body types and is the same starting point most pro shops use before they ever hand you a bow. Write the number down — it is your baseline, not your final answer.
A half-inch error in draw length moves your anchor point roughly the same distance every single shot. Consistency is the whole game, and the wall can only help you if it lands where your face already is.
Why the Formula Can Mislead You
The wingspan calculation assumes average arm-to-torso proportions. Archers with long arms and a short torso, or those who shoot with a very bent bow arm, will find the formula off by half an inch or more. That is fine — the number is meant to get you into the right ballpark so a fitting session starts from something sensible rather than a wild guess. Treat it as a hypothesis you are about to test on the shooting line.
Confirming It at Full Draw
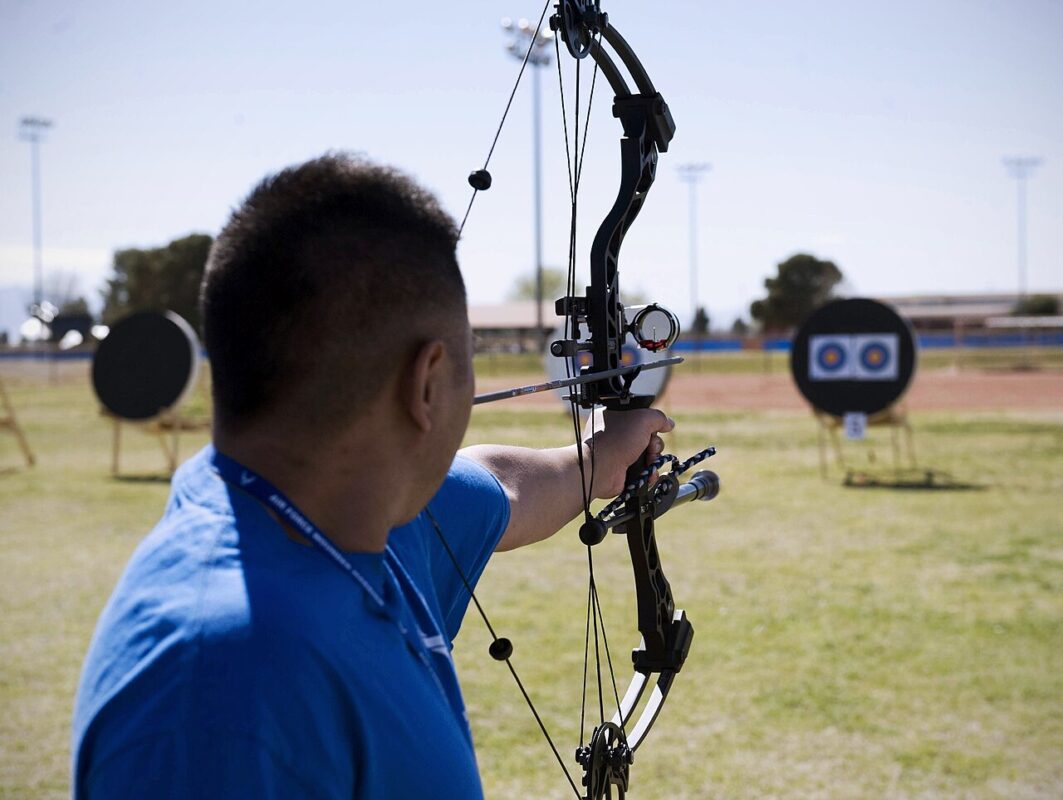
The wall test turns your estimate into a real setting. Nock an arrow, come to full draw on a bow set near your estimated length, and settle into your anchor. With correct form, your bow arm should be nearly straight but not locked, your shoulders down and level, and your drawing forearm in line with the arrow. The string should touch a consistent point on your face — the corner of your mouth, the tip of your nose, or both.
Here is what tells you the length is wrong. If you have to crane your head forward or the string barely reaches your face, the draw is too long and you are stretching to meet it. If your drawing elbow points sharply out behind you and your string hand crowds your face, the draw is too short and you are cramped. When the length is correct, everything stacks naturally: straight bow arm, relaxed anchor, forearm and arrow forming one clean line back toward the target.
The Bow-Arm Test
A quick field check: at full draw, glance at your bow arm. It should have a soft, natural bend at the elbow — not hyperextended and locked, which invites string slap and shoulder strain, and not deeply bent, which usually means the draw is too short. Rotating the inside of your elbow away from the string is a form fix, but if you simply cannot find any comfortable bow-arm position, the draw length itself is the culprit, not your technique.
Adjusting Draw Length on a Compound Bow
This is where compound bows shine. Most modern compounds offer a range of draw lengths without a trip to the shop, though the method depends on the cam system. Some use a rotating module on the cam with numbered positions you shift with a hex wrench. Others use a series of screw holes in the cam that let you move a peg to a new setting. A third group uses fully adjustable cams that turn with a set screw, giving you continuous adjustment across the whole range.
Whatever the mechanism, changing draw length alters the cam timing and can shift your peep sight position, so plan to re-check both after any change. Moving in half-inch increments and shooting a few ends between adjustments is the sane approach. If your bow does not cover your measured length within its adjustment range, you have bought the wrong bow size — an important thing to verify before purchase rather than after.
If you are shopping for a compound and want a model with a wide, tool-free draw-length range so it can grow with your form, browse current options before you commit.
Shop Adjustable Draw Length Compound Bows on Amazon →
Draw Length and Arrow Selection
Your draw length feeds directly into two more decisions: arrow length and spine. A longer draw pulls the arrow farther back and generally calls for a longer, and therefore weaker-flexing, arrow — which pushes you toward a stiffer spine to compensate. Cut an arrow too short for your draw and the broadhead or point can pull back inside the riser at full draw, a genuine safety hazard. This is why fitters lock down draw length first, then choose arrows around it, never the reverse.
A simple measuring tool called a draw-length arrow — an over-long shaft marked in inches — lets a shop read your exact draw straight off the arrow at full draw against a bow, then size your real arrows with the right safety margin past the rest. If you handle your own tuning, a marked measuring arrow is a cheap, worthwhile addition to your kit.
Shop Draw Length Measuring Arrows on Amazon →
Common Mistakes That Wreck Your Measurement
The most frequent error is overdrawing on purpose. Beginners often feel that a longer draw means more power and reach, so they set the bow long and stretch to it. The result is a locked bow arm, a floating anchor, and inconsistent groups — the opposite of what they wanted. A slightly short, comfortable draw beats a long, strained one every time.
The second mistake is measuring wingspan while flexing. Reaching hard during the T-pose adds an inch of “span” that does not exist in your natural shooting posture. Stay relaxed. The third is ignoring form drift — as your shooting develops over months, your posture settles and your true draw length can shrink by a quarter to a half inch. Re-measuring after a season of practice is normal, not a sign you did it wrong the first time.
- Measure wingspan relaxed, not stretched — then divide by 2.5.
- Confirm at full draw: straight-ish bow arm, consistent facial anchor, forearm in line with the arrow.
- Adjust the compound cam in half-inch steps and re-check peep and cam timing.
- Set draw length first, then size arrow length and spine around it.
- Re-measure after a season as your form matures.
When to Get a Professional Fitting
You can nail the wingspan estimate and the wall test at home, and for many archers that is enough. But if you are buying your first compound, if two shops quote you different numbers, or if your groups stay stubbornly wide despite good practice, a fitting is worth the money. A good fitter watches you shoot, reads your anchor and bow-arm behavior in real time, and adjusts in small increments until the bow disappears into your form. That feedback loop is hard to replicate alone.
Whether you measure at home or in a shop, the principle never changes: draw length is the foundation the rest of your setup sits on. Sights, rests, stabilizers, and premium arrows can all improve a bow that already fits. None of them can rescue one that does not. Spend the twenty minutes it takes to measure carefully, confirm it at full draw, and you will have removed the most common hidden cause of inconsistent shooting before you ever touch another accessory.
Sources
- Archery Trade Association (ATA) — industry standards for draw length and equipment specification.
- Wikipedia: Bow draw — overview of draw length, draw weight, and archery mechanics.
- USA Archery — coaching resources on form, anchor point, and shooting fundamentals.
