Archery Blog
How to Make Arrows: 9-Step DIY Guide for Hunters
Jun
Learning how to make arrows means assembling six components — shaft, insert, point, nock, vanes, and (optional) wrap — into a flight-ready projectile that matches your bow’s spine and your hunting setup. A solid DIY hunting arrow lands within $14–$22 per finished arrow, compared to $25–$40 for a name-brand factory build, and the build itself takes roughly 20 minutes per shaft once your jig is dialed in.
The reason serious bowhunters build their own is not the savings. It is the control: matched FOC, matched weight to the grain, fletching configurations the factory will not sell, and the option to rebuild a damaged arrow on a Tuesday night instead of waiting eight days for a UPS package during peak season.
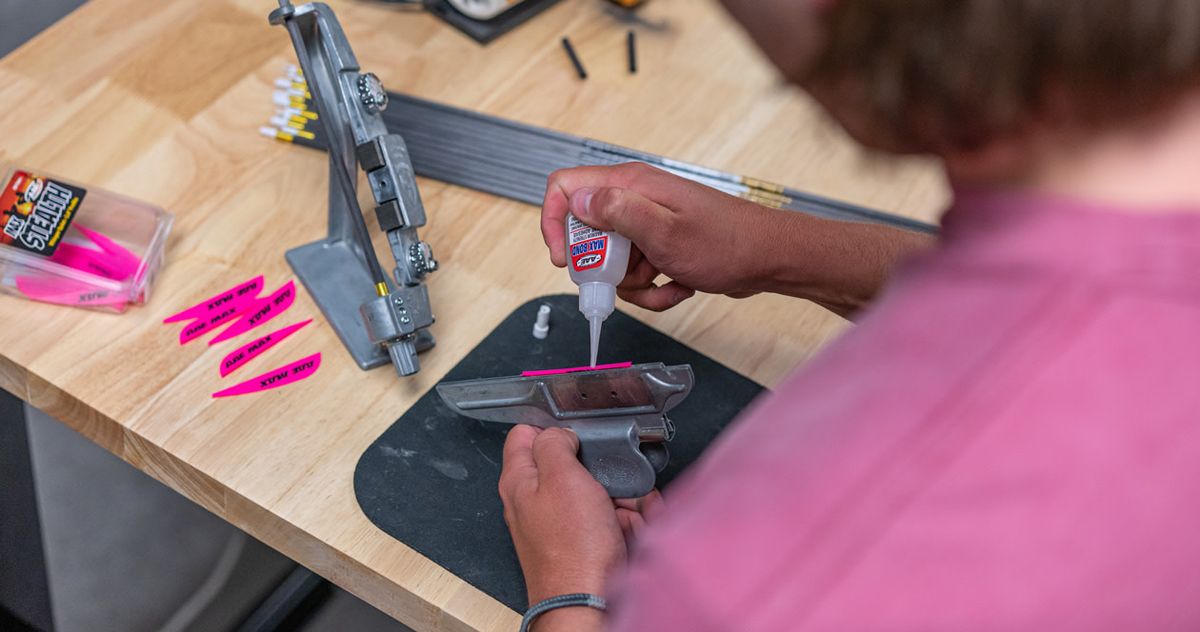
![]()
A dialed-in fletching jig with vanes laid out and ready turns arrow building into a 20-minute process per shaft.
Why Build Your Own Hunting Arrows
Factory-built arrows are spined within a tolerance, weighed within a tolerance, and squared within a tolerance — three tolerances stacked on top of each other. By the time the dozen lands on your doorstep, the lightest arrow and the heaviest arrow in the same pack can differ by 8 to 14 grains. At twenty yards that is invisible. At sixty, it is the difference between a clean lung shot and one that drifts low.
When you build your own, you weigh every component. You match shafts in same-grain groups. You spin every finished arrow on a roller. The result is a dozen that act like a dozen, not twelve individual experiments.
You also get to chase exact FOC. Want 15% FOC for a Western elk hunt? You can dial it with a 75-grain brass insert and a 125-grain head. The factory does not sell that combination — but you can build it tonight.
Arrow Components You Will Need
Six parts make a finished arrow:
- Shaft — carbon for most hunters, aluminum for indoor target work, full-metal-jacket for deep penetration on big game.
- Insert — threaded sleeve that holds your point. Aluminum (standard, ~10 gr), brass (heavy, ~50–75 gr for higher FOC), or stainless steel (durable, varying weights).
- Point — field tip for practice (75 gr, 100 gr, 125 gr), broadhead for hunting (fixed or mechanical, matched in grain weight to your field tips).
- Nock — press-fit, pin nock, or G-nock. Match to your shaft’s inside diameter.
- Vanes (fletching) — 2-inch to 4-inch, plastic vanes for compound, feathers for traditional and some recurve setups.
- Wrap — optional but recommended. Makes refletching easier and adds rear visibility for blood-trailing.
![]()
Vanes, fletching adhesive, and a jig — the core build kit. AAE Max Bond is one of the few glues that bonds carbon-to-vane reliably in cold weather.
Tools for Building Arrows
You do not need a tournament-level shop. A bowhunter can build a dozen accurate arrows with five tools.
First, an arrow shaft cutter. Hand saws and pipe cutters destroy the carbon fiber matrix and create stress fractures you will not see — until the arrow explodes off the bow. A dedicated high-speed cutoff wheel or a guillotine-style carbon cutter is non-negotiable.
Second, a squaring tool. A G5 ASD or a Pine Ridge squaring device removes any micro-burr from the cut end. Without it, your insert sits crooked, your point wobbles, and your groups open up at distance.
Third, a grain scale that reads to 0.1 grain. Component variation is real — a 100-grain field tip might weigh 99.4 or 101.2. Stack three variances on one arrow and you have a different arrow.
Fourth, a fletching jig — Bitzenburger, Arizona EZ-Fletch, or one of the newer magnetic models. Right helical, left helical, or straight clamp depending on the spin you want. Most compound hunters use a 2-degree right-helical for stabilization without excessive drag.
Fifth, vane glue. Loctite gel and Saunders NPV both work, but AAE Max Bond and Bohning Platinum are the two that hold in cold November weather without releasing when the arrow takes impact.
Step 1: Pick the Right Spine for Your Bow
Spine is the stiffness rating of your shaft, and it is the only number that matters before you cut anything. A 350-spine shaft on a 70-pound bow with a 28-inch draw flies clean. The same shaft on a 60-pound bow with a 27-inch draw flexes too much and tail-kicks left or right. Check a spine chart from Easton or Gold Tip and confirm before buying a dozen blank shafts — for a deeper breakdown of the math, see our arrow spine chart guide.
Step 2: Spin Test Each Shaft Before You Cut
![]()
Roll each shaft on a flat surface or arrow spin tester. The end that wobbles more is the end you cut.
Set each shaft on a flat granite slab or a dedicated arrow spin tester. Spin it. Watch both ends. One end will wobble more than the other — that is the end you cut off. The wobbly end carries the manufacturing inconsistency from the cure cycle, and cutting it off leaves you with the straightest section of the shaft.
Mark the wobbly end with a paint pen before you take it to the cutter. Do all twelve shafts in one sitting, mark them all, and only then move to the cutter.
Step 3: Cut Shafts to Length
![]()
Rotate the shaft as the cutoff wheel makes contact. A static cut leaves jagged carbon strands.
Measure twice. Your arrow length is measured from the throat of the nock to the back of the insert seat, not to the tip of the point. A 28-inch draw with a typical 1.5-inch overhang past the rest means 29.5-inch shafts from nock throat to insert face.
When the cutoff wheel makes contact, rotate the shaft slowly through the cut. A stationary cut tears the carbon fibers on the exit side and leaves a jagged edge that no squaring tool can fix.
Step 4: Square the Ends
Drop the cut shaft into your squaring tool and spin it under light pressure. Use a sharpie to color the cut face first — when the color is gone, the end is square. Both ends get this treatment, not just the insert end. A crooked nock end produces inconsistent string contact and shot-to-shot vertical variation.
Step 5: Clean and Install the Insert
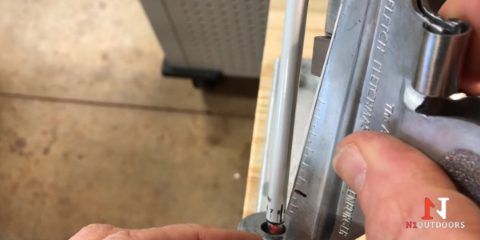
![]()
Inserts, nocks, and vanes staged before the build begins. Doing all twelve shafts in parallel cuts total time in half.
Carbon shafts have a release agent and dust inside the bore. Run a Q-tip soaked in acetone or denatured alcohol through the insert end until the tip comes out clean. Skipping this step is the number-one cause of inserts pulling out on the first hard impact.
Apply a thin ring of insert epoxy or hot-melt glue around the insert — not in the shaft. Rotate the insert as you push it in. Wipe excess glue immediately with a paper towel. If you are using hot-melt, set the insert and let the shaft cool to room temperature before any further handling.
Step 6: Apply Arrow Wraps (Optional)
Wraps are a 3 to 5 inch heat-shrink or pressure-sensitive vinyl sleeve at the rear of the shaft. They give you a uniform surface for the vane glue to grip, make refletching trivially easy (peel and replace), and add high-visibility color for tracking a hit animal in low light. Build six wrapped, six unwrapped, and shoot both — you will pick one and never go back.
Step 7: Fletch the Vanes
A right helical clamp puts a slight twist on the vane, which spins the arrow in flight for stability.
Wipe the vane base with rubbing alcohol — vanes ship with a release agent from the mold, and unwiped vanes will lift in flight after a hot afternoon. Load the vane into the clamp, run a thin bead of glue along the base (the smaller the bead, the better the bond), and seat the clamp on the shaft. Hold light pressure for 10 seconds and let it cure for 5 to 10 minutes before rotating to the next position.
Three-vane fletching is standard. Four vanes are popular with target archers using small-diameter shafts but add drag — most bowhunters stay at three.
For a deeper look at vane shape, length, and helical vs. offset, our arrow fletching types and sizes guide covers what each profile actually does in flight.
Step 8: Seal the Vane Ends and Install the Nock
Place a tiny drop of glue at the front and back of each vane. The front drop stops the vane peeling on a pass-through animal hit. The rear drop prevents the trailing edge lifting in supersonic airflow downrange. Skipping this on a hunting arrow is how you find a vane stuck in the grass twenty yards behind your stand.
Press-fit nocks just push in. Pin nocks slip over a pin bushing first. Test fit before gluing — a nock that is too tight can cause inconsistent release; one that is too loose can rotate between shots.
Step 9: Weigh, Match, and Tune
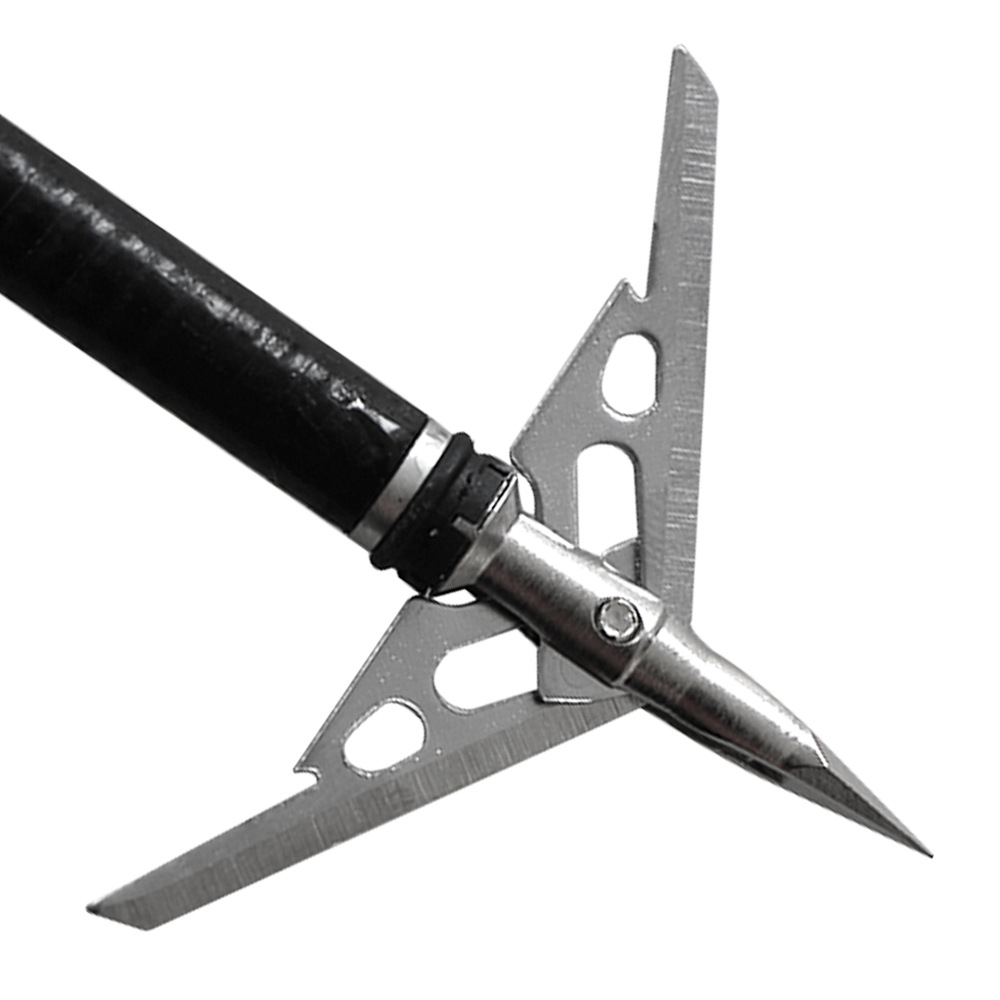
![]()
A finished broadhead-tipped hunting arrow. From here, paper tune the dozen and confirm flight before season opens.
Put each finished arrow on the grain scale. Group them into matched sets — ideally within 2 grains of each other. The lightest few become your practice arrows; the matched group becomes your hunting dozen.
Then paper tune. A clean bullet hole at six feet confirms the spine choice and fletching pattern. If you see tail-left or tail-right, walk back through the paper tuning chart to diagnose. Most fixes are rest adjustment or nock rotation, not a rebuild.
Front-of-center matters as much as raw weight for penetration. The relationship is covered in detail in our arrow weight and FOC explainer — for hunting, 12% to 18% FOC is the practical range.
Common Mistakes That Ruin a Build
Three errors destroy more DIY arrows than any other. First: skipping the spin test on bare shafts. Second: insufficient bore cleaning before the insert goes in. Third: using too much glue. Excess glue does not strengthen the bond — it gets squeezed out, traps dust, and creates a stress riser exactly where you do not want one.
One more, often overlooked: building all twelve in the same session without rotating tasks. Fatigue creates inconsistency. Build six, walk away, come back tomorrow. The second six are always tighter.
Cost Breakdown vs Factory Arrows
A dozen mid-tier carbon shafts (Gold Tip Hunter, Easton 5MM Axis, Victory VAP) runs $90–$130 bare. Inserts add $15–$25, nocks $10–$15, vanes $12–$18, wraps $10. Total raw cost per finished arrow lands between $14 and $20 — assuming you already own the tools.
The tool kit (cutter, squaring tool, scale, jig, glue) runs $200–$400 once. Spread across two dozen builds, that is $8–$17 per arrow amortized in the first year and nothing thereafter. A factory dozen of comparable arrows runs $250–$400 — the breakeven on tools shows up by the third dozen.
Watch the Full Process
Dan Schmidt walks through each step in this Bowhunt 101 video — start to finish on a dozen carbon hunters, including the spine selection and fletching jig setup most written guides gloss over.
One Last Thing Before You Cut
Buy thirteen shafts, not twelve. The first cut is always the one you measure wrong. The thirteenth shaft is the insurance policy that turns “ruined my dozen” into “learned something on shaft one.” Veteran arrow builders order an extra every time — the cost is twelve bucks and the lesson is worth it.
Sources
- Easton Archery — Bowhunter Basecamp: How to Build Your Own Arrows — Manufacturer guide to component selection and assembly.
- Bowhunting.com — How To Build Your Own Arrows — Bowhunt 101 step-by-step including spine selection.
- N1 Outdoors — DIY Arrow Building for Bowhunting — Photo-led walkthrough of insert installation and fletching.
- GOHUNT — How to Build Your Own Hunting Arrows — Tooling list and FOC calculation reference.
Browse archery bows, arrows, and accessories at the Archery Supplier shop →