Archery Blog
Proper Bow Grip: 7 Rules That Stop Torque
Jun
The fastest way to lose three inches of accuracy at 40 yards is to wrap your fingers around the riser the way you’d hold a hammer. A proper bow grip is the quietest piece of form in archery — nobody talks about it the way they talk about anchor or release — and it’s also the one mistake that will sabotage everything downstream. Twist the riser one degree at the shot and your arrow drifts four inches across a 30-yard lane. Keep the bow hand passive, knuckles cocked at roughly 45 degrees, and the pressure point parked on the thumb pad, and the bow will jump the same direction every time. That repeatability is what tight groups are actually made of.
Below is the no-nonsense breakdown: where the pressure point belongs, why the death grip kills accuracy, the seven rules that hold up from the indoor lane to a treestand, and the drills that retrain a torque-heavy hand in about a week.
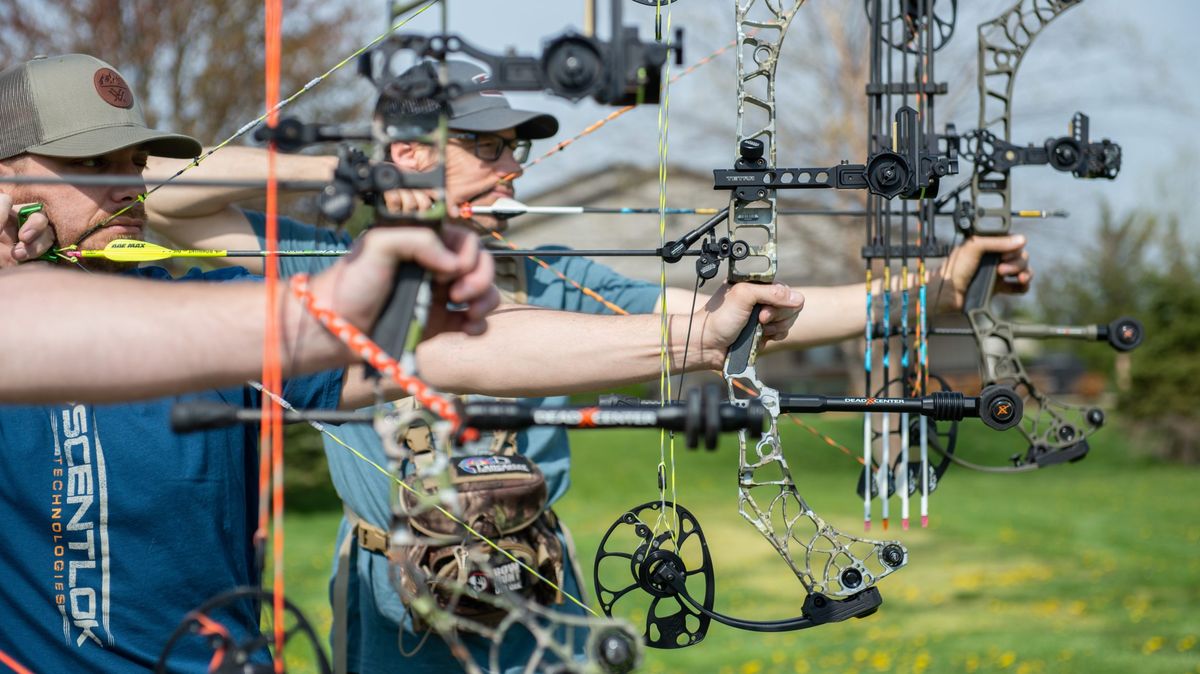
Pro shooter at full draw — thumb pad on the grip, fingers relaxed, knuckles tipped at 45 degrees.
What a Proper Bow Grip Actually Looks Like
A proper bow grip puts the riser’s narrowest point against the meat of your thumb pad — the thenar eminence, the muscle directly below your thumb. That pad is the only contact point that matters. Everything else (palm, fingers, web of the hand) should be along for the ride. When the bow recoils forward at release, it should jump straight away from you, not roll left or right.
The reference angle most coaches converge on is 45 degrees. At full draw, look down at your bow hand: the knuckle line should run roughly diagonal to the bowstring, not parallel. Knuckles parallel to the riser means you’ve rotated the wrist inward, the palm is now driving the bow, and torque is baked in before you ever release.
The truth is, most bowhunters who struggle with left/right misses aren’t punching the trigger — they’re torquing the riser. Fix the grip and a third of release-side flyers disappear without touching anything else on the bow.
Rule 1: Pressure on the Thumb Pad, Nowhere Else
The thumb pad is the only piece of your hand that bears load. Outdoor Life’s bow grip primer puts it plainly: rest the bow on the pad to the left of your lifeline (right-handed shooters), with the thumb itself pointing toward the target.1 If you can feel the grip pressing against your palm or the base of your fingers, your hand is rotated too far and torque is coming.
Quick check: at full draw, ask a buddy to slide a credit card between your palm and the riser. It should slip through clean below the thumb pad. If it catches, your grip is wrapping the bow.

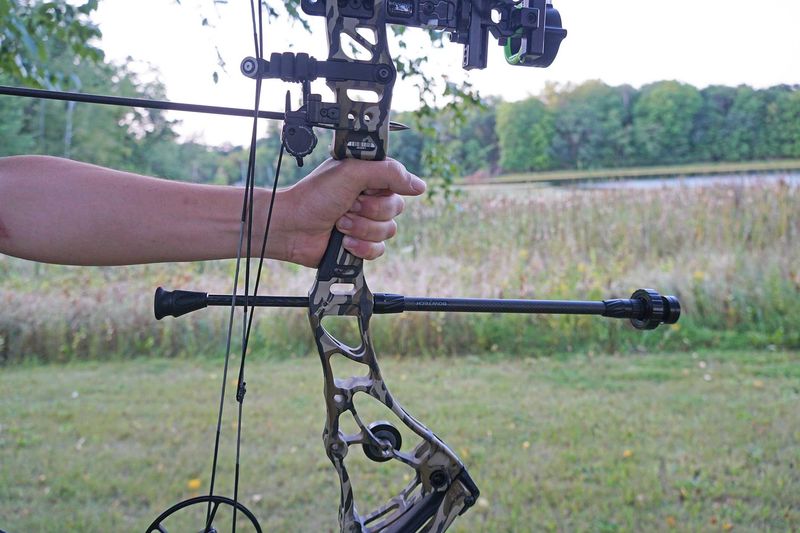
An open bow hand — fingers extended, the bow rests only on the thumb pad. Nothing else is doing work.
Rule 2: Fingers Stay Relaxed and Off the Riser
The death grip kills more shots than bad arrows ever will. When the fingers wrap around the riser, three things happen at once: the wrist rotates inward, the bow pre-loads with side torque, and the recoil path becomes unpredictable. A relaxed hand fixes all three at the same time.
The two safe options most pros use:
- Open hand — fingers extended forward, completely off the bow. Cleanest geometry, hardest to do when a 70-pound bow leaves your hand at the shot.
- Loose finger curl — fingers hang naturally, touching the grip without wrapping it. Lower mental overhead in a hunting scenario where a dropped bow is unacceptable.
Either works. The non-negotiable is that no finger pressure presses against the riser. A wrist sling makes either option safer — you can let the bow fly forward at the shot without it hitting the ground.
The death grip — fingers wrapped tight. This is where left/right groups get born.
Rule 3: Knuckles at 45 Degrees, Not Flat
Drop your bow arm to your side, fingers loose. Notice the natural angle of your knuckles — they’re diagonal, not horizontal. That’s the angle to hold at full draw. A 45-degree knuckle line keeps the wrist in a neutral position and stops the palm from rolling into the grip.
Flat knuckles (palm rotated flat against the riser) is the most common compound-shooter mistake. It feels stable, but the wrist is locked into a position where any thumb movement at release translates into riser rotation. Lift the pinky side of the hand until the knuckles run diagonal and the wrist falls into neutral on its own.
The 45-degree reference isn’t a religious number — anywhere from 35 to 55 works depending on hand size. What matters is that the wrist isn’t bent and the knuckle line isn’t flat.
Rule 4: Pick One Wrist Position and Live There
The grip debate that won’t die: high wrist, medium wrist, or low wrist. Each one is a real method that real pros shoot. None is objectively best. What matters is picking one and committing.
- Low wrist — palm is straight, the bow rests deep in the hand. Most forgiving for new shooters because the contact area is widest. Slightly more grip influence on the shot.
- Medium wrist — slight bend in the wrist, pressure point on the thumb pad. The compromise position. Common on hunting compounds with wider grips.
- High wrist — pronounced wrist bend, only the thumb pad touches. Smallest contact patch, lowest torque, hardest to repeat under pressure. The target compound default.
Switching between styles between shots is how groups blow out. Pick one based on your dominant shooting context — hunting tilts toward medium, indoor target tilts toward high — and stop fiddling.
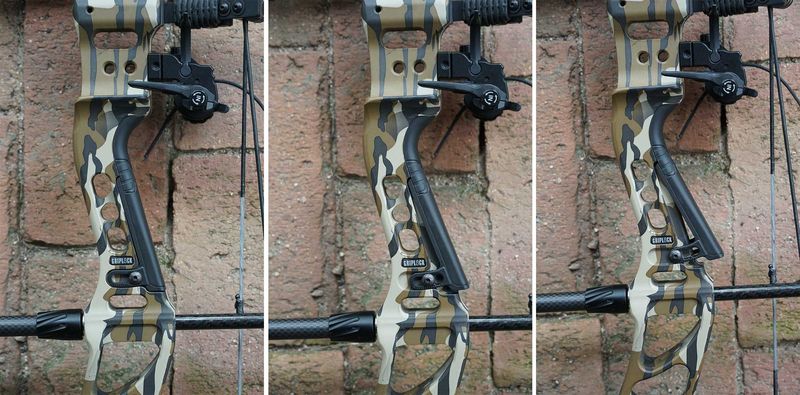
Aftermarket grip inserts like the GripLock help lock in a repeatable hand position across hundreds of shots.
Rule 5: Set the Grip Before the Draw, Not During
Sloppy grip starts before the draw cycle. If you grab the bow off the hook, draw, and then adjust your hand at anchor, you’ve already lost. The hand position you anchor with is the position that delivers the shot — fiddling at full draw with 60 pounds of holding weight is a recipe for inconsistent contact.
The pre-shot routine that fixes this: nock the arrow, pick up the bow, deliberately set the thumb pad against the pressure point, confirm the knuckle angle, then draw. Three seconds before the draw saves three feet of group at 50 yards.
Rule 6: Same Grip From 10 Yards to 60
The grip doesn’t change with distance. Whatever pressure, angle, and finger position works at 20 yards has to be identical at 50. This is where most hunters fall apart — they shoot relaxed at 20 in the backyard, then squeeze the riser at 40 in the woods because they’re nervous about the shot. The arrow lands left every time.
Drill: shoot a five-arrow group at 20, then move to 40 without resetting anything else on the bow. If the 40-yard group walks left or right, your grip pressure changed even if you didn’t notice it. Run it again and consciously match the 20-yard relaxation. Most shooters cut their long-range error in half within a session by isolating this one variable.
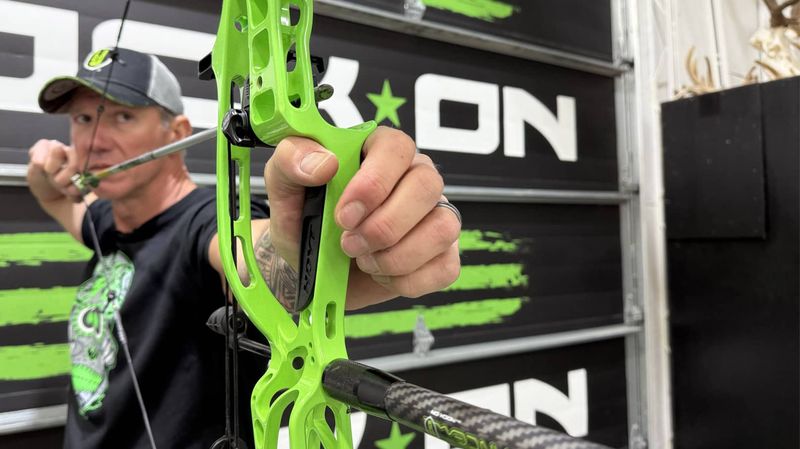
John Dudley demonstrating the thumb pad pressure point — the single contact point that should bear load.
Rule 7: Use a Wrist Sling — Trust the Bow Will Fly
The reason most shooters can’t relax their fingers is fear of dropping the bow. A wrist sling solves that fear in 10 seconds. Loop a quality sling between the riser and your wrist, and you can let the bow leap forward at the shot with zero risk of it hitting the ground. The improvement in groups from this single change is bigger than most $400 sight upgrades.
BCY, Easton, and Mathews all make $15-30 wrist slings that get the job done. Paracord versions tied at home work fine. The only requirement is that it lets the bow swing forward freely after the shot without restricting motion at full draw.
If you’re not running a wrist sling and you’re shooting open-handed, you’re either lying about being open-handed or you’ve cracked a riser at some point. There’s no third option.
The Drill That Retrains a Bad Bow Grip
One week of blank-bale shooting at 5 yards will rewrite muscle memory. Stand close, ignore the target, and shoot 30-40 arrows per session with eyes on the bow hand instead of the arrow. The job is to feel the thumb pad pressure, see the 45-degree knuckle angle at anchor, and watch the bow leap straight forward at the shot.
Day one feels awkward. By day three the new position starts to feel familiar. By day seven the old death grip feels wrong. Skip the drill and the brain reverts under stress — every single time.
Pair the blank-bale work with one of the foundational form fixes: a stable proper archery stance and a repeatable archery anchor point. Grip is the third leg of that stool — fix it in isolation and you still need the other two to score.
Bow Grip and Target Panic
The torquing hand and the punching trigger feed each other. Shooters with bad grip habits develop target panic faster because the brain learns to compensate for left/right miss tendencies with last-second hand pressure adjustments. Fix the grip and the trigger work cleans up almost on its own.
If you’re already deep in target panic recovery, run the grip reset alongside the blank-bale work. Doing one without the other usually means a six-month recovery instead of a six-week one.
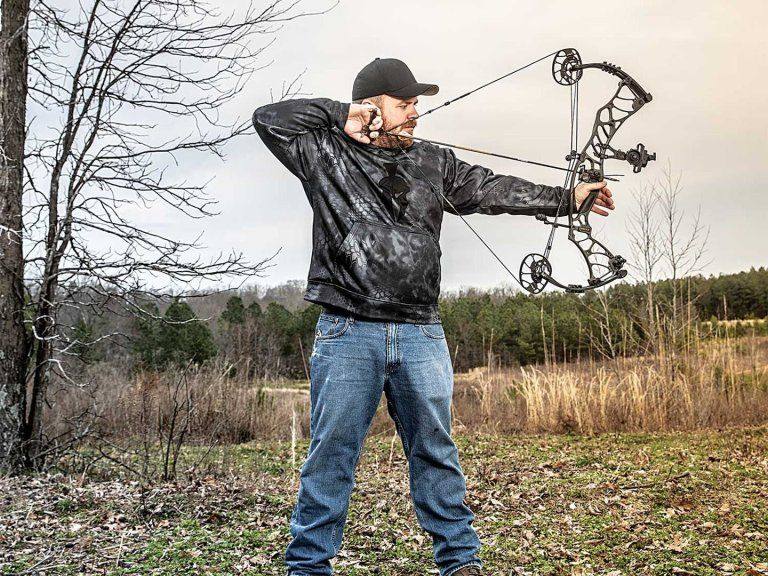
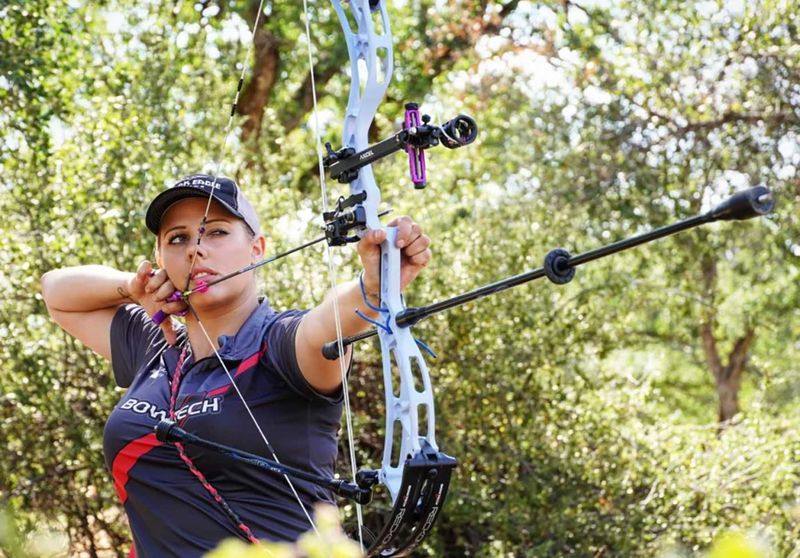
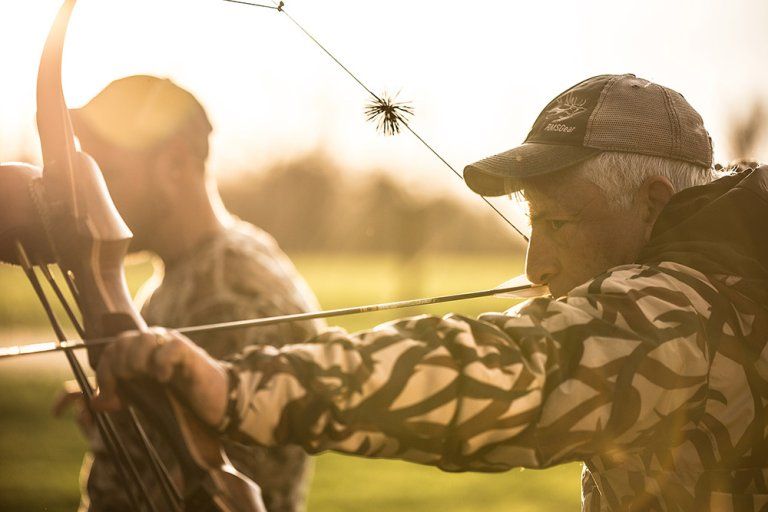
Hunter at full draw — relaxed bow hand, bow held by the thumb pad alone, wrist sling doing the catching.
Watch: How the Pros Actually Set Their Grip
Levi Morgan breaks down what a champion-level bow grip looks like on the line. Two minutes of this footage is worth a dozen written explanations.
Common Bow Grip Mistakes (And the Fixes)
Heeling the bow. Pressure migrates from the thumb pad down toward the heel of the palm — usually under fatigue. Fix: shorten practice sessions and rest before form breaks down.
Cupping the grip. The web of the hand wraps around the throat of the riser. Fix: deliberately drop the wrist, set thumb pad pressure first, then let the hand close naturally.
Wrist collapse at the shot. The bow hand drops after release because the wrist was tense and gave way when the string broke. Fix: hold follow-through for two seconds on every shot — wrist stays where it was.
Torquing under pressure. Grip cleans up at the range but falls apart on game. Fix: simulate pressure during practice — timed shots, single-arrow groups, witnesses watching.

Grip Differences: Compound vs Recurve vs Traditional
The thumb pad rule holds across every bow type. What changes is the grip’s shape and how much real estate the riser gives you. Compound risers are narrow and contoured — the pressure point is obvious. Olympic recurves use a deep grip that wraps the thumb pad even more deliberately. Traditional bows (longbows, selfbows) often have minimal grip shape, which means the shooter has to set the contact point manually with no tactile reference.
The traditional crowd often shoots with a slightly more relaxed hand than compound shooters because the lower draw weight forgives a little more grip influence. Translation: 45-pound recurve mistakes are 30% smaller than 70-pound compound mistakes. Same form, smaller error window.
Traditional shooters use the same thumb-pad pressure principle, just with a different grip shape and a more relaxed bow hand.
When to Replace the Factory Grip
Most factory grips work fine. The ones that don’t are obvious — they’re slick, too wide for your hand, or have a contour that fights the 45-degree knuckle position. If you’ve fixed your form and the bow still rolls in your hand, an aftermarket grip from Shrewd, Stan, or Bee Stinger can be worth the $40-80.
Side-plate grips (the kind that bolt onto Hoyt and Mathews risers) come in narrow, medium, and wide. Pick the one that lets your thumb pad land naturally on the pressure point without your hand wrapping. A grip change is the cheapest accuracy upgrade in archery — cheaper than arrows, cheaper than a sight, cheaper than a stabilizer.
Speaking of stabilizers — they only do their job if the bow hand stays passive. A torqued grip will steer through any front-loaded stabilizer setup, no matter how much weight is bolted on.
The Bottom Line
Proper bow grip is the cheapest, fastest, most under-talked accuracy upgrade in archery. It costs nothing, takes one week of blank-bale work to fix, and erases more left/right misses than any other single change. Run the seven rules above, drill the grip in isolation, and put a wrist sling on the bow today. The next session at the range will tell you everything.
Sources
- How to Grip a Compound Bow — Outdoor Life — Thumb pad pressure point and 45-degree knuckle reference.
- Proper Grip — Mission Archery by Mathews — Manufacturer guide on contact patch and torque-free hand setup.
- How To Grip A Bow For Better Accuracy — Bowhunting.com — Thenar eminence anatomy and relaxed-hand fundamentals.
- Get a Grip on Accuracy — Nock On Archery (John Dudley) — Wrist position and lifeline reference for compound shooters.