Archery Blog
How to Sight In a Compound Bow: 7 Steps to Tight Groups
Jun
Most blown shots on opening day come down to a sight that was never properly set. A compound bow leaving the shop pre-sighted at the factory is sighted in for the factory’s arrows at the factory’s draw weight — not yours. To sight in a compound bow correctly, you need to verify bow tune first, set a single pin at 10 yards, build out to 60+ in 10-yard steps, and chase every miss with a sight adjustment in the direction the arrow hit. The whole job takes about 90 minutes if your tune is honest, three sessions if it isn’t.
This guide walks through 7 steps from initial bow check to a verified 60-yard pin, with the specific adjustments most archers get wrong the first time.
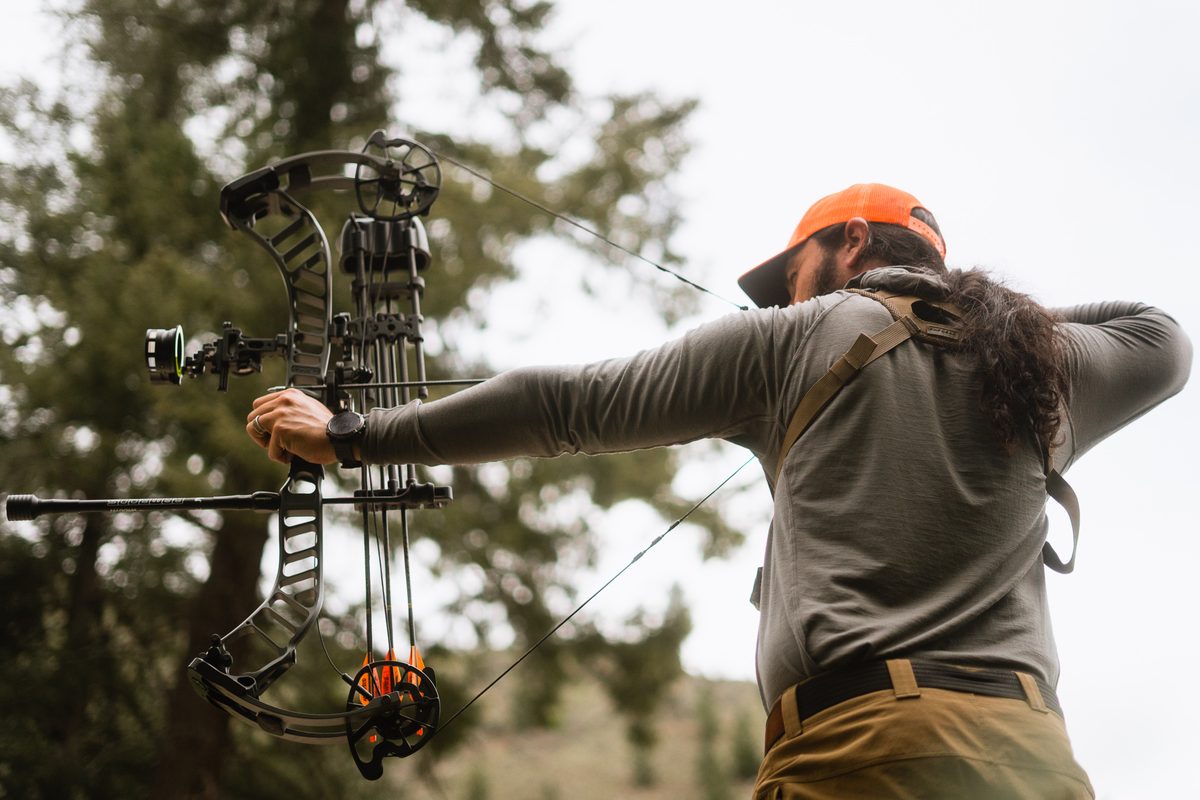
A sighted compound bow at full draw — the goal is a sight that holds zero across 60+ yards.
Before You Sight In: 4 Bow Setup Checks
Skip these and you will chase your tail for hours. A bow that won’t sight in usually isn’t a sight problem — it’s a tune problem upstream. The order matters: tune before sight, never the reverse.
Check 1 — Paper tune. Shoot through a sheet of paper at 6 feet. You want a clean bullet hole, not a tear. A tail-left tear means the rest needs to move left (for a right-handed shooter); a tail-high tear means raise the nocking point or drop the rest. Don’t bother sighting in until paper is clean. The Easton tuning guide is the bible on this and worth keeping bookmarked.
Check 2 — Peep alignment. Draw the bow with your eyes closed, settle into anchor, then open your eyes. The peep should be staring straight through the sight housing without you adjusting your head. If it’s twisted, retie it. A misaligned peep will pull every shot in a consistent direction and you will spend hours chasing a tune that isn’t there.
Check 3 — Sight level. Hang a plumb line in the backyard or use a digital level. The sight bubble must read true when the string is vertical. If the sight cants left, every pin past 20 yards drifts left. Past 50 yards, a 2-degree cant puts you a foot off the spot.
Check 4 — Rest contact. The arrow should sit centered on the launcher with zero contact during the shot cycle. Powder the rest, draw, and let down. Any wipe marks mean the arrow is bouncing — fix that before you waste fletching.
Step 1: Start at 10 Yards to Get on Paper
Walk up to 10 yards from a bag target with a 6-inch dot. The point here isn’t accuracy — it’s just getting an arrow on the bag so you can see what your sight is doing relative to where you are aiming. Use the top pin (your 20-yard pin if it’s a multi-pin, or your only pin if it’s a single).
Shoot a single arrow. If it’s within 6 inches of the dot vertically and horizontally, you are ready to back up. If the arrow is closer to the floor than the bag, the sight is way off — adjust at 10 yards before you give yourself a 60-yard problem to solve.

Step 2: Set Your 20-Yard Pin First
Twenty yards is the master pin. Everything else stacks off this one. Move back to 20 yards and shoot a tight group of three arrows. Three is the magic number — one is luck, two is a coincidence, three is a pattern. Aim at the center of a small dot, not a deer-target kill zone. Those zones are too forgiving for sight-in work.
Now read the group. The center of the group, not the best arrow, is where the bow is shooting. If your three arrows are within 2 inches of each other but the cluster sits 4 inches left and 3 inches low of the dot, the bow is shooting 4 inches left and 3 inches low — not the best arrow that snuck into the X.
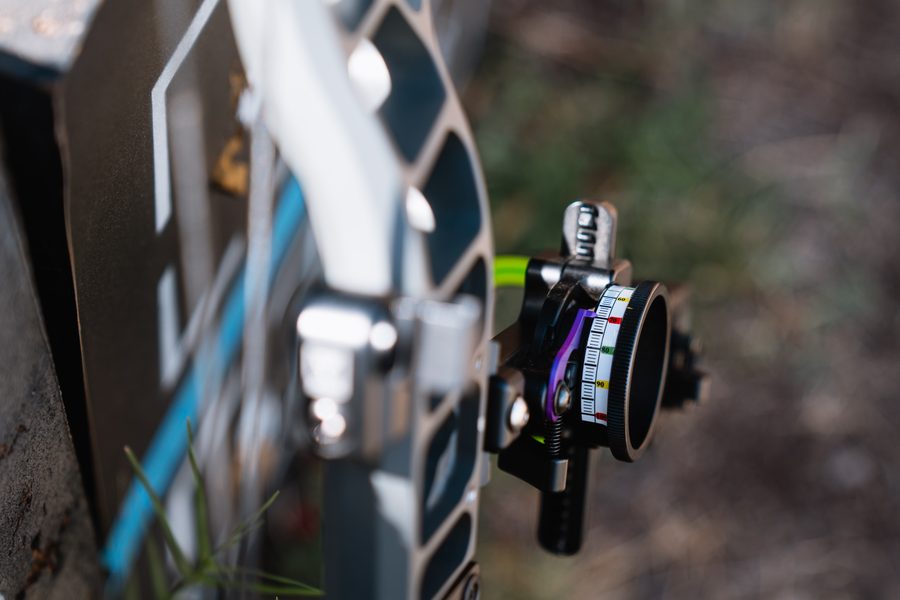
Adjust the sight, then shoot another three. Repeat until the center of your group is on the dot. Most modern sights have micro-adjustment dials calibrated in increments — note how many clicks it takes to move impact one inch at 20 yards. You will use this math for every pin afterward.
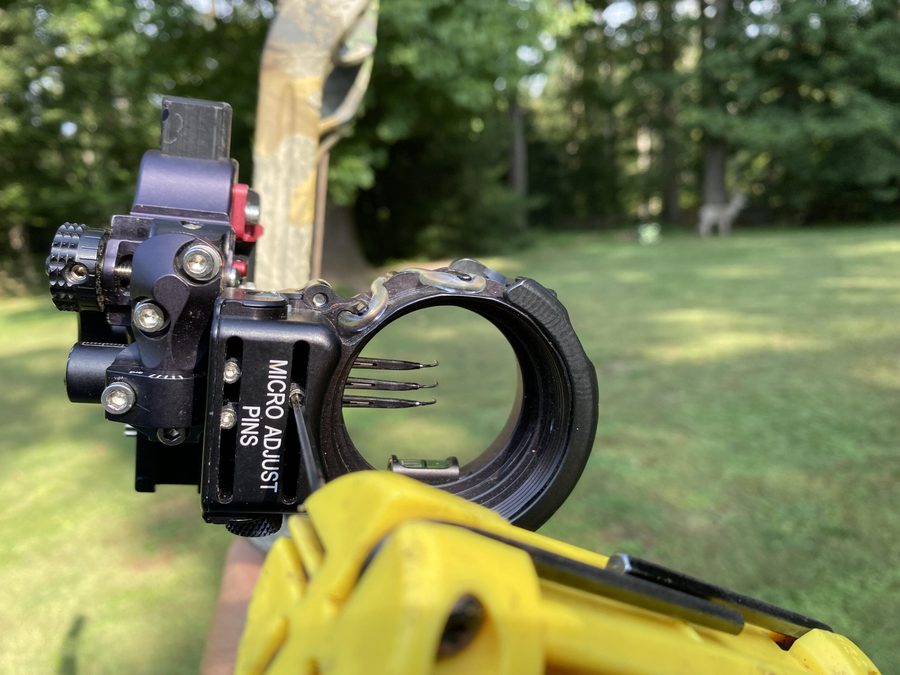
Micro-adjust dials let you move impact by tiny increments — count the clicks.
Step 3: Chase Your Misses — Move the Sight Toward the Hit
This is where new shooters lose hours. The rule is simple and counter-intuitive: move the sight in the direction the arrow hit, not the direction you want it to go. Arrow hits low and right? Move the pin down and right. Arrow hits high? Move the pin up.
The reason this works: you aren’t physically moving the arrow, you are moving the aiming reference. By shifting the pin toward where the arrow landed, you force yourself to aim higher (or further left, etc.) on the next shot, which corrects the impact. Tape this rule to your bow case if you have to. Field & Stream’s own sight-in walkthrough phrases it the same way for the same reason — it’s the one mistake that costs hours of arrow waste.
The amount you adjust depends on the pin housing, but a useful baseline: most sights move impact about 1 inch per full revolution of the windage knob at 20 yards. Half-turn for a 1/2-inch correction. Don’t free-eye it.
Step 4: Stack the Rest of Your Pins (Multi-Pin Setup)
Once the 20-yard pin is locked, walk back to 30 yards and shoot three arrows using your second pin. The whole point of a multi-pin sight is that each pin is a fixed reference for a specific distance — typically 20, 30, 40, 50, and 60 on a five-pin housing.
Pin spacing isn’t linear. The gap between your 20 and 30 pins will be smaller than the gap between your 50 and 60 pins, because arrow drop accelerates with distance. A 280 FPS bow shooting a 420-grain arrow will see roughly 3-4 inches between the 20 and 30 pin, but closer to 6-7 inches between the 50 and 60. Let the arrows tell you where the pins go.
Adjust each pin individually, working from top to bottom. Don’t touch the 20-yard pin during this process — it’s locked. Only touch the pin for the distance you are currently shooting. Bowhunter Magazine’s pin-stacking method (top pin first, then work down one at a time) has held up for decades because it removes the variables one at a time.
A five-pin housing — each pin is set independently in 10-yard increments.
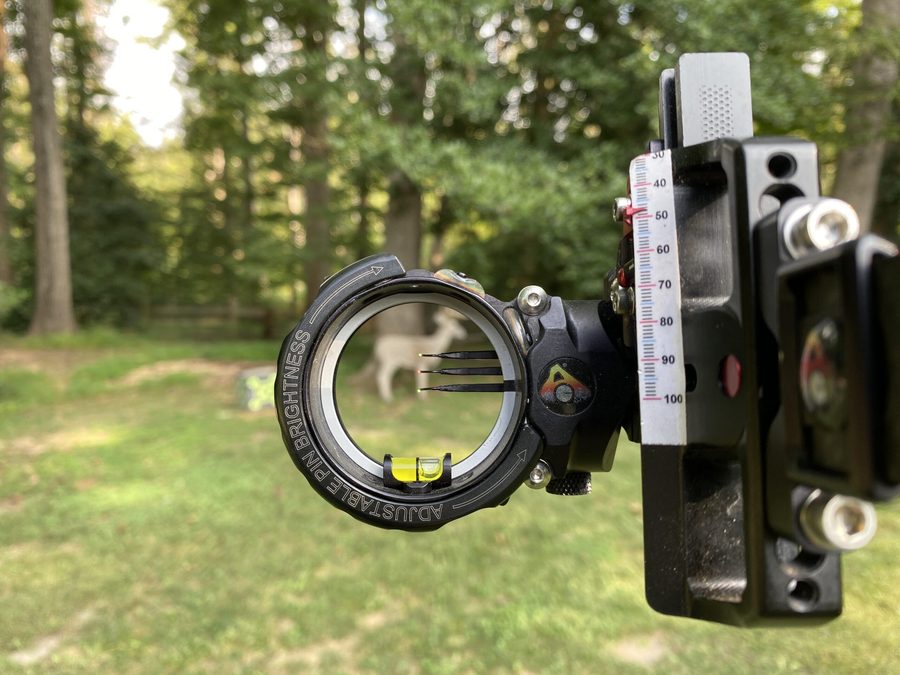
Step 5: Use a Sight Tape for a Single-Pin Slider
Running a single-pin slider sight like an HHA, Spot Hogg Fast Eddie, or Black Gold Ascent? The setup is different. You’re not stacking pins — you’re calibrating a tape that tells the pin where to sit at any given distance.
First, sight in the single pin at 20 yards exactly like Step 2. Then move to 60 yards (or whatever your maximum sight-tape mark is) and adjust the slider until you are hitting on at 60. Now grab a blank sight tape, mark 20 at the top reference and 60 at the bottom reference, and the manufacturer’s interpolation does the rest. Most modern slider sights ship with a tape calculator app — enter your arrow speed, peep height, and 20/60 marks, and it spits out a custom tape.
Once the tape is installed, verify at 30, 40, and 50 yards. If the 40-yard mark is shooting an inch high, you have an arrow speed input that’s slightly off — recalculate the tape with a chronograph reading instead of the spec-sheet IBO.
A sight tape on a slider sight — verify at every 10 yards, not just at the endpoints.
Step 6: Verify at 50 and 60 Yards
This is where bowhunters get humbled. A pin that looks perfect at 30 can be 4 inches off at 60 if your form breaks down at distance. Move back to 50 yards and shoot a five-arrow group, not three. At 50 yards, three arrows can lie to you — five gives you the truth.
Watch for vertical scatter. If your arrows are stringing top-to-bottom rather than clustering, the issue is usually not the sight — it’s grip torque, anchor inconsistency, or punching the release. Sighting in won’t fix a form problem; it just hides it at close range and reveals it at distance.
If the 50-yard group center is off, adjust only the 50 pin. Then repeat at 60. Many bowhunters set a sight-in benchmark of a 5-inch group at 60 yards before they consider the bow hunt-ready — that’s tight enough to put an arrow inside the kill zone of a whitetail at any realistic bow range.
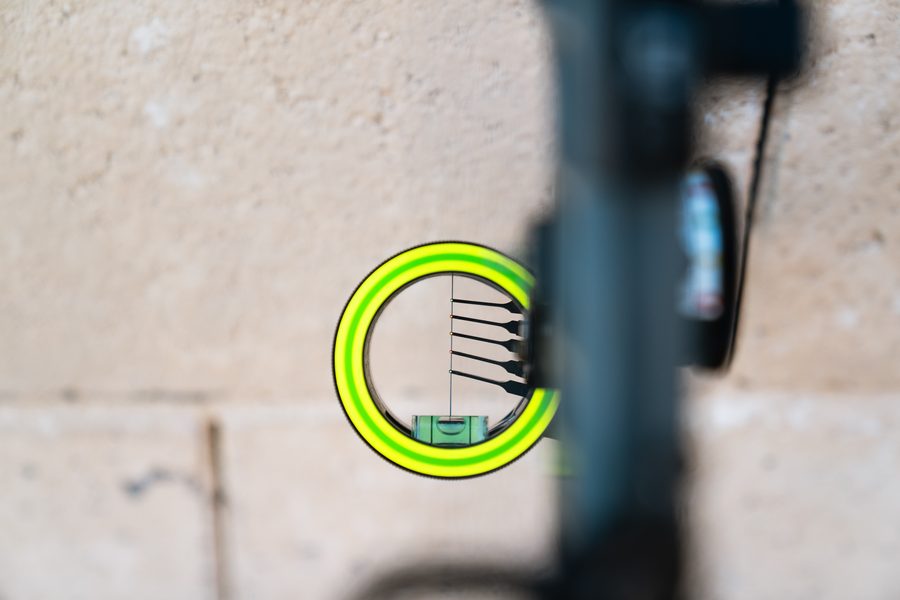
Looking down the housing at a sighted-in target — clean pin alignment is the payoff.
Step 7: Field Check From Real Shooting Positions
Sighting in from a flat backyard stance is one thing. Sighting in from a treestand at a 25-foot elevation, leaning around a trunk, with a coat over your release hand, is something else entirely. The last step before you call the bow sighted in is to replicate field conditions.
Climb into your treestand at the practice range. Shoot one arrow from sitting, one from kneeling, and one with your jacket on. If any of those three lands more than 4 inches off-pin compared to your standing groups, that’s the form variable to drill before opening day — not a sight adjustment.
One often-overlooked element: shoot with whatever broadhead or field point you plan to hunt with. A field-point-sighted bow can throw broadheads four inches off at 40 yards if the broadheads aren’t tuned — and that’s a story for a different article. For now, plan on shooting at least three broadheads through the same sight before you call it done. We covered the full broadhead-to-field-point process in our broadhead tuning guide.
Common Sight-In Mistakes That Wreck Your Groups
After running sighted-in checks on dozens of bows at our local range, the same five mistakes show up over and over. The biggest one isn’t a sight problem — it’s a form problem masquerading as one.
Mistake 1: Sighting in cold without warming up. The first three arrows of a session are not representative of your shooting. Shoot a full quiver before you start adjusting anything. A cold archer is not the same as a tuned archer.
Mistake 2: Chasing single arrows. One arrow flies off and the archer cranks the windage knob. Three shots later, the original group is gone and the new one is somewhere else. Adjust by group center, not by single arrows. Period.
Mistake 3: Skipping the paper tune. If your arrow is leaving the bow with the back end kicking left, no amount of sight adjustment will give you tight groups at 50 yards. Paper-tune first. Always. Cam timing, rest position, and nock height all upstream of any sight work — see our compound bow tuning guide for the full sequence.
Mistake 4: Different arrows during sight-in. Sight in with the arrows you will hunt with. A 100-grain difference in arrow weight changes point of impact by 6+ inches at 40 yards. If you sight in with 400-grain practice arrows and switch to 500-grain hunting arrows, you start over.
Mistake 5: Ignoring the rest. A sloppy arrow rest will make a perfectly sighted bow shoot like garbage. If your sight-in groups suddenly widen mid-session, the issue is usually the rest, not the sight. Our arrow rest types comparison walks through which rests hold zero best for sight-in work.
![]()
A tight five-arrow group at distance is the payoff for honest sight-in work.

Watch: Sighting In a Compound Bow (Lancaster Archery)
Lancaster Archery Supply’s tutorial below is the cleanest video walkthrough of the process from a respected pro shop — the exact pin-adjustment language matches what’s in this guide.
How Long Should Sighting In Take?
For a tuned bow with a fresh sight: about 90 minutes from setup to a verified 60-yard pin. For a bow you suspect needs paper-tuning first: plan on three sessions of 45 minutes each, spread across a couple of days so your shoulders aren’t fatigued. Sighting in a bow when you are exhausted is how 40-yard groups become 8-inch patterns.
The pro tip nobody tells you: sight in early in the morning before wind kicks up. Sight in on a still day if you can. Even a 5 mph crosswind will push an arrow an inch left at 40 yards, and you can spend an hour chasing a sight problem that’s actually a weather problem.
FAQs
How many pins do I need on my bow sight? Five pins (20-60 yards) covers virtually every realistic bowhunting shot. Three pins (20-30-40) is enough for whitetail-only hunters who never plan to shoot past 40. Western elk hunters often run seven pins or a single-pin slider out to 80+ yards.
Can I sight in a compound bow indoors? Yes, but only out to 20 yards in most indoor ranges. Verify 30+ yards outside before you call it done. Indoor range lighting also lies — a pin that looks bright indoors can disappear in low-light field conditions.
Does the kisser button affect sight-in? Indirectly. The kisser is an anchor-point reference. If it shifts on the string, your anchor shifts, and impact shifts with it. Lock it down with serving thread once you have it in place.
How often should I re-check my pins? Every two weeks of regular shooting, and any time you change strings, arrows, or broadheads. Pins drift. Even premium sights need a quick verification check.
The Bottom Line
A sighted-in compound bow is the single biggest variable in opening-day success — bigger than camo, bigger than scent control, bigger than gear selection. The work isn’t complicated, but it does demand patience and honest self-assessment. If you’ve made it through these seven steps with a 5-inch group at 60 yards, you’ve earned your shot. The rest is woodsmanship.
Ready to dial in your setup? Browse our archery shop for sights, rests, and tuning tools, and check the 2026 compound bow buyer’s breakdown if you’re shopping for a new bow this season.
Sources
- Outdoor Life — How to Sight in a Compound Bow: A Step-by-Step Guide — Pro-level adjustment principles and pin-direction rule.
- GearJunkie — How to Sight In a Compound Bow — Multi-pin and single-pin slider walkthroughs with sight tape setup.
- Field & Stream — How to Sight In a Compound Bow — Range-by-range progression and form-check framework.
- GOHUNT — The Bowsight Pin Diameter Debate — Pin size selection criteria for bowhunting sight setups.
- Archery360 — Types of Compound Bow Sights — Sight category overview and aperture configurations.