
Archery Blog
Archery Form: A Shot-Cycle Walkthrough From Stance to Follow-Through
Jul
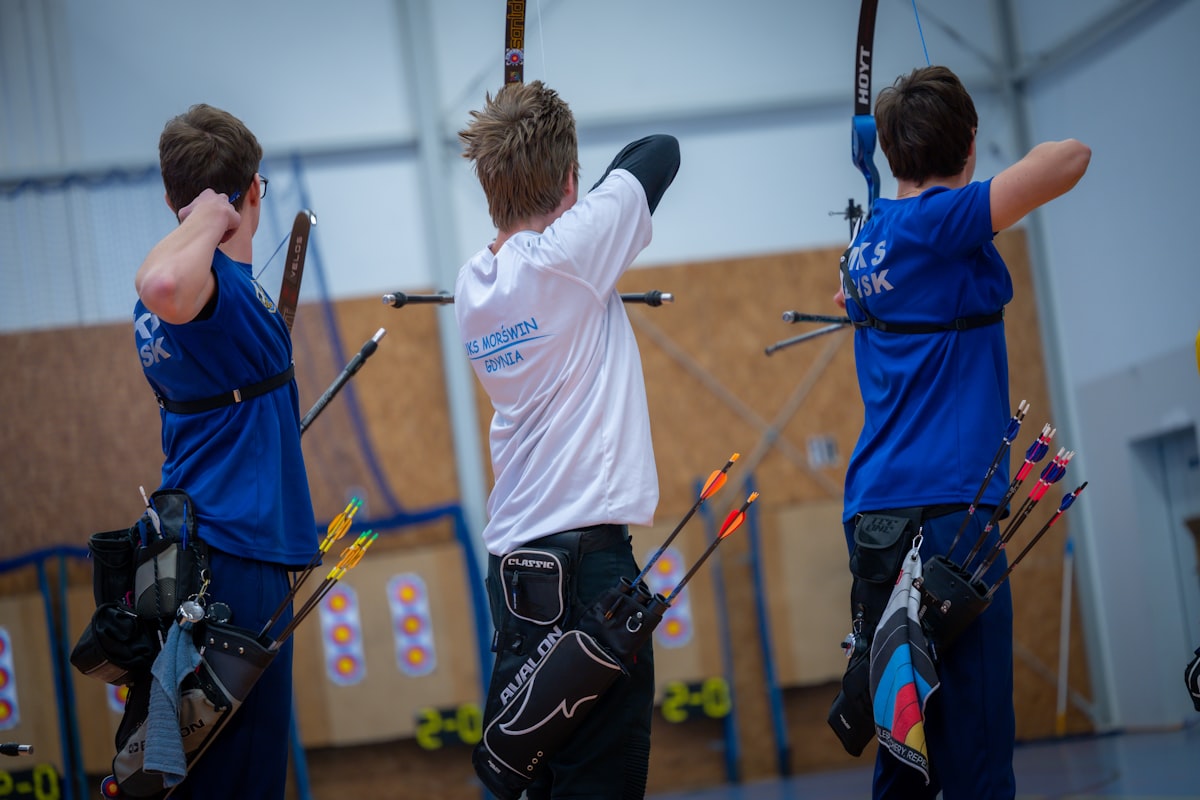
Good archery form is not a collection of tips you bolt onto your shooting one at a time. It is a single, connected motion — a shot cycle — where each step sets up the one that follows. A sloppy stance quietly ruins your anchor. A tense grip poisons your release. When you understand how the pieces link together, you stop chasing random fixes and start building a shot you can repeat under pressure. This guide walks the whole cycle in order, from the feet up to the moment after the arrow is gone.
Whether you shoot a recurve on a target line or a hunting rig in the woods, the underlying mechanics are remarkably similar. The goal is always the same: remove as much variability as you can, so the only thing changing between arrows is the shot itself — not your posture, not your hand placement, not your timing.
It Starts From the Ground Up: Stance
Every shot is built on a foundation, and that foundation is your feet. Stand roughly shoulder-width apart, straddling the shooting line, with your body perpendicular to the target. Most beginners start with a square stance — both feet parallel to the line — because it is the easiest to reproduce. As you progress, you may drop your back foot slightly into an open stance, which clears your string path from your chest and gives your core a more stable rotation.
What matters more than which stance you pick is that you pick one and repeat it exactly. Weight should sit evenly between both feet, balanced over the balls, not rocked back on your heels. Think of yourself as a tripod being planted: stable, upright, and unhurried. If your stance drifts a few degrees each end, your whole aiming reference drifts with it, and no amount of good release will save the arrow.
Nocking, Hooking, and Setting the Hands
With your feet set, nock an arrow beneath the nock point on the string and seat it on the rest. Now the hands go to work, and this is where a huge amount of accuracy is won or lost.
The Hook (String Hand)
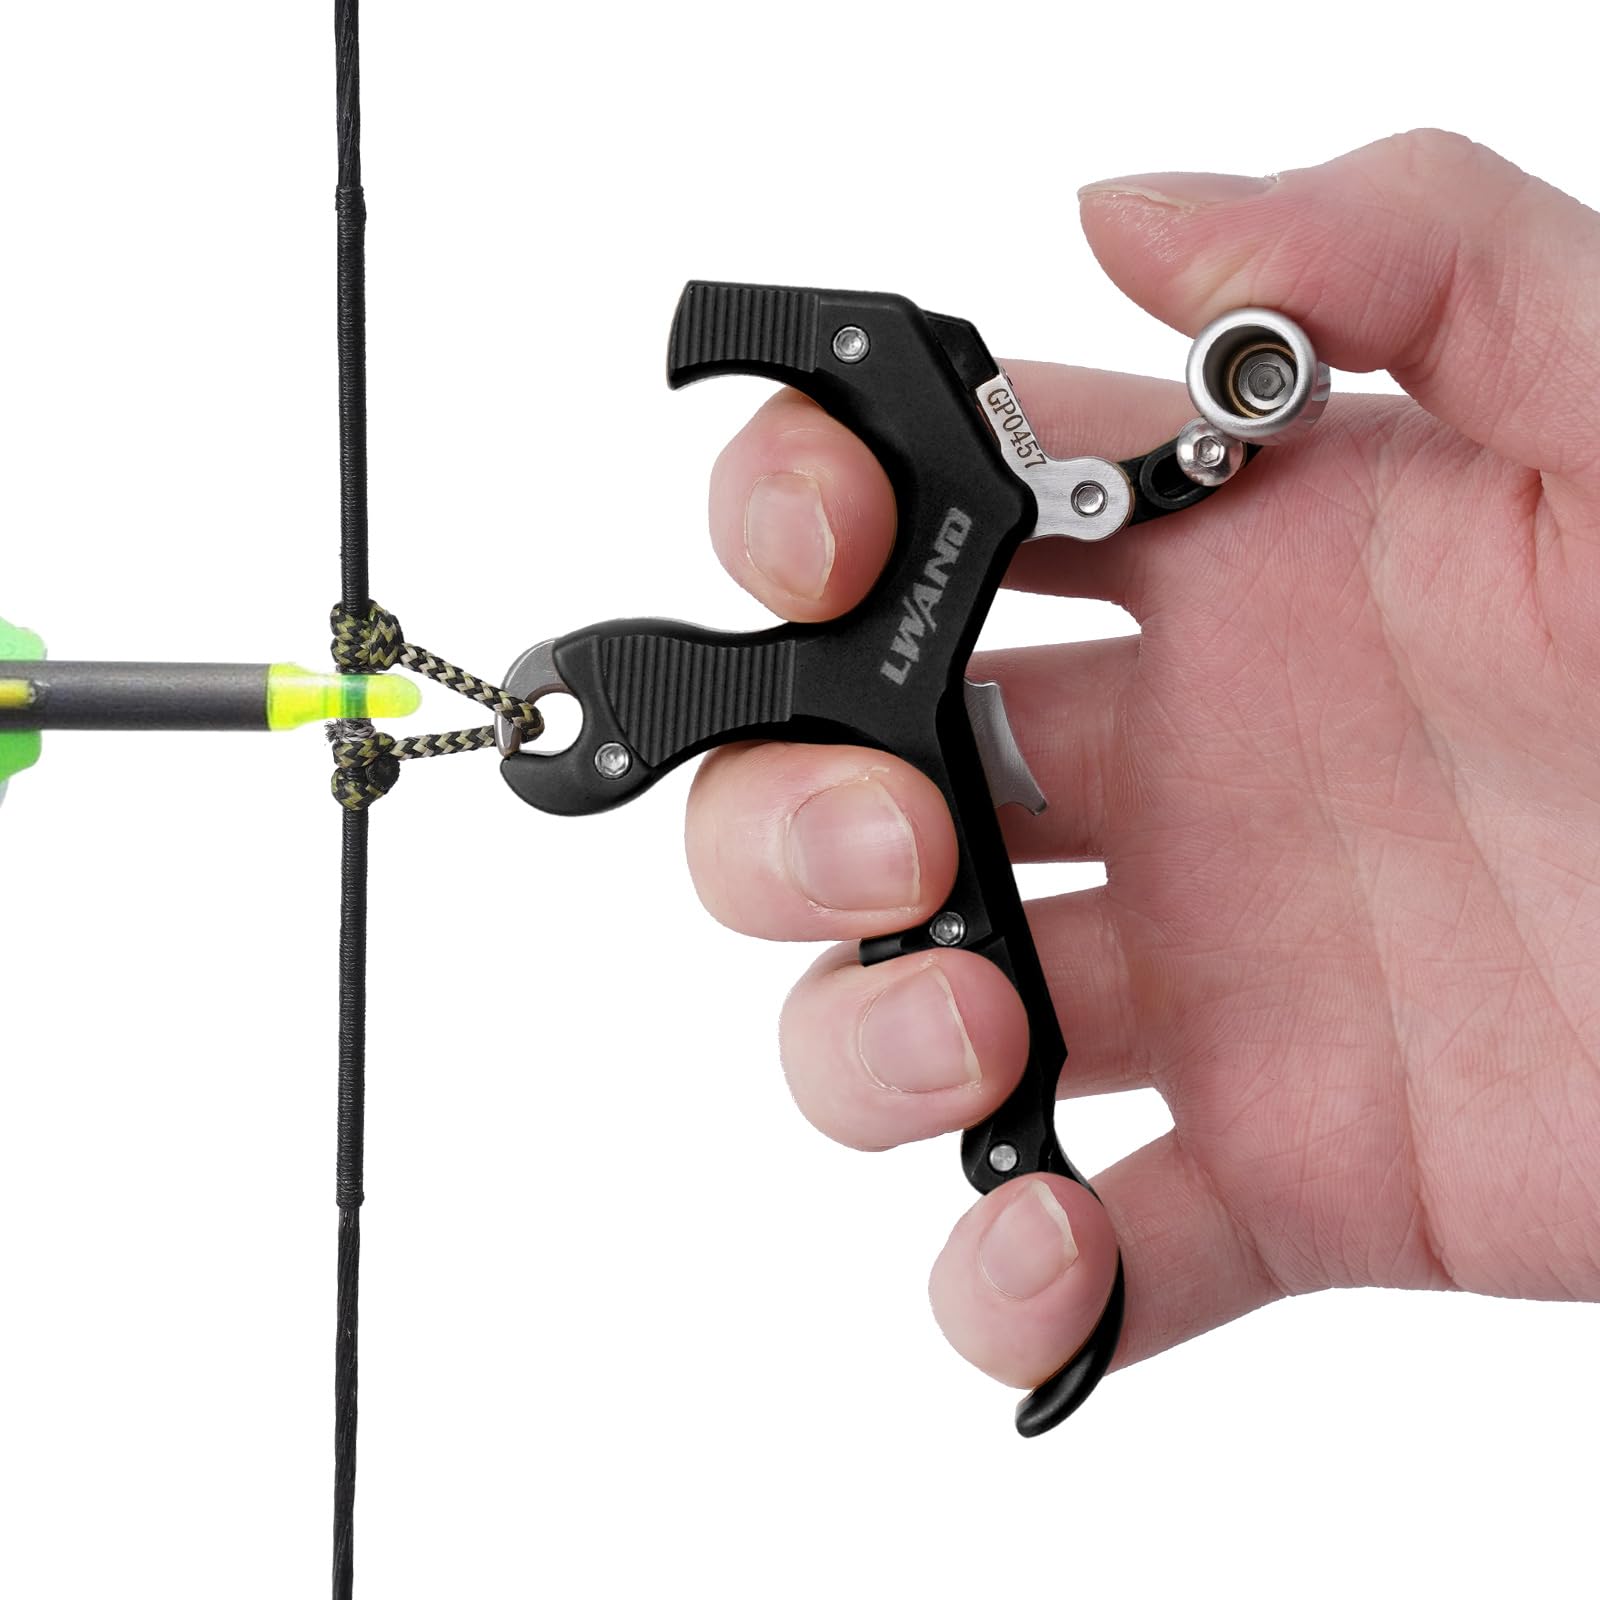
For finger shooters, hook the string in the first groove of your fingers — the crease closest to the fingertip — not buried in the second joint. A deep hook creates tension you will have to fight through the whole shot. A shallow, relaxed hook lets the string leave cleanly. If you shoot a mechanical release aid on a compound, the same principle applies: let the release do the holding so your hand can stay soft.
The Grip (Bow Hand)
The single most common form fault in all of archery is squeezing the bow. Your bow hand should not grab — it should press. Let the grip sit in the lifeline of your palm, angled toward the thumb pad, with your fingers relaxed or lightly curled. At full draw the bow is essentially resting against a soft, open hand. A tight grip introduces torque, and torque sends arrows left and right for reasons that feel maddeningly random until you fix the hand.
A well-fitted finger tab or glove protects your string hand and keeps the release consistent, which is why it is one of the first accessories worth getting right.
Posture and the Pre-Draw
Before you pull anything, set your posture. Stand tall through the spine, shoulders down and level, head turned to face the target without tilting. Raise the bow arm toward the target and extend it — but do not lock the elbow into a rigid, hyperextended bar. A slightly soft, rotated elbow keeps the string clear of your forearm and takes strain off the joint.
This pre-draw position is your launch pad. Both shoulders should stay low; the number-one posture mistake is letting the bow shoulder creep up toward the ear as the draw gets heavy. If it does, your draw weight is likely too high, and the fix is dropping poundage rather than muscling through it.
The Draw: Pulling With the Back, Not the Arm
Here is the concept that separates archers who plateau from those who keep improving: you draw the bow with your back, not your arm. The bicep and forearm are just cables connecting the string to the real engine — the large muscles between your shoulder blades.
As you draw, imagine your drawing elbow tracing a horizontal path back and around, as though your shoulder blade is sliding toward your spine. Keep the movement smooth and continuous. Jerky, arm-dominant draws lead to inconsistent anchor points and early fatigue. When back tension drives the motion, you can hold at full draw longer, aim more calmly, and release more cleanly because the strong muscles are doing the strong work.
Anchor: The Reference Point That Makes Everything Repeatable
The draw ends at your anchor point — a fixed, tactile place where your string hand contacts your face the same way every single time. Because your eye sits just above the arrow, a consistent anchor is effectively your rear sight. Move it a quarter inch and your point of impact moves noticeably downrange.
Recurve target archers typically anchor with the index finger under the chin and the string touching the tip of the nose and the center of the chin — three points of contact, not one. Barebow and traditional shooters often anchor higher, at the corner of the mouth or the cheekbone, to bring the arrow closer to the eye for instinctive aiming. Compound shooters use a peep sight and a kisser button or nose point for the same purpose. Pick the anchor that suits your style and then guard it obsessively; it is the reference the whole shot depends on.
Aiming and Holding
Only now, anchored and stable, do you aim. Whether you are settling a sight pin on the gold or floating an arrow tip using a traditional gap, resist the urge to freeze. The pin will never sit perfectly still — a small, controlled float around the center is normal and healthy. Fighting to pin it dead-center creates tension that ruins the release. Let it drift, trust your subconscious to keep it near center, and stay focused on continuing to pull.
This is the moment where mental discipline matters as much as mechanics. Keep the back muscles engaged and expanding even while you aim. A shot that is being actively driven through the middle is far more forgiving than one that has stalled while you stare at the target and wait.

Expansion and Release: The Shot That Surprises You
The best release does not feel like a decision. Instead of consciously opening your fingers or punching a trigger, you continue expanding through the shot — a subtle, ongoing pull that increases back tension until the string simply slips away. Coaches call this a surprise release, and it is the antidote to target panic and flinching.
For finger shooters, the string hand relaxes and the fingers get out of the way, allowing the hand to move backward along the jaw. For compound archers, a back-tension or hinge release rewards exactly the same motion. The enemy in both cases is plucking — snapping the hand out to the side — which throws energy into the string and scatters arrows. If your hand flies away from your face, you plucked; if it slides straight back along your neck, you executed.
A back-tension release aid can teach compound shooters this feeling by removing the temptation to punch a trigger, and many target archers keep one in the bag specifically as a form trainer.
Follow-Through: The Step Everyone Skips
The arrow is gone in a few milliseconds — long before your body knows it. That is exactly why follow-through matters. What you do after release reveals whether the shot before it was honest. Hold your form. Let the bow hand stay extended toward the target, let the string hand finish its rearward slide along your neck, and keep your posture and head position frozen until the arrow lands.
If you collapse forward, drop the bow arm, or peek at the target the instant you release, you are almost certainly starting that collapse a hair before the string leaves — sabotaging the shot at its most critical moment. A clean, held follow-through is proof that back tension carried the shot all the way through. Treat it as the final step of the cycle, not an afterthought.
Linking It Into One Repeatable Motion
Read in order — stance, hook and grip, posture, draw, anchor, aim, expansion, release, follow-through — the shot cycle looks like a checklist. But the goal is to stop counting steps. With repetition the whole sequence blurs into a single flowing motion you can run identically dozens of times an hour. That consistency is what actually produces tight groups; raw strength and expensive gear are a distant second.
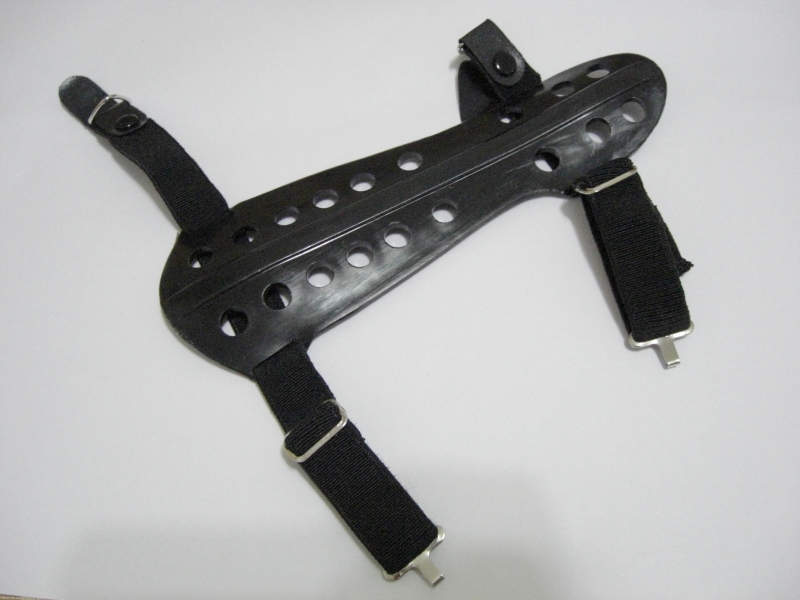
The fastest way to build that groove is deliberate, low-volume practice with a bow you can control comfortably. Shoot at close range with your eyes closed sometimes, feeling each stage rather than watching the target — a drill target archers call “blank bale” shooting. Protecting your forearm with a proper arm guard lets you focus on the motion instead of flinching from string slap.
Common Faults and Quick Self-Checks
When arrows start scattering, resist the temptation to blame the sight or the bow. Walk back through the cycle instead. A few reliable diagnostics:
- Left-right spread: usually grip torque or a plucked release — check that your bow hand is relaxed and your string hand finishes back along your neck.
- Vertical spread: often an inconsistent anchor or varying draw length — confirm your string touches the same facial contact points every time.
- String slapping the forearm: your elbow is rotated wrong or your grip is torquing the riser — rotate the bow elbow so the crease runs vertical.
- Shots creeping low as you tire: the draw is too heavy and your form is collapsing — drop poundage before ego insists otherwise.
Each of these traces back to a specific stage of the cycle, which is the whole point of learning form as a connected sequence. When you know the order, you know where to look.
The Takeaway
Archery form rewards patience over power. Build your stance the same way every time, keep both hands soft, pull with your back, anchor to a fixed reference, let the release surprise you, and hold your follow-through until the arrow lands. Do that consistently and the groups tighten on their own. The archers who shoot beautifully are not doing something exotic — they are simply running the same clean shot cycle, arrow after arrow, without shortcuts.
Sources
- World Archery — international governing body, coaching and technique resources
- USA Archery — national coaching standards and shot-cycle instruction
- Wikipedia: Archery — overview of equipment, styles, and shooting technique
