Archery Blog
Spot and Stalk Bowhunting: 7 Tactics to Get Within Bow Range
Jun
The average bowhunter who tags a mature mule deer in open country burns through seven to twelve blown stalks before the one that works. Spot and stalk bowhunting looks slow from the truck, but the math is brutal: get inside 40 yards of an animal that can see, hear, and smell better than you, on terrain that hides nothing. Tree stand hunters can sit still and let the woods forget them. Stalkers don’t have that luxury — every step is a decision the animal might catch you making.
What separates the bowhunters who close the deal from the ones who eat tag soup isn’t physical fitness or expensive optics. It’s a stack of small disciplines: glassing twice as long as feels reasonable, waiting for a bedded animal, treating wind as the only thing that matters, and pulling the plug on a stalk that has gone sideways before the animal blows. The seven tactics below are how the best western bowhunters keep their close-range opportunities under 60 yards instead of 200.
What Spot and Stalk Bowhunting Actually Demands
Spot and stalk bowhunting is a two-phase game. The spot phase is patient, sit-still optics work from a high vantage point — typically 600 yards to two miles from the animal. The stalk phase is the careful, route-by-route closing of distance until you are inside an ethical bow range, which for most hunters means 40 yards or less. The split between the two is roughly 80/20 — four hours of glassing for every hour of actual stalking, and the people who reverse that ratio go home empty-handed.
The most honest thing to say about this style of hunting is that the bow itself rarely fails you. Anchor, release, and pin placement are almost never the reason a stalk falls apart. The reasons are wind that swirled at the last twenty yards, a doe that wasn’t accounted for, a single dry stick under a boot at thirty yards out. The bow is the easy part.
1. Glass First, Walk Second
If you take one rule from this entire piece, take this one: locate the animal with optics before you ever take a step toward it. The hunters who consistently kill mature animals on the ground spend the first two hours of legal light behind glass, then move. Walking ridges hoping to bump something into bow range is how you educate every animal in a square mile without firing an arrow.
A spotting scope at 20–60x earns its weight on mule deer and antelope country because it lets you confirm the bed, the wind, and the buck’s body position before you commit. Binoculars in the 10×42 or 12×50 range handle the initial sweep. The Vortex Razor HD, Swarovski EL, and Maven B.2 lines are common picks at the high end, but a $400 binocular used properly outperforms a $2,500 binocular used lazily.

2. Wait Until the Animal Beds
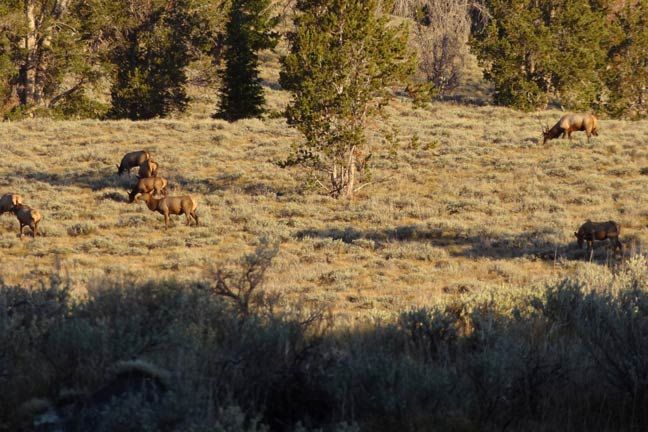
Stalking a feeding mule deer is a coin flip. Stalking a bedded one in the middle of the day, with the wind locked and the buck’s eyes pointing the wrong direction, is the highest-percentage shot opportunity in western archery. Most mature bucks bed between 9 AM and 3 PM in country that offers shade, an escape route, and a clear view of their backtrack. That predictability is the gift.
The discipline is hard because you usually spot the animal feeding at dawn and the temptation to move immediately is enormous. Don’t. Watch the buck through the binoculars until he beds, mark his exact position against a fixed landmark (a tree, a rock outcrop, a fence post), then begin planning your approach route. The wait can run two to four hours. That is the price of admission.
3. Read the Wind Before You Move
A bowhunter’s wind problem is not the prevailing breeze you feel at the truck. It’s the dozen micro-thermals that swirl in canyons, the sudden updraft when the sun hits a north slope at 10 AM, and the convection downdraft that starts the moment the sun drops behind a ridge. Powder bottles, milkweed seeds, and lighter flicks tell the truth that your face can’t.
The rule that matters: if the wind is uncertain on a stalk, abort and try again from a different angle. A single thermal swirl at fifty yards is a busted stalk. The animal will not give you another chance that day, and in many cases you’ll have educated him out of his bedding area for the rest of the week. Patience beats persistence here, every time.
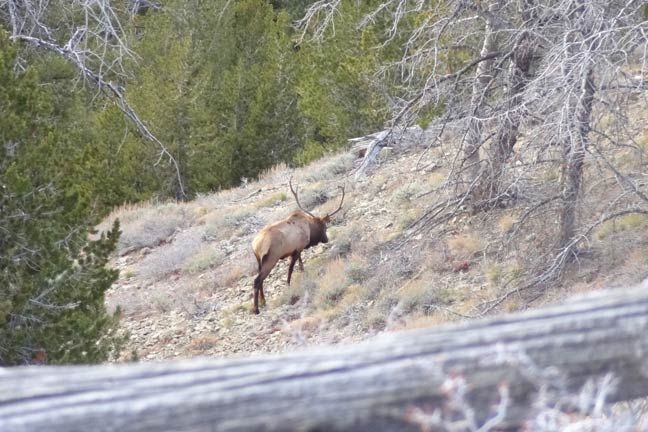
4. Use Terrain Like a Shield
Mature animals are not paying attention to brush — they’re scanning ridgelines and openings for movement. Use the country to keep you below their sightlines. Walking the spine of a ridge silhouettes you against the sky. Walking the back side of that same ridge, fifty feet below the crest, makes you invisible.
Cuts, draws, dry creek beds, and the back side of rolling sage flats are your highways. A two-mile stalk on the long way around is almost always better than a three-hundred-yard approach across open ground. Hayden Sammak’s MeatEater piece on stalking hammers this point: the route should be chosen for cover and wind, not for distance.
5. Strip Down, Slow Down, Get Low
At about 200 yards from the animal, the stalk changes. Boots come off and wool socks go on, or low-profile stalking slippers if the terrain has too much cactus. A pack is set on a landmark so you can find it again. From here, the rule is one foot per minute on the final approach — slower than feels possible.
Profile matters more than camouflage at close range. A standing bowhunter is a vertical line in a horizontal landscape, which the animal’s brain reads as wrong even at 80 yards. Crawling on hands and knees, or even a low duck-walk, breaks that silhouette. The hunters who close the last hundred yards on their belly are the ones drawing arrows at 30. If you’ve been working on a strong, repeatable anchor point for bow shooting, this is where it pays — you’ll be drawing from a kneeling or hunched position, not a clean upright stance.

6. Range Everything Before You Draw
One of the cleanest ways to blow a stalk is to range the animal at the moment of truth and miscount yardage in your head. Range the bedded buck and three landmarks around him — a rock at his nose, a sage clump at his hindquarters, a stump on his backtrack — before you start the final twenty-yard approach. Then when he stands, you already know the range to wherever he steps.
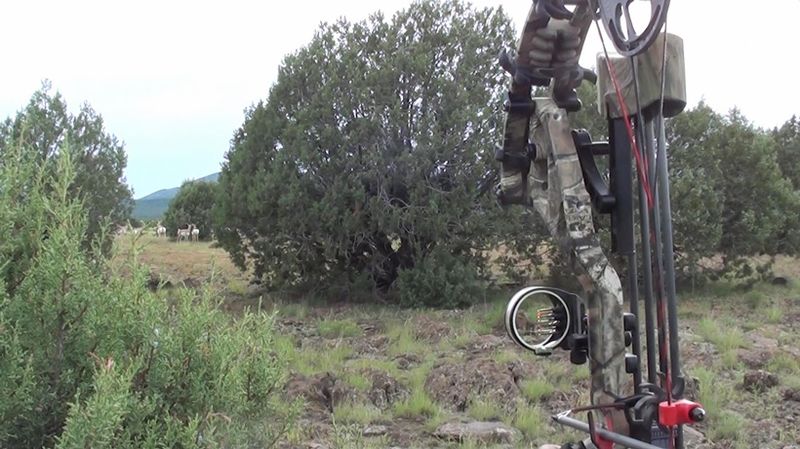
Most modern rangefinders calibrate for angle and give true horizontal yardage, which matters on western country where you might be shooting downhill at 25 degrees. Hold for the corrected number, not the actual distance, or you’ll shoot over the back every time on a steep angle. Practice this in the offseason on a 3D course with elevation — flat-range practice does not prepare you for it.
7. The 50-Yard Decision Point
Inside fifty yards on an undisturbed animal is the decision zone. Push closer if the wind and cover allow, but be honest about whether the next ten yards adds real shot quality or just satisfies an arbitrary “I want to get to 30” itch. A clean broadside shot at 45 yards on a calm bedded buck beats a 28-yard shot through a window with the animal looking at you.
The arrows and broadheads do the work at distance now in a way they didn’t twenty years ago. A modern broadhead matched to your game with a 470-grain arrow at 280 fps will pass through a mule deer at 50 yards. The bow is not the limit. Your willingness to stop pushing when the percentages drop is the limit.
Where Spot and Stalk Beats Tree Stand Hunting
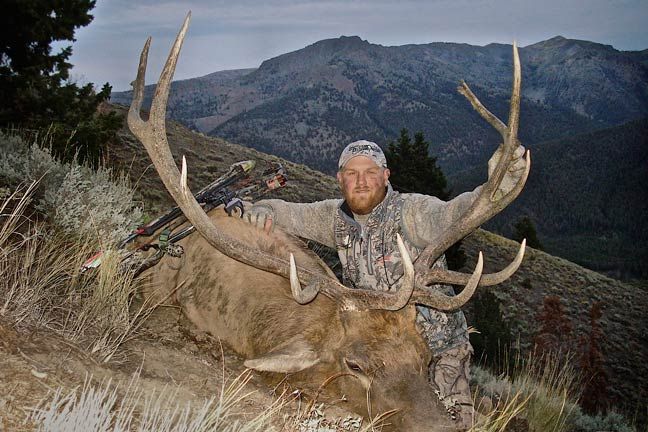
This is the part that makes most eastern whitetail hunters skeptical: stalking is not a worse way to bowhunt, it’s a different game with a different yield curve. A tree stand hunter who sees one buck a week and lets fly at 20 yards has a 90% success rate on that shot. A western bowhunter sees a buck every morning, blows seven stalks, and connects on the eighth — that’s a 12% close rate on individual stalks but a 60% season success rate because the opportunities are constant.
The other piece is the country. Mule deer, antelope, elk, and Coues whitetail live in terrain where tree stands rarely make sense. There aren’t enough trees, the animals don’t pattern through funnels the way whitetails do, and the wind shifts too much for a stationary setup. Outdoor Life’s writeup on teaching a buddy to bowhunt mule deer spells out the contrast: in mule deer country, the animal won’t come to you, so you go to it.
The Gear That Earns Its Weight
A spot-and-stalk loadout is light and ruthless about what it includes. Two-thirds of your pack weight should be optics, water, and a knife. The rest is the bow on the side, six arrows in a quiver, a bino harness, a rangefinder, wind powder, knee pads, stalking socks or slippers, and a kill kit. If a piece of gear hasn’t earned its place on three stalks in a row, it gets left at the truck.
Boots are the one place not to cheap out. You’re going to walk ten to fifteen miles on broken ground, then take them off and finish on socks. Mid-height boots with a stiff shank and aggressive lugs save your ankles and your legs over a five-day hunt. Crispi, Schnee’s, Kenetrek, and Lowa Tibet are the boots you see in camp; they’re priced like a bow because they last as long.
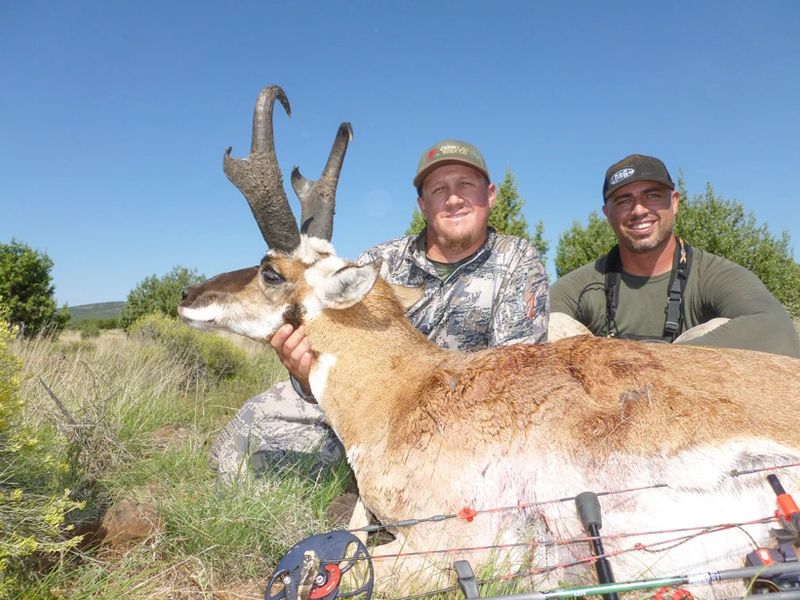
For the bow itself, anything tuned and shootable works — the western country doesn’t reward gimmicks. A compound at 60–70 lb with a 28–30 inch draw, a single-pin slider sight or a 3-pin fixed, a drop-away rest, and a five-inch front stabilizer is the baseline setup that has killed thousands of bucks. GoHunt’s antelope tactics guide covers the decoying game that opens up in pronghorn country, which is a worthy specialty within the spot-and-stalk world.
Watch a Real Spot and Stalk Bowhunt Unfold
Reading about the cadence of a stalk is one thing — seeing the long, patient buildup is another. The footage below from Born and Raised Outdoors follows a stalk on a bull elk where the closing distance and final shot show exactly how the wind, terrain, and patience pieces come together in the field:
After the Shot
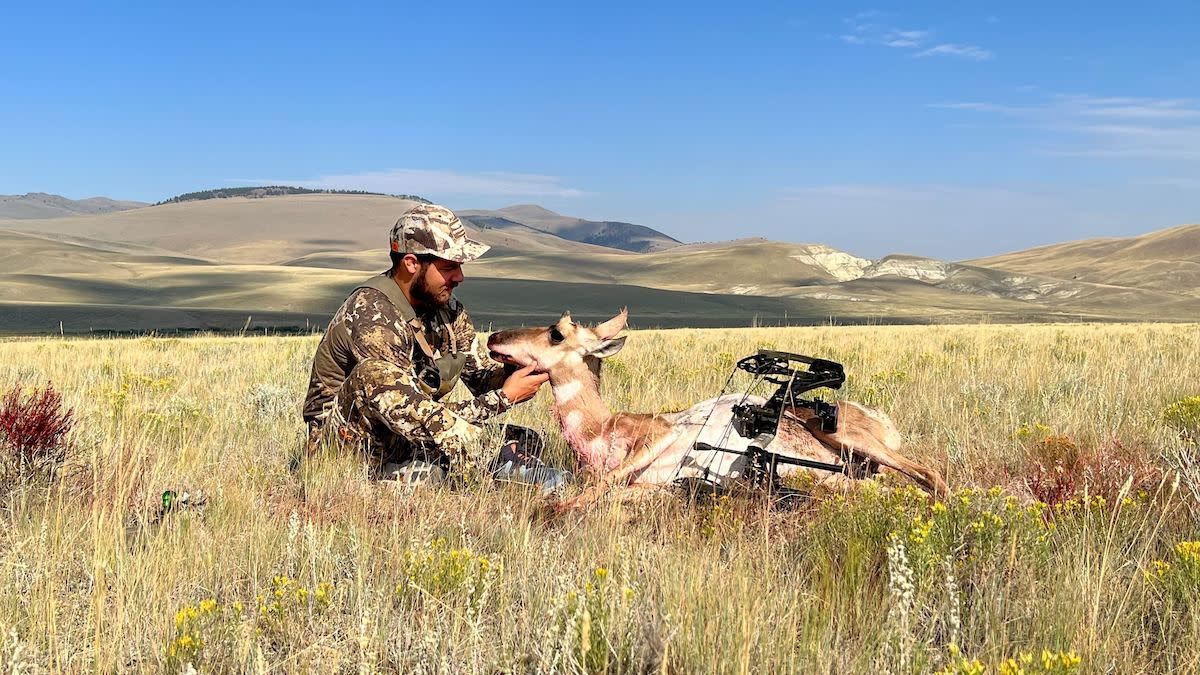
The stalk is not over when the arrow lands. Mark the exact spot the animal was standing with a landmark, give the buck at least 30 minutes before you take a step (longer if the shot wasn’t perfect), then begin tracking from the impact site. In dry western country, blood dries fast and you lose contrast in an hour. Move slow, mark every drop, and trust the arrow if you can find it — the fletching condition and any tissue on the shaft will tell you what you hit.
A mortally hit mule deer or antelope rarely runs more than 80 yards if left alone. Push the animal and you turn a 30-minute recovery into a six-hour grid search. The math here is exactly the same as the patience math earlier in the hunt: doing nothing for a half hour is the fastest way to fill the tag.
Frequently Asked Questions
What is the maximum ethical range for spot and stalk bowhunting?
For most hunters, 40 yards is the honest ceiling on living game with a compound bow. Some experienced shooters push to 50 or 60 on calm, broadside, unalerted animals, but the wind drift and animal reaction time at 60 yards eats into your margin badly. New bowhunters should treat 30 yards as their cap until they’ve shot enough animals to know what they actually do at distance.
Can you spot and stalk whitetail deer?
Yes — but it’s the hardest version of the game. Whitetails live in thick cover, have shorter sightlines, and react to noise more than visual cues. The hunters who pull it off (the Whitetail Adrenaline crew built a brand around it) typically work standing or feeding bucks in CRP fields, picked corn, and edge cover. Mule deer country is the friendlier classroom; carry the skills back east.
How long does the average successful stalk take?
From first spot to bow draw, a textbook stalk on a bedded mule deer runs three to six hours. The first hour is glassing and waiting for the bed. The next two are route planning and approach. The last hour is the final crawl inside 150 yards. A stalk that wraps in under 90 minutes usually means the animal was in unusually friendly terrain, or the hunter rushed and got lucky.
Is spot and stalk bowhunting suitable for beginners?
It’s suitable for any bowhunter who can shoot a calm 30-yard group, but it punishes impatience and bad wind reading. Most newcomers benefit from a season of structured bowhunting from a ground blind or tree stand first to build shot discipline, then transition to spot and stalk in the second or third year. Don’t let that scare you off though — the learning curve is steep but the country is the best part of bowhunting.
What’s the best state for a first spot and stalk bowhunt?
Wyoming and Montana for antelope and mule deer offer the friendliest combination of open public land, generous tag draws, and high animal density. Colorado’s elk archery season has more competition but unmatched volume of bulls. New Mexico’s Coues whitetail and Arizona’s mule deer offer the most challenging classroom. Start with antelope on public land in Wyoming — the open country forces you to learn glassing, wind, and stalking without the cover crutches of timber.
The Real Skill You’re Building
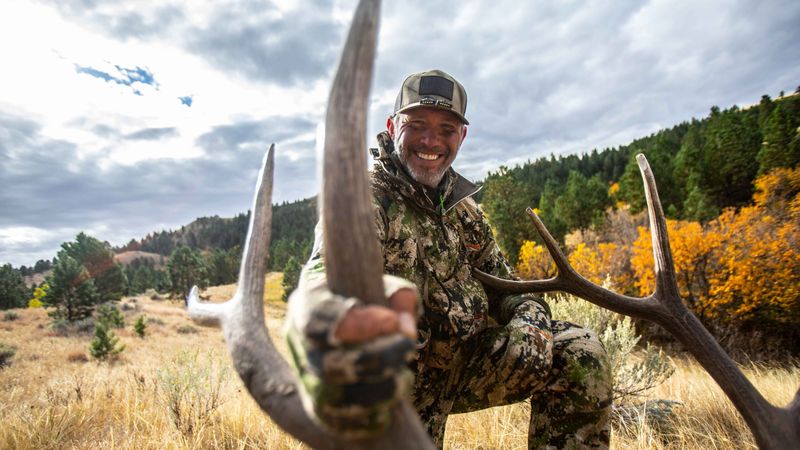
Spot and stalk bowhunting is the only style of hunting that demands you become better at observation, patience, and decision-making in equal measure. The bow is just the closer. Most of the work happens with your eyes, the wind, and your ability to say “not today” on a stalk that has gone wrong. Get those three pieces right and the close-range shot opportunities pile up faster than you expect — and the country you cover in the process is the reason most western bowhunters never go back to a tree stand.
Sources
- 5 Tips For Better Spot-and-Stalk Hunting — MeatEater — Hayden Sammak on the disciplines that separate stalking successes from failures.
- A Dozen Blown Stalks: Teaching My Buddy to Bowhunt Mule Deer — Outdoor Life — Honest account of the success rate on mule deer stalks.
- Bowhunting for Antelope: Tactics You Need to Know — GoHunt — Pronghorn-specific spot, stalk, and decoy tactics.
- Forget Calling: The Strategy Behind Stalking Elk — Bowhunter Magazine — Why stalking beats calling on pressured elk.
- How to Be a Better Spot-and-Stalk Bowhunter — Nock On Archery — John Dudley’s framework for stalk planning.
Browse archery bows, arrows, and accessories at the Archery Supplier shop →
Binoculars, scopes & trail cameras
Shop Binocular Base →
We may earn a commission when you shop through our Binocular Base link.