Archery Blog
How to Hold a Bow: 7 Grip Fixes for Tighter Groups
Jun
Most archers who can’t shrink their group beyond a paper plate at 30 yards don’t have a sight problem. They have a grip problem. Knowing how to hold a bow correctly is the single fastest accuracy upgrade you can make — no new pins, no new arrows, no tuning rig required. The fix takes about ten minutes to learn and a few weeks to ingrain. This guide walks through where the bow actually sits in your hand, why the death grip kills tight groups, how compound and recurve grips differ, and the pre-shot routine that keeps your bow hand consistent shot after shot.
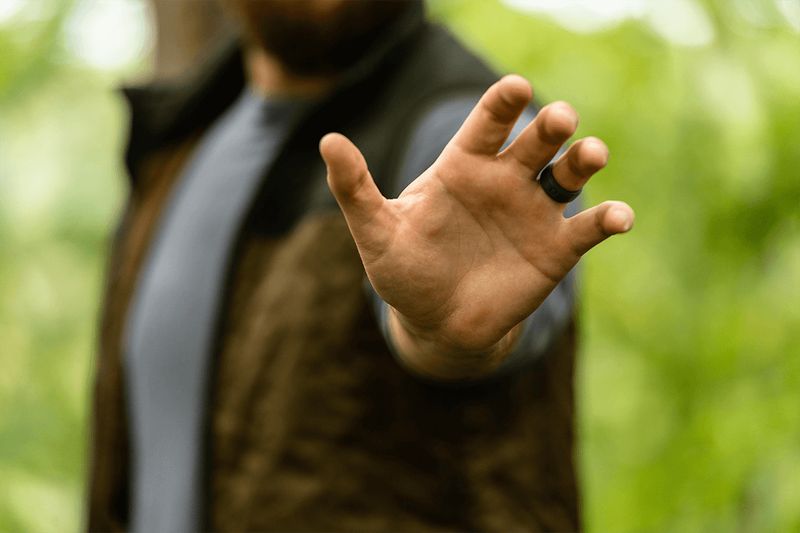
Short answer: Hold the bow with a relaxed hand, knuckles angled roughly 45 degrees from the riser, pressure on the meat of your thumb pad — not in the middle of your palm. Your fingers should hang loose, not wrap. Treat the riser like you’re carrying a glass of water, not holding a hammer.

The Grip Problem That’s Hiding Your Accuracy
Pro coaches will tell you that grip is the most common form fault they fix on day one — and it’s almost always the same fault. Beginners wrap the bow because they’re afraid of dropping it. That fear creates tension. Tension creates torque. Torque sends arrows two inches left at 20 yards and a foot left at 40. The shooter blames the pins, dials the sight, and the left misses get worse.
The truth is, your bow hand doesn’t need to hold the bow up at full draw. The bow is being pulled into your hand by the string — that’s why you can technically shoot without a finger sling and the bow won’t fall (it just jumps forward after the release). Your hand’s only job is to be a stable, predictable platform. Anything you do beyond that is sabotage.
How to Hold a Bow: The Hand Position That Works
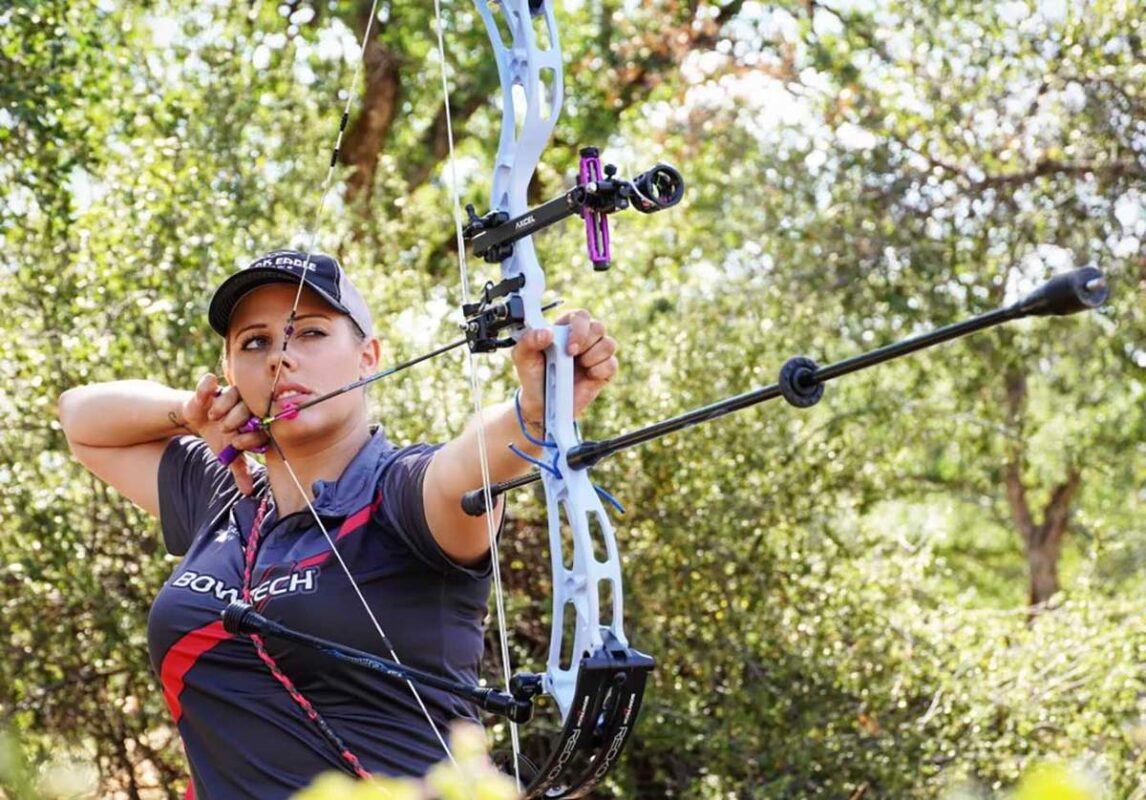
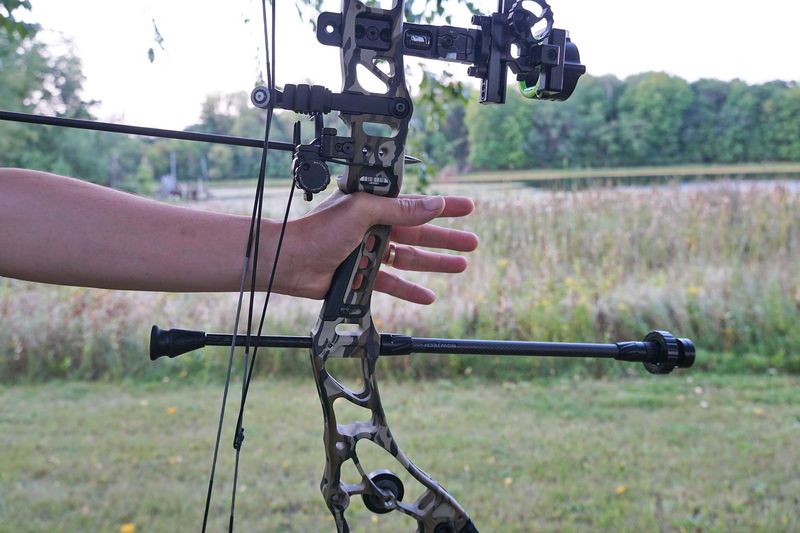
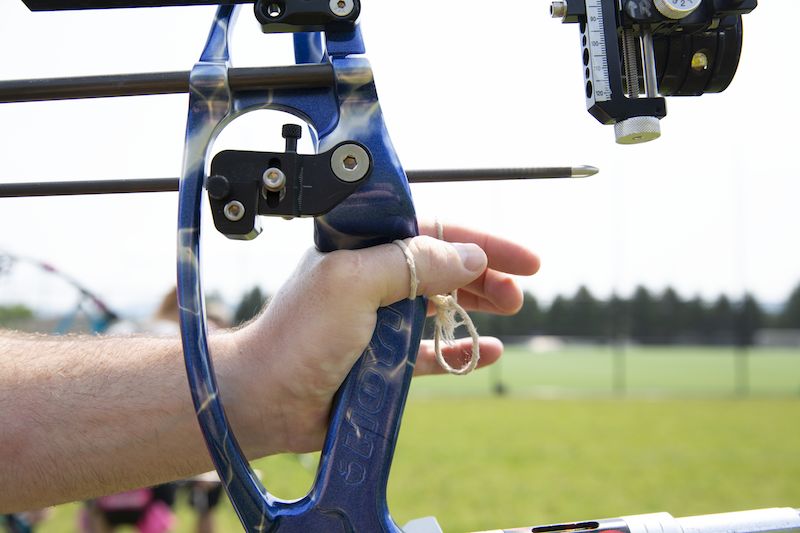
Here’s the position every coach teaches because it works. Hold up your bow hand like you’re signaling someone to stop — fingers extended, palm facing forward, thumb out. Now relax everything by about 30 percent. That’s the starting shape. Your thumb naturally angles toward the target, your fingers stay loose, and the meat of your thumb pad is exposed to take the load of the bow.
From that shape, set the riser into your hand. The bow grip should land on the thenar eminence — the muscular pad that sits below your thumb, just left of your lifeline if you’re a right-handed shooter. That spot is in line with the bones of your forearm, which means the bow’s push-back travels through the skeleton, not through twisted soft tissue. It’s the only spot on the hand where you can take 60 pounds of holding weight and not need to grip.
Where the Bow Actually Sits in Your Hand
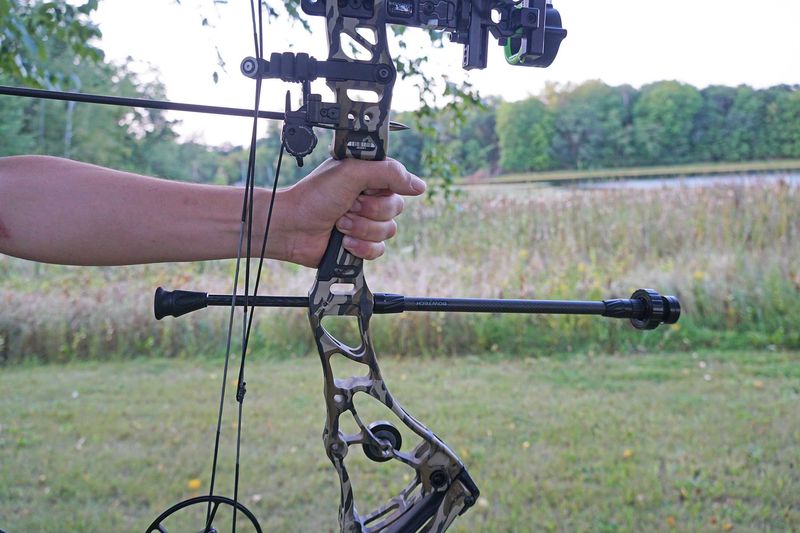
The contact patch matters more than people think. If the bow sits in the center of your palm, two bad things happen. First, the load runs through the soft tissue of your hand, which compresses unevenly every shot. Second, your fingers naturally try to close around the grip because they’re already wrapped behind it. Both create torque.
Slide the bow until it’s pressed against the bottom of the grip shelf — no air gap between your hand and the riser. That gap, if you let it exist, becomes a different gap every shot. A different gap means different pressure, different pin float, different impact. Bow grip technique starts with eliminating that gap.
The Knuckle Angle Almost Every Beginner Gets Wrong
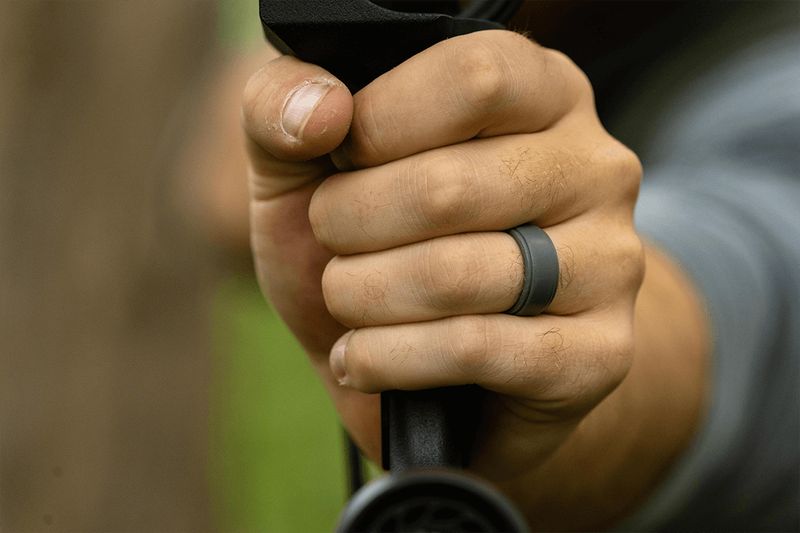
Look at your knuckles. If they run vertical and parallel to the bow riser, your wrist is rolled in and your forearm is sitting right in the path of the bowstring. Welcome to string slap — the bruise across the inside of your forearm that’s slowed down half the new archers we know.
Rotate your wrist so the knuckles angle out at roughly 45 degrees from the riser. That rotation pulls the meaty part of your forearm out of the string’s path, drops your elbow into the right position, and locks your bow shoulder down where it should be. The same micro-adjustment fixes three problems at once: torque, string slap, and a high bow shoulder.
If you can’t tell whether your knuckles are at 45 degrees, draw the bow in front of a mirror or have a buddy take a phone video from behind your bow arm. The first time most archers see their own grip on video, they’re surprised — the wrist is usually rolled in further than they think.
Death Grip vs. Open Hand: Why Pressure Matters More Than Position
The single biggest accuracy killer in archery is the death grip — when an archer clamps all four fingers tight around the riser like they’re trying to crush it. Every fiber of tension in those fingers transmits into the bow as torque. The harder you squeeze, the more the bow twists during the release, and the further left or right your arrow lands.
The fix isn’t subtle. Open your fingers. Let them hang. If you’re worried about the bow jumping forward after the release, that’s what a wrist sling or finger sling is for — a simple loop of cord that catches the bow so you don’t have to. Once you trust the sling, your fingers can finally relax, and the death grip dies on its own.
How loose is loose enough? A good benchmark from Mathews coaches: imagine you’re holding a small bird. Tight enough that it can’t fly away, loose enough that you don’t crush it. That mental picture beats any percentage of pressure you’ll read in a manual.
Bow Torque: How a Twisted Grip Wrecks Arrow Flight
Bow torque is the silent killer behind most “mystery” tuning problems. You paper-tuned the bow last week and got a clean bullet hole. This week the arrow is throwing a four-inch left tear. The bow didn’t change. Your grip did.
Here’s what’s happening physically. When you torque the bow, the riser pivots a few degrees off its natural line before the arrow fully clears the rest. The string yaws, the nock end of the arrow gets pushed sideways, and the arrow flies with a slight fishtail. Multiply that across 30 yards and you’ve got a flier — or worse, a consistent group that drifts left every time.
The diagnostic test is paper tuning. Shoot through a sheet of paper at six feet with a known good arrow. A vertical tear is nock height. A horizontal tear is almost always grip torque — not the rest, not the cam timing, not the spine. Fix the grip first, then re-paper. Half the “rest problems” we’ve seen solve themselves with a hand reset.
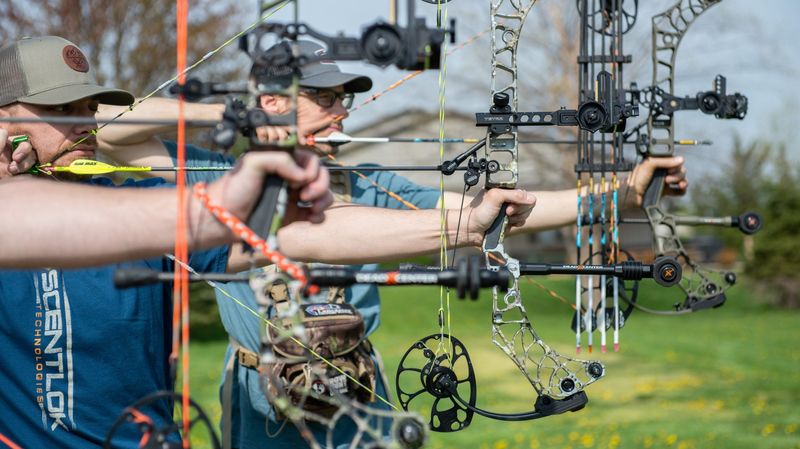
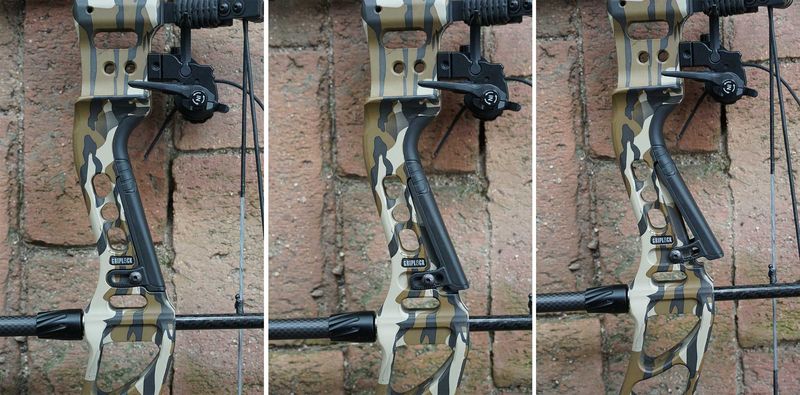
The Compound Bow Grip vs. the Recurve Bow Grip
The fundamentals are the same — relaxed hand, 45-degree knuckles, pressure on the thumb pad — but the equipment changes the details. Compound bow grip technique tends to involve a narrow, sculpted grip section with a slim profile, which actually makes the proper position easier to find. Your hand naturally lands on the thumb pad because there’s nowhere else for it to go.
Recurve bow grip is a different beast. Olympic recurve grips are wider, and the bow’s heavier static weight means it wants to roll out of your hand after the release — which is why every serious recurve archer uses a finger sling. The position is still thumb-pad-and-relaxed-fingers, but the post-release dynamics are more dramatic. The bow should physically fall forward and dangle from the sling. If it doesn’t, you’re holding on.
For traditional and barebow shooters, the grip philosophy is the same with one caveat: traditional bows often have a deeper grip throat, so the hand can sink in further before contacting the shelf. The principle of pressure-on-the-thumb-pad still applies, but you may have to consciously prevent your hand from rotating inward.
A Repeatable Pre-Shot Routine for the Bow Hand
Consistency is the whole game. The hand position you can do once on demand is worthless if you can’t replicate it under the pressure of a hunt or a tournament. Build a five-step pre-shot routine for the bow hand and run it every single shot in practice until it becomes automatic.
- Set the hand open. Before you touch the bow, hold your bow hand up in the stop-signal position and let the fingers relax.
- Place the bow on the thumb pad. Lower your hand onto the grip, contacting the thenar eminence first, then sliding up to the shelf.
- Check the knuckle angle. Knuckles at roughly 45 degrees from the riser.
- Verify the fingers are loose. Index finger may wrap, middle/ring/pinky stay relaxed, hanging or curled lightly.
- Draw without re-gripping. Through the entire draw, anchor, and release, do not re-clench. Your hand should look the same at the end of the shot as it did at the start.
If you forget step five and snatch the bow at release, you’ll throw the shot every time. The finger sling exists precisely so you don’t have to grab. Use it.
How to Cure a Bad Grip You’ve Built for Years
If you’ve been shooting with a death grip for five seasons, the muscle memory won’t unwind in an afternoon. Plan for two to three weeks of deliberate practice, and accept that your scores may dip during the rebuild. The dip is real — and it’s also the price of a permanent fix.
A drill that works for almost everyone: shoot at a blank bale, three yards away, eyes closed. Forget the target. Forget the pins. The only thing you’re doing is feeling the bow sit on your thumb pad and watching that the fingers stay open through the release. Run 20 to 30 shots like that per session for two weeks. When you come back to a target, the new grip will be there waiting for you.
For practical pillar guides on the rest of your form, see our breakdowns of the anchor point that locks in a stable shot and the archery posture that holds your foundation steady. If you’re building from scratch on a compound, the 7-step compound bow setup guide covers the equipment side that pairs with this grip work.
Watch It on Video
Archery 360’s quick visual tutorial covers the hand position from start to finish in under three minutes — useful as a visual companion to everything above.
What to Practice This Week
Pick one drill from this article and run it for seven days. The blank-bale, eyes-closed drill is the one that pays back fastest — it isolates the bow hand from every other variable. Twenty arrows a night, two weeks, no target panic, no scoring pressure. The grip you build there is the grip you’ll have on every shot for the rest of your shooting life.
If your groups still drift after the rebuild, paper tune again. If the tear is gone, the grip was the problem all along. If it persists, then you’re looking at a rest, cam timing, or spine issue — and you’ve earned the right to actually diagnose those without grip noise getting in the way.
Sources
- Mission Archery (Mathews) — Proper Grip — official Mathews-affiliated coaching breakdown of bow hand position.
- Outdoor Life — How to Grip a Compound Bow for Better Hunting Accuracy — long-form grip technique guide with visual examples.
- Archery 360 — Form Breakdown: Grip — World Archery–affiliated coaching reference on grip fundamentals.
- Bowhunting.com — How to Grip a Bow for Better Accuracy — practical bowhunter-focused breakdown of grip torque and fixes.
Browse archery bows, arrows, and accessories at the Archery Supplier shop →
Shop on eBay
Archery Equipment on eBay →
We may earn a commission when you shop through our eBay links.