
Archery Blog
How to Choose a Bow Sight: 5 Specs That Matter
Jul
A sight is the single accessory most responsible for where your arrow lands, yet most archers pick one on price alone and then blame their form. The hardware on a $40 sight and a $250 sight is genuinely different — the pins are thicker, the fibers shorter and dimmer, the windage adjustment sloppier. Knowing what to look at before you buy saves you from re-sighting a bargain sight every other week. This guide breaks a sight down into the parts that matter and tells you which spec to prioritize for your style of shooting.
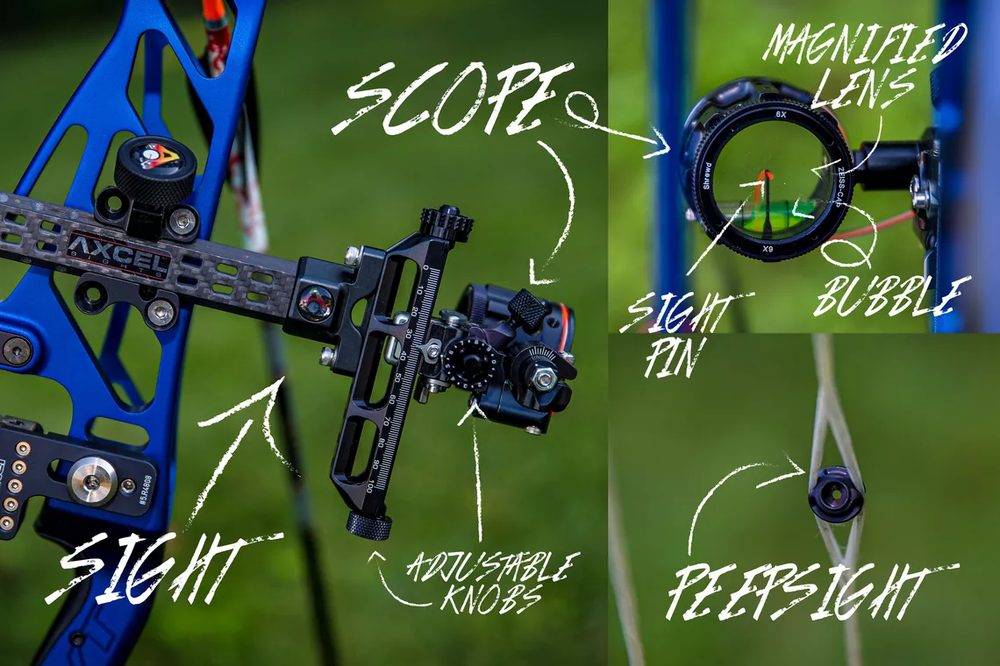
The core parts of a sight: the housing (scope), the sight pins, the adjustable knobs, and the bubble level. Image: World Archery.
How to Choose a Bow Sight: Start With How You Shoot
Before comparing any spec sheet, answer one question: do your shot distances change fast, or do you have time to range first? That answer decides more than brand or budget ever will. A treestand bowhunter taking a 20-yard shot on a deer that just stepped out has no time to dial anything — they need a fixed pin already set. A target archer or a western spot-and-stalk hunter usually knows the exact yardage before drawing, so a single adjustable pin gives them a cleaner picture.
Everything else — aperture, fiber, level, adjustment quality — is a refinement on top of that first decision. Nail the shooting-style match first, then optimize the hardware.
Single-Pin vs Multi-Pin: The First Fork in the Road
A multi-pin sight stacks three to seven fixed pins in the housing, each sighted for a set distance — say 20, 30, 40, and 50 yards. You pick the pin that matches and hold. It’s fast and forgiving of a bad range estimate, which is why treestand hunters lean on it. The downside is pin clutter: seven glowing dots can crowd a small target at distance.
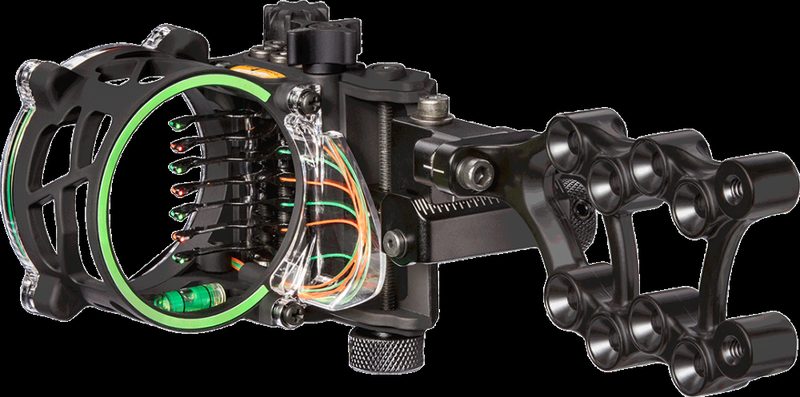
A seven-pin sight covers a wide range of distances without dialing, but the stacked pins crowd the sight picture at long range.
A single-pin sight has one pin on a slider you dial to the exact yardage using a marked tape. The reward is an uncluttered view and pinpoint aiming — nothing sits below your aiming point blocking the target. The cost is time: you have to range and dial before the shot, which is a problem when an animal is moving. For a deeper breakdown of the trade-offs, see our full guide on single pin vs multi pin sight.
There’s no universally correct answer. 3D and field archers who love a clean picture tend toward single-pin; whitetail hunters who need speed tend toward multi-pin. Some sights split the difference with a movable multi-pin housing.
Pin Diameter and Aperture Size: .010 vs .019
Pin diameter is measured in thousandths of an inch, and the two you’ll see most are .019 and .010. A .019 pin is thicker and brighter — easier to pick up in low light and at the blur of a fast shot, which is why hunting sights favor it. A .010 pin is finer, so it covers less of the target and lets you aim more precisely at distance, which is why target and long-range shooters prefer it. If you hunt at dawn and dusk, go .019. If most of your shooting is 3D or paper past 40 yards, .010 rewards you with tighter groups.
The aperture is the round housing opening the pins sit inside. A larger aperture gathers more light and pairs naturally with your peep sight — you center the circle of the aperture inside the circle of the peep for a repeatable anchor. Some target apertures accept a clarifier or verifier lens to sharpen the picture for aging eyes. Bigger isn’t always better: a smaller aperture forces a more consistent peep alignment, which some archers find tightens their groups.
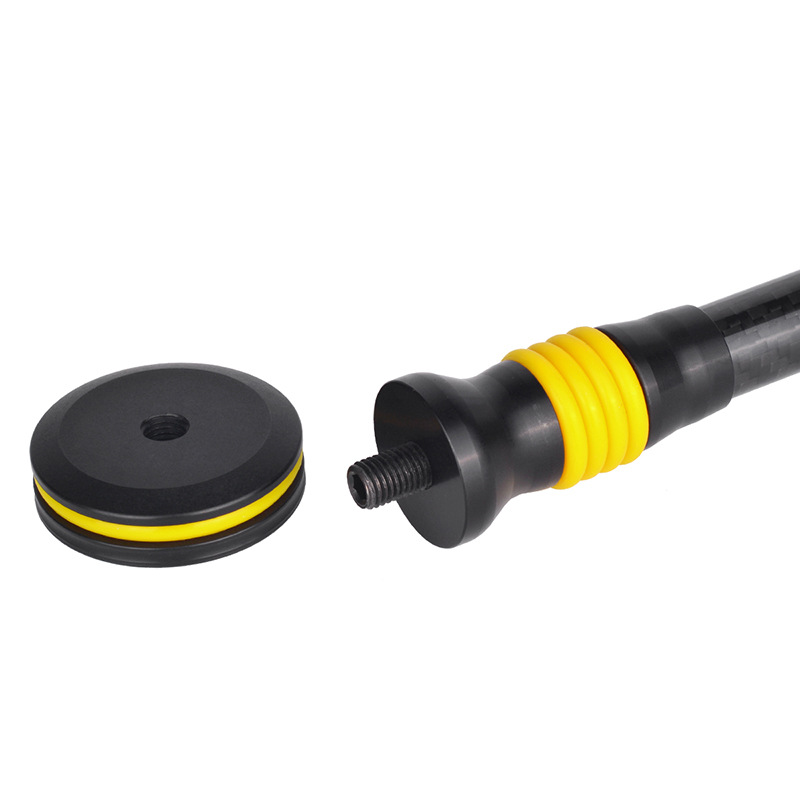
A sight is only as steady as the bow behind it. A stabilizer calms pin float so the aperture holds still on the target instead of wandering.
Fiber Optic Length and Brightness
The glowing dot on your pin isn’t lit by a battery — it’s the tip of a fiber-optic strand collecting ambient light along its length. That’s why fiber length matters: a longer wrapped fiber gathers more light and glows brighter in the last legal minutes of shooting light. Cheap sights use short, exposed fibers that dim fast at dusk exactly when a bowhunter needs them most. Quality sights wrap a long fiber around the housing to soak up light and protect it from snags.
Longer wrapped fibers gather more light and stay visible at last light. Short, exposed fibers fade at dusk.
If you routinely hunt low light, look for a sight rated for a light kit — a small rheostat-controlled LED that lights the fibers on demand without washing out your night vision. Just check your local regulations; lighted pins are legal in most places but not all.
The Bubble Level (and Why 2nd/3rd Axis Matters)
The small bubble level at the bottom of the aperture is the most underrated part of a sight. Cant the bow even a few degrees left or right and your arrow drifts sideways, and the error grows with distance — a lean you’d never notice at 20 yards can miss the vitals at 60. The level lets you confirm the bow is plumb before release.
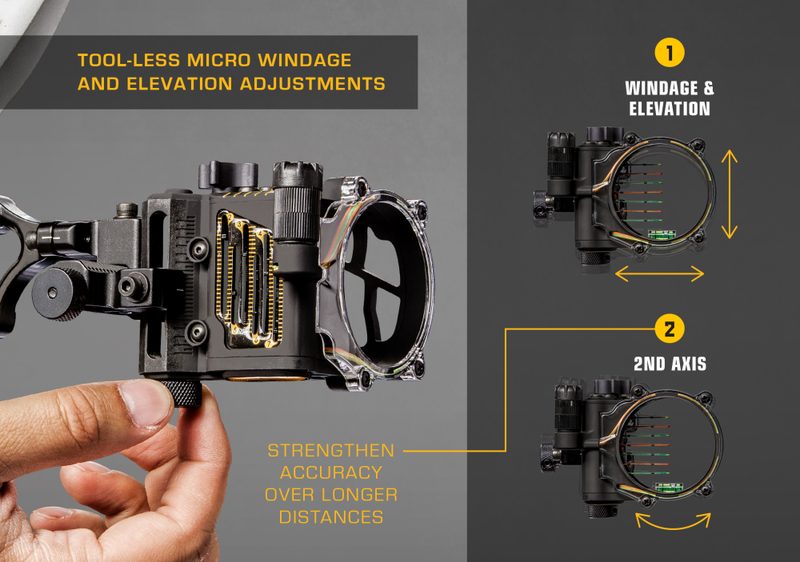
Tool-less windage and elevation knobs plus 2nd-axis adjustment keep the bubble true across the whole range of distances.
Here’s where cheaper sights fall short. A basic sight has a fixed level. A better sight offers 2nd-axis adjustment, which levels the bubble relative to the sight’s travel so it stays honest at every yardage on a single-pin slider. Premium target sights add 3rd-axis adjustment, which corrects for shots up or down a steep angle — the situation that ruins treestand and mountain shots. If you shoot flat ground only, a fixed level is fine. If you hunt from height or shoot long, pay for the axis adjustments.
Micro-Adjustment, Windage and Elevation
Sighting in means moving the pins until the arrow hits where you aim. How that movement happens separates a frustrating afternoon from a five-minute job. Budget sights move on friction and a set screw — loosen, nudge, guess, tighten, repeat. Micro-adjust sights use a geared knob with click detents, so you can move the whole housing a hair at a time and return to a known setting. Once you’ve sighted in with micro-adjust, you’ll never want to go back.
Look for tool-less windage and elevation knobs so you can make range-side corrections without digging for an Allen wrench. When you’re ready to dial your pins in, our step-by-step walkthrough on how to sight in a compound bow covers the process pin by pin.
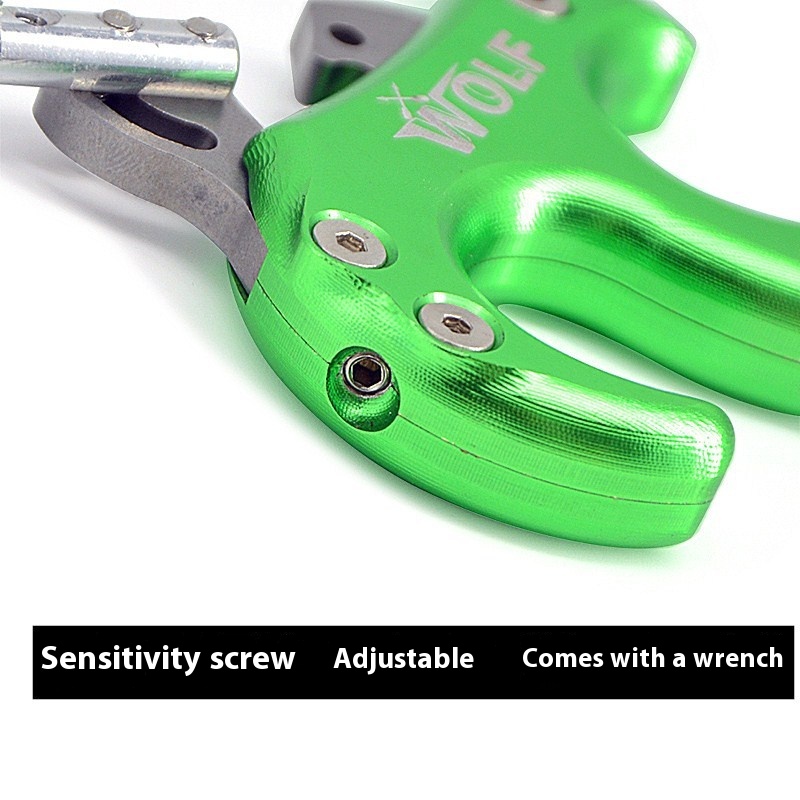
The finest sight can’t fix a punchy release. A consistent release aid keeps the pin parked on target through the shot.
Materials, Weight, and Mounting
Sight bodies are machined aluminum or molded from carbon composite. Aluminum is tough and affordable; carbon is lighter and dampens vibration, which matters if you’re counting every ounce on a backcountry hunt. For most shooters the weight difference is small enough that build quality and adjustment features matter more than material alone.
Check the dovetail or riser mount too. A dovetail bar lets you slide the whole sight forward or back to fine-tune your peep-to-aperture distance and balance — a feature target archers rely on. Make sure the sight matches your riser’s mounting holes; nearly all modern compounds use a standard pattern, but confirm before you buy. A sight that mounts solid and doesn’t shift under recoil is worth more than an extra pin.
Matching the Sight to Your Setup
Your sight doesn’t work alone. Pin float — the wobble of your aiming point — comes as much from a bare, unbalanced bow as from your hold, which is why a stabilizer and a clean release do as much for your groups as the sight itself. A well-tuned bow puts a still pin on the target; a poorly tuned one makes even a great sight chase the target around. If your pins won’t settle, walk through our compound bow tuning guide before blaming the sight.
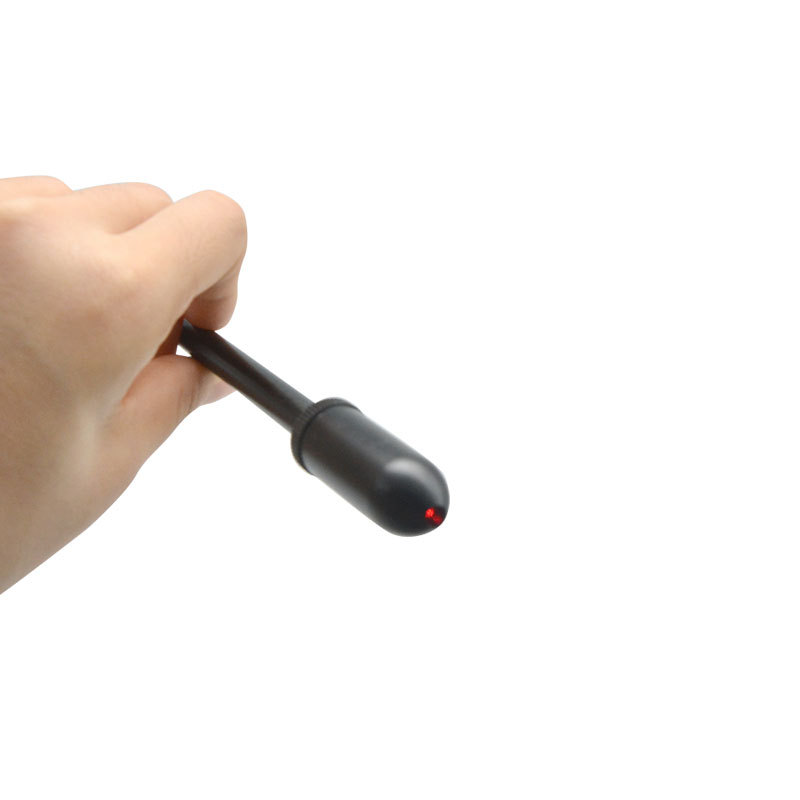
A calibration tool takes the guesswork out of checking pin gaps and confirming your setup is true before you commit to a tape.
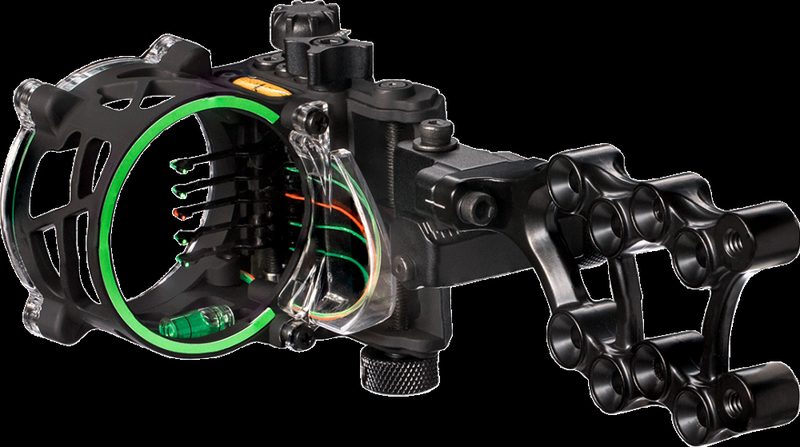
A five-pin sight is the popular middle ground: enough pins to cover common hunting ranges without the clutter of seven.
Common Bow Sight Mistakes to Avoid
The most expensive mistake is buying on pin count. More pins isn’t better — it’s just more coverage at the cost of a busier picture. A skilled single-pin shooter often out-groups a seven-pin setup. The second mistake is ignoring the level: archers spend hours on form and then cant the bow on every shot. The third is skipping 2nd-axis adjustment on a single-pin slider, then wondering why the arrow drifts as they dial out to 50 yards.
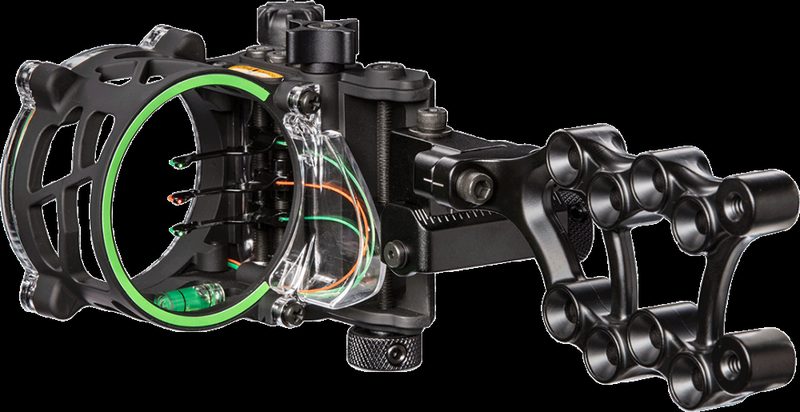
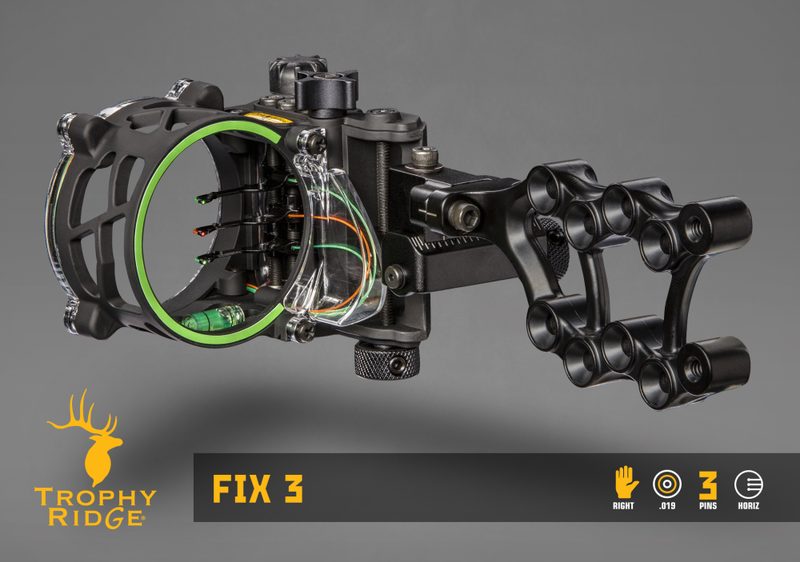
A three-pin sight keeps the picture clean while still covering the most common hunting distances.
One more: never trust a sight tape you didn’t verify at range. Print or dial the tape, then shoot every distance and adjust. Paper math gets you close; arrows on target get you honest.
Which Bow Sight Should You Buy?
If you hunt from a treestand and shoot inside 40 yards, a three- or five-pin sight with .019 fibers and a light kit is the practical pick — fast, bright, forgiving. If you shoot 3D, field, or spot-and-stalk where you range before every shot, a single-pin slider with .010 pins, micro-adjust, and 2nd/3rd axis will reward the extra effort with a cleaner picture and tighter groups. Buy the sight that fits how you shoot, then spend your range time learning it cold. A mid-priced sight you understand beats a premium one you never dialed in. Browse the full lineup of sights and accessories in the Archery Supplier accessories collection to match the hardware to your bow.
Sources
- World Archery — Compound Equipment — official breakdown of sight, scope, level, and peep components.
- Bear Archery / Trophy Ridge Fix Sight — multi-pin sight specs, fiber diameters, and pin configurations.
- HHA Sports — Single & Multi-Pin Sights — single-pin slider and axis-adjustment reference.
