Archery Blog
Saddle Hunting: The Complete 2026 Beginner’s Guide
Jun
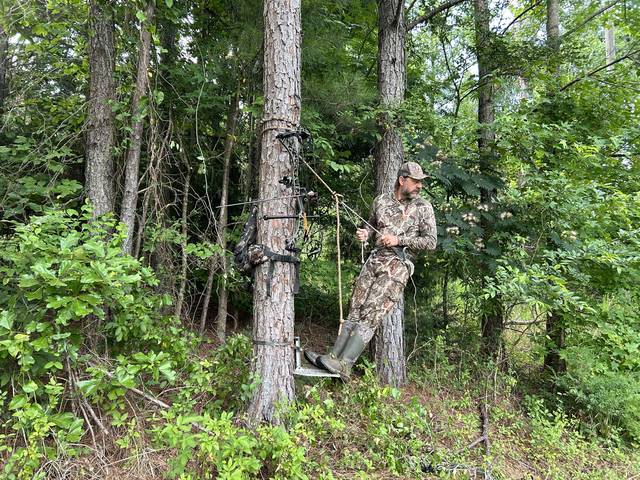
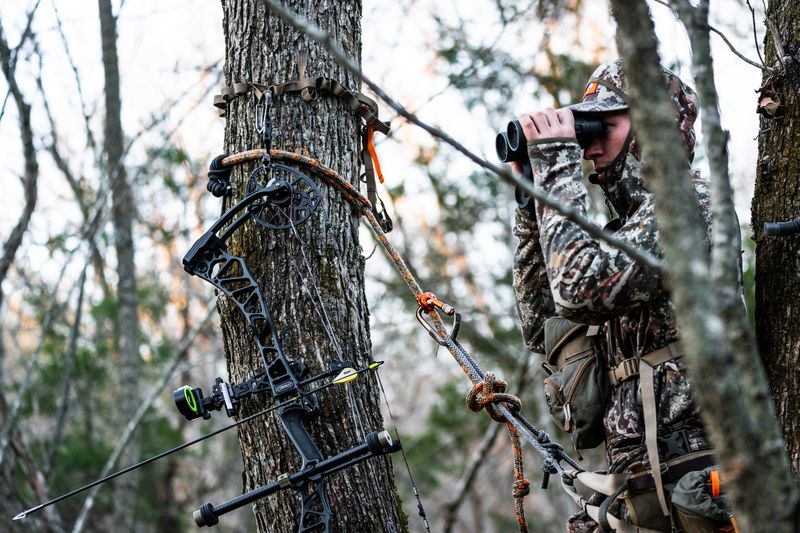
Saddle hunting puts a bowhunter in a tree with under ten pounds of gear, no fixed stand, and the ability to slip into a setup at last light and be back on the ground before a deer ever crosses the wind. It’s a harness-based system where the hunter sits in a fabric seat suspended from the tree, feet braced on a small platform, free to pivot 360 degrees and shoot in any direction. The method exploded in popularity among public-land whitetail hunters between 2018 and 2024, and the gear has finally matured into something a first-timer can actually buy and run without a six-month learning curve.
If you’re tired of dragging a 20-pound climber up a hill at 4 a.m., or you hunt a public unit where every promising tree gets pressured within a week, saddle hunting is worth a hard look. The truth is, most bowhunters who try it for one full season don’t go back.
What Is Saddle Hunting?
A tree saddle is a sewn fabric and webbing harness that wraps your hips and supports your weight while you sit suspended from a tree trunk. You face the tree, the trunk acts as a natural blind between you and the deer, and your feet rest on a tiny aluminum platform — sometimes called a ring of steps or a tethered platform. A tether rope connects your saddle’s bridge to a hitch above your head on the tree, and that single line carries your full body weight.
The functional difference between a saddle and a treestand isn’t comfort — it’s geometry. A treestand puts you behind your equipment, perpendicular to the trunk, with a fixed shooting window. A saddle puts you on the trunk, with the tree itself absorbing your silhouette. You can lean around either side, shoot straight down, or take a behind-the-tree quartering shot that would be impossible from a hang-on.
Why Bowhunters Are Switching From Treestands
Three things drive the shift. Weight is the obvious one — a full saddle setup runs 6 to 9 pounds versus 15 to 25 for a hang-on stand and four sticks. On a one-mile pack into a hardwood ridge, that’s the difference between arriving sweat-soaked and arriving dry enough to hunt the same evening.
Mobility is the bigger argument. A saddle hunter can leave a property dry on a Tuesday morning, scout a fresh rub line on Wednesday afternoon, and be hunting that exact tree by 3 p.m. Thursday with no pre-set stand to give away the location. Pressured deer become readable again because the hunter moves to them, not the other way around.
Concealment is the third. A whitetail looking up at a treestand sees a square chunk of metal and a hunter perched on top of it. A whitetail looking up at a saddle hunter sees the back of a tree trunk and maybe a knee. The difference matters more than most bowhunters admit until they sit in one.
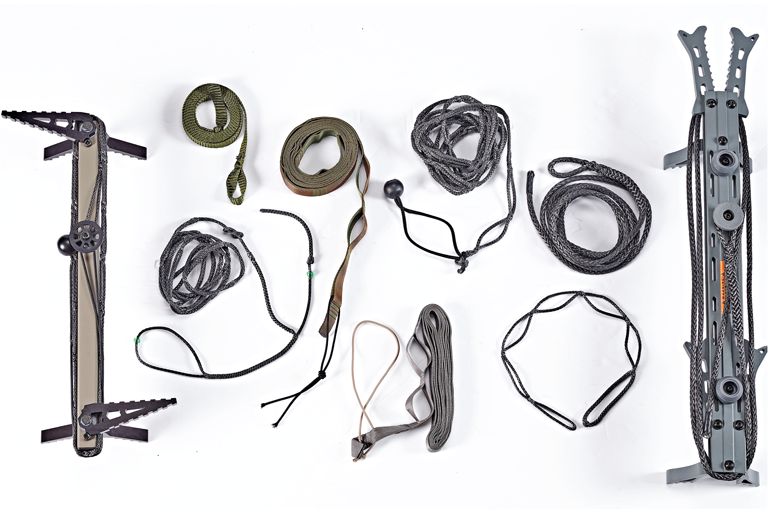
The Four Pieces of Saddle Hunting Gear
Strip away the brand marketing and the entire saddle hunting category comes down to four hard items: the saddle, the rope system, the climbing sticks, and the platform. Skip any one of them and you don’t have a working setup.
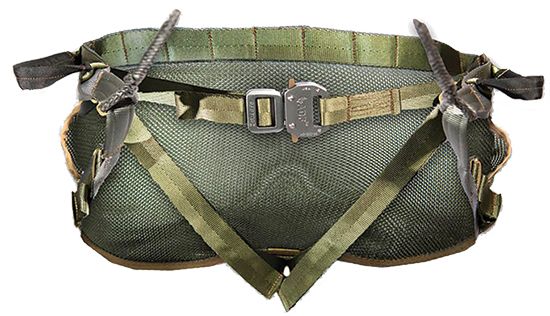
The Saddle Itself
Saddles come in single-panel and two-panel designs. A single-panel saddle, like the Tethrd Phantom, is one continuous piece of fabric — lighter, simpler, packs smaller. A two-panel design like the Latitude Outdoors Method 2 has adjustable webbing between two seat panels, letting you dial the width of your seat to your hip span. Two-panel saddles are more forgiving for hunters new to the sit position; single-panel saddles reward hunters who already know how they like to lean.
Budget for $200 to $400 on the saddle alone. The Tethrd Mantis and Trophyline Ambush Lite sit in the $250 range and both have proven track records across multiple seasons.
Lineman Belt and Tree Tether
The lineman belt loops around the tree and clips to both sides of your saddle while you’re climbing. It keeps you attached to the tree at all times — drop a stick, lose footing, and the lineman catches you. The tree tether is the rope that carries your weight once you’re at hunting height; it hitches above your head and connects to the saddle’s bridge with a carabiner.
Most hunters run an 8 mm or 11 mm static rope with a prusik hitch for the tether and a separate adjustable rope with a tender for the lineman. Tethrd’s starter kit includes both ropes pre-spliced and pre-tied, which saves a beginner from learning two new knots before their first sit.
Climbing Sticks
You’re not climbing the bark, you’re climbing aluminum or steel sticks strapped to the trunk every three to four feet. Most beginners run a four-stick setup that gets them 16 to 18 feet up. Lone Wolf, Hawk, and Tethrd all make compact stackable sticks in the $150 to $350 per set range. Length matters more than weight — a 20-inch stick gives more usable steps per pack than a 15-inch ultralight, and the gram-counting argument falls apart fast when you’re cold and tired.
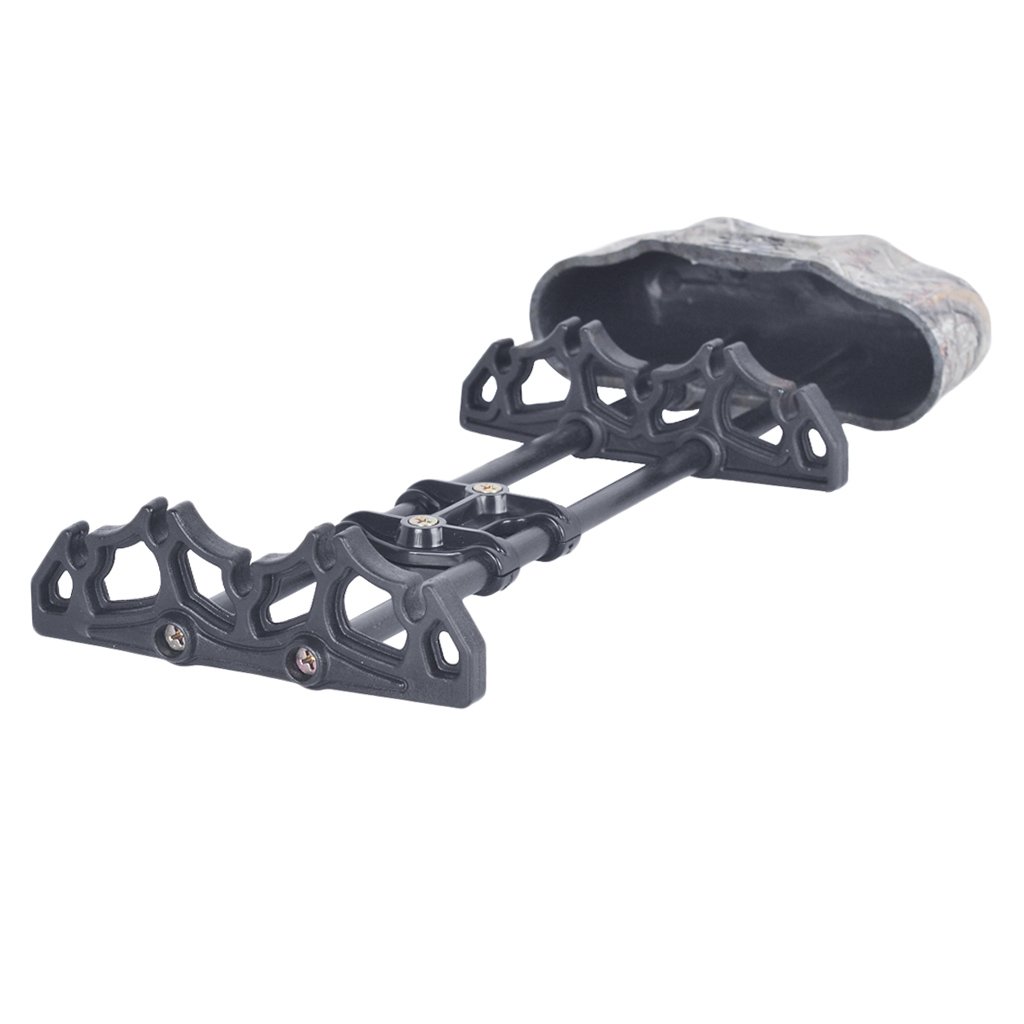
The Platform
The platform is a small aluminum step you strap to the tree at hunting height. Your feet rest on it while you lean back into the saddle. Some hunters use a full platform (Tethrd Predator, Trophyline Mission) for a wider stance and the ability to stand up between sits. Others run a ring of steps — three or four small steps screwed or strapped in a circle around the trunk — which weighs less but limits your foot placement to the rotation you set up.
For your first season, get a real platform. Ring of steps is a refinement for hunters who already know what they want.
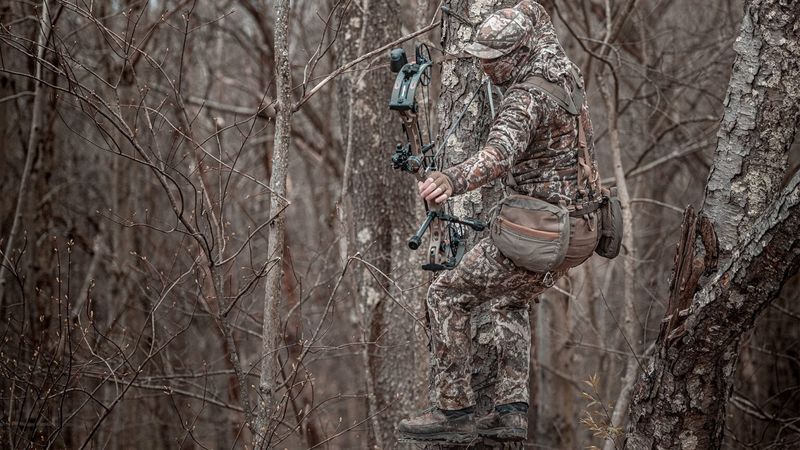
How to Set Up a Tree Saddle (Step-by-Step)
The mechanics of getting into a tree are simple once you’ve done them three times. Pick a straight tree with a 12 to 20 inch diameter at hunting height — too thin and the saddle won’t sit right, too thick and your tether eats into your reach.
Wrap your lineman around the tree and clip it to both saddle bridges. Set your first stick low — knee height is normal — step up onto it, then loosen the lineman, slide it higher, retighten, and set the next stick. Repeat until your feet are at the height where you want the platform. Strap the platform on, step onto it, then run your tether rope around the tree above your head with a prusik or a girth-hitched loop. Clip the tether to your bridge, sit back, and confirm the tether takes your full weight before you unclip the lineman.
Pull your bow up on a separate haul line — never with your shooting hand on the climb. Hang your pack from a gear hook on the offside of the tree. Total time from boots-on-ground to ready-to-shoot, with practice, is six to eight minutes.
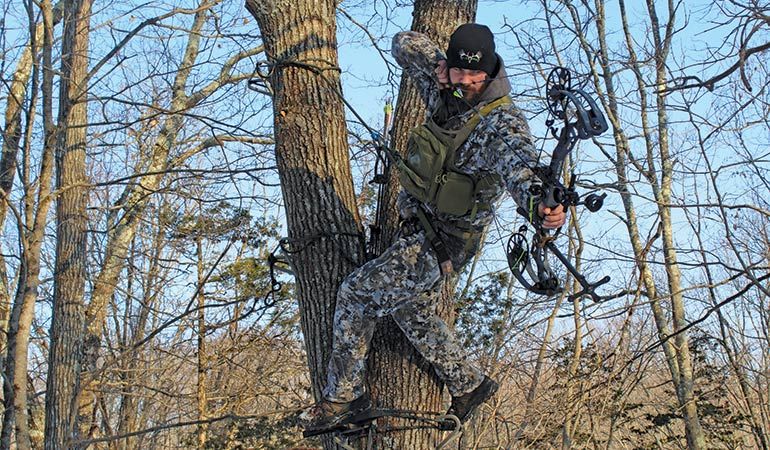
Shooting From a Saddle: The Four Shot Positions
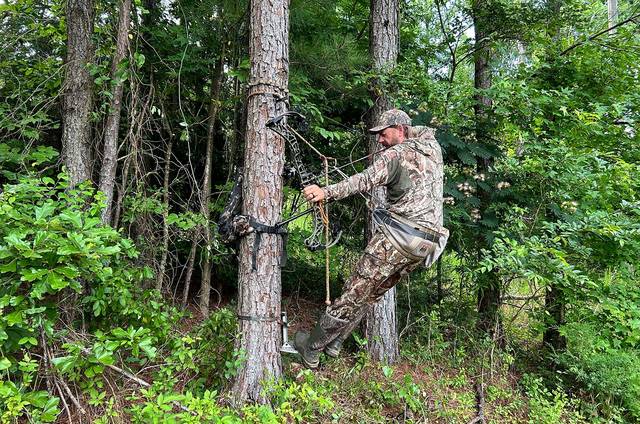
Saddle shooters think in clock positions relative to the tree. The 12 o’clock shot — straight in front of you, away from the trunk — is the easiest and the one beginners default to. The 9 and 3 o’clock shots, off your strong and weak sides, are where the saddle earns its reputation; you lean hard, pivot on the platform, and shoot around the tree.
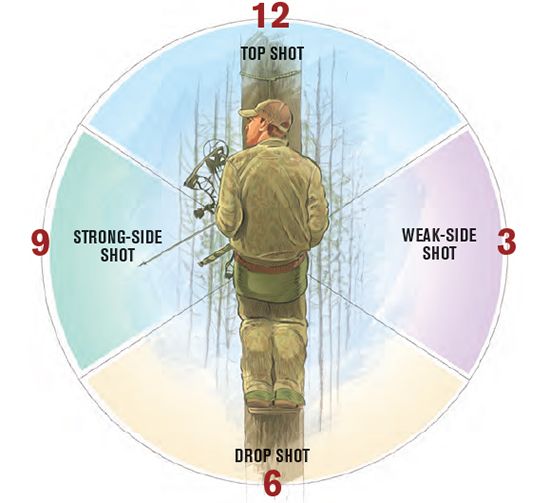
The 6 o’clock shot — drop shot, straight down between your feet — is the one most hunters never practice and most miss the first time it counts. A deer that walks under the tree is a fast, steep, downward shot that requires bending at the waist and letting the saddle support your full lean. Drill this one in the backyard before the season opens.
Strong-side and weak-side shots also change your draw mechanics. On a weak-side shot, your bow arm is on the wrong side of the tree, and your draw clearance can disappear if you didn’t tether high enough. Pick a hunting height that gives you at least eight inches of rope above your head — short tethers kill weak-side shots.
For a deeper read on shot mechanics from elevation, see our guide on how to shoot a bow from a treestand — most of the form principles carry over directly to the saddle.
The Three Best Beginner Saddles for 2026
You don’t need to spend $500 on day one. Three saddles cover the realistic beginner price range and each one has earned its spot through multiple seasons of real field use, not marketing copy.
The Latitude Maverick is the best overall choice for new saddle hunters. Two-panel design, broad seat, forgiving fit, and a price point under $300. It rewards mistakes — uneven leg straps, slightly off-center bridge, a tether set too low — without dumping you sideways or pinching off circulation.
The Tethrd Phantom earns the lightweight pick at just over 1.5 pounds. Single-panel, minimalist, packs into a side pocket. Best for hunters who already know they want to walk a mile-plus to every sit and care more about pack weight than seat width.
The Trophyline Nimbus is the budget entry under $200. It strips the comfort features but keeps the structural safety standard — the harness rating, the bridge build, the stitching tolerances. A first-season hunter who’s not sure they’ll stick with saddle hunting can buy this one, run it for 30 sits, and not feel locked in.
Mistakes That Will Wreck Your First Sit
The most common beginner mistake is tethering too low. A tether set at chin height feels secure on the ground but cuts off your weak-side shooting window the second a deer angles in. Set the tether high — above the top of your head — and accept the slight lean-back. Your shot windows open up immediately.
The second is over-tightening the leg straps. A snug leg strap feels right when you first buckle up; thirty minutes into a sit, it’s a tourniquet. Leave room for a balled fist between your thigh and the strap. You can always cinch tighter mid-sit if you need to.
The third is hunting a tree too small. Anything under 10 inches in diameter is a sway problem — wind moves the trunk, the trunk moves you, and your shot opportunity is gone before you can settle the pin. Walk past the skinny trees, even if the rub line says otherwise. The right tree is worth the extra 20 yards.
The fourth and least talked about is the dismount. Hunters set up carefully, sit four hours, and then rush the climb down because they’re cold and tired. Most saddle hunting falls happen on the descent, not the ascent. Slow down, retether your lineman before you unclip the tree tether, and treat the last stick the same as the first.
Safety: The Non-Negotiables
A saddle hunter is on the tree from the moment the lineman clips to the saddle until the moment both feet are flat on the ground after the descent. There is no point in the climb, the sit, or the dismount where you should be disconnected. The transition from lineman to tether at hunting height is the single highest-risk moment — clip the tether first, weight it, then unclip the lineman. Never the other way around.
Inspect your ropes every single sit. Look for sheath wear, sun-bleach discoloration on the prusik, and any fuzzing at the eye splice. A tether rope that’s spent two seasons in the sun is approaching replacement age regardless of how it looks. Static ropes degrade from UV exposure even when they’re sitting in a pack.
Weight limits matter. Most production saddles are rated for 300 pounds inclusive of gear — that’s hunter plus pack plus bow. A 240-pound hunter with a 30-pound pack and a 5-pound bow is already at 275. Read the saddle’s manufacturer rating, not the marketing page.
For broader bowhunting safety and gear setup foundations, our bowhunting for beginners guide covers the basics every first-season hunter needs.
Saddle Versus Treestand: How They Compare
The honest answer is they’re complementary, not competing. A saddle is the right tool for mobile, hike-in, single-sit hunting on pressured ground. A treestand — especially a hang-on or a ladder — is the right tool for a permanent setup on a property you control, where you want maximum comfort for an all-day sit during the rut.
For a side-by-side breakdown of the elevated versus ground option, see our comparison of tree stand versus ground blind bowhunting.

Watch a Full Setup in the Tree
If you’ve never watched a full beginner-to-advanced saddle hunting walk-through, The Element’s video below shows the climb, the tether transition, the platform setup, and the shot positions in one continuous run. Worth a watch before your first sit.
Is Saddle Hunting Right for You?
Saddle hunting is not a gear upgrade — it’s a method change. You’re trading the comfort of a chair for the mobility of a harness, and you’re trading the simplicity of a pre-set stand for the responsibility of evaluating every tree on the fly. If you hunt the same five stand locations every season and you’re happy, a saddle won’t change your life. If you hunt big public ground, scout aggressively, and you’re frustrated by the pressure on every good tree by mid-October, a saddle is probably the most consequential gear decision you can make this season.
Start with a budget setup. Run it for fifteen sits before you decide whether to upgrade. The hunters who quit saddle hunting usually quit in the first three trips because they bought the wrong saddle, set the tether too low, or never practiced the dismount. None of those are reasons the method doesn’t work — they’re reasons the first week is hard.
Sources
- Bowhunter Magazine: Bowhunting’s Guide to Tree Saddle Hunting — Industry overview of saddle components and shot positions
- MeatEater Wired to Hunt: Saddle Hunting 101 — Beginner-focused breakdown of saddle types and gear
- onX Hunt: Saddle Hunting 101 Tips, Gear, and Techniques — Mapping and mobility perspective
- Field & Stream: Saddle Hunting 101 — A Beginner’s Guide — Setup and safety walkthrough
- Tethrd: Saddle Hunting 101 — Manufacturer reference for saddle anatomy and rope systems