Archery Blog
How to Sight In a Compound Bow: 7 Steps to Perfect Pins
Jun
Most missed shots on a compound bow are not bad form. They are a poorly sighted bow that the archer never bothered to verify. Learning how to sight in a compound bow correctly takes about an hour the first time and roughly fifteen minutes every time you change strings, accessories, or arrow weight after that. The process is mechanical, not mystical, and every wandering arrow you have ever blamed on yourself was probably your pins lying to you.
Here is the short answer: a compound bow gets sighted in by leveling the sight, shooting a tight group at 10 yards, moving the pin in the same direction the arrows are hitting until the pin and the group agree, then repeating that exact loop at 20, 30, 40 and 50 yards. Below is the long answer with the parts the YouTube tutorials skip.
Before You Touch the Sight: 3 Things to Check First
Sighting in a misbehaving bow is the fastest way to chase your tail for an afternoon. If the bow itself is out of tune, every pin you set will drift the moment you fix the underlying problem. Run this short pre-flight before you adjust a single screw.
First, paper tune at five yards and confirm a bullet hole. A nock-left or nock-high tear means your arrow is fishtailing through the sight window and no amount of pin adjustment will save you. Second, check that the sight, rest, peep, and stabilizer mounting bolts are fully torqued — a loose sight housing moves between groups and turns every adjustment into nonsense. Third, confirm your peep is rotated correctly at full draw. If you have to twist your head to find the housing, that twist is changing the geometry of every shot.
If you skipped peep alignment when you built your string, read our peep sight installation guide before going any further. Sighting in around a misaligned peep is a recipe for repeating the entire process next week.
Step 1: Level the Sight (Don’t Skip This)
Leveling sets the geometry that everything downstream depends on. Skip it and your 20-yard pin can be dead nuts while your 50-yard pin throws arrows two feet left. There are three axes to think about.
Second axis is the easy one — with the bow held vertical in a bow vise, the bubble inside the sight housing should read level. Third axis is the one most archers miss: rotate the bow as if you are shooting a steep downhill angle, and the bubble must still read level. If it tilts, the housing itself needs adjustment. Without third-axis leveling, every angled shot in real terrain will hit off line, and that error compounds with distance. Bowhunting.com has a clean walk-through on the third-axis correction if your sight allows it.
Step 2: Start at 10 Yards, Not 20
The temptation is to walk straight to the 20-yard line because that is your first pin. Resist it. Most archers who start at 20 spend the first ten arrows trying to find the target at all, lose two arrows behind it, and burn an hour they did not have to.
Set up at 10 yards and shoot three arrows using your 20-yard pin. You are not trying to hit center — you are trying to confirm the arrows are landing on the target face and roughly grouping. If your pin is wildly off, move the entire sight housing (not the individual pin) to get the group close to the middle. The rule that governs every adjustment from here forward is simple: move the pin in the direction your arrows are hitting. Arrows hitting low and right? Pin down and right. The sight follows the impact, not the other way around.

Step 3: How to Sight In Your 20-Yard Pin
Once your arrows are landing on paper at 10 yards, walk back to 20. This pin is the most important one on the bow — it is the foundation that every other pin builds off, and it is the pin you will use for 80% of practice shots and most hunting opportunities.
Shoot a three-arrow group. Don’t touch the sight after each shot — that is how beginners blow an afternoon chasing their own tail. Find the geometric center of the group, then move the 20-yard pin to match where the group landed. If the group is two inches low and one inch right, the pin moves two inches down and one inch right inside the housing. Shoot another group. Repeat until the pin and the group agree. Most well-tuned compound bows lock in a 20-yard pin within three groups.
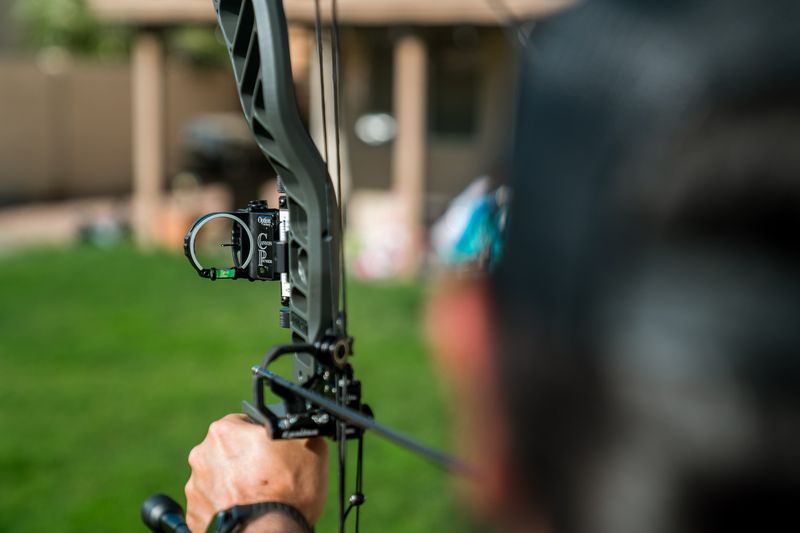
Step 4: Set the Rest of Your Pins (Multi-Pin Sight)

With your 20 locked in, the rest of the pins follow the same loop at longer distances. Step back to 30 yards, shoot a three-arrow group with your 30-yard pin, and adjust that pin only — the 20 stays untouched. Then 40. Then 50. A typical five-pin hunting sight gets set at 20, 30, 40, 50, and 60 yards. A three-pin sight usually covers 20, 30, and 40.
One detail that quietly ruins multi-pin setups: the gap between pins should get visibly larger as distance increases. If your 30 and 40 pins are almost touching, your bow is shooting flatter than the sight expected and the pin spacing is wrong — either the cam timing is off or the arrow is overspined. If you are choosing between sight styles, the single pin vs multi-pin comparison is worth reading before you commit to either system.
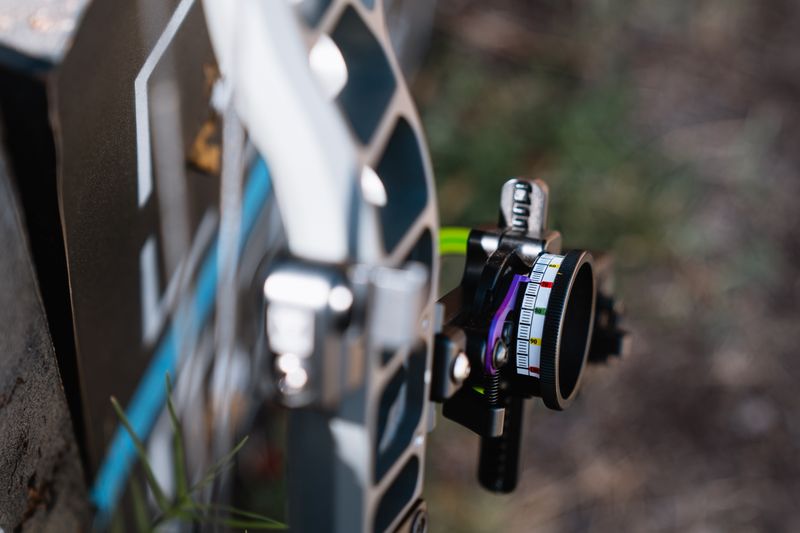
Step 5: Calibrating a Single-Pin Slider Sight
Single-pin sliders work differently. You are not setting individual pins — you are calibrating one pin against a yardage tape so that dialing the slider to “30” actually hits at 30 yards. Pick the right tape from the manufacturer’s chart based on your IBO speed and arrow weight, install it, then verify.
Shoot the 20-yard pin set, then move to 30 yards and dial the slider to the 30 mark. Shoot a group. If the group is high, the tape is too slow for your actual arrow speed — slide the indicator and re-mark. If it’s low, your arrow is heavier or slower than the tape predicted. Repeat at 40, 50, and 60 to verify the tape across distance. A correctly calibrated tape gives you one pin that works from 20 to 80 yards. A bad tape gives you one pin that lies at every distance except the one you sighted at.
Step 6: Group Tuning Beats Chasing Single Arrows
The single biggest rookie mistake during a sight-in session is adjusting the pin after one shot. One arrow tells you almost nothing — your release was a little tight, the wind nudged it, you flinched, your arrow had a wobbly fletch. The bow itself probably did exactly what you asked.
Three to six arrow groups give you the bow’s honest answer. Find the geometric center of the group, adjust to that center, then shoot another full group to confirm. If your groups are inconsistent — say, six inches across at 20 yards — fix the form issue before you keep adjusting the sight. A wandering group is a form problem masquerading as a sight problem, and dialing the pin will just chase noise. Solid form starts with a repeatable anchor point, so if your draws feel inconsistent, fix that first.

Step 7: Confirm With a Cold Shot at Hunting Distance
Every archer’s groups tighten after the first few arrows. Muscles warm up, the brain calibrates, the second arrow always lands closer than the first. That is fine for the practice range. It is a real problem when a deer steps out at 30 yards and you have one shot, cold, with cortisol in your blood.
The final check is what hunters call the cold shot. Walk away from the bow for ten minutes. Drink water. Then come back, draw once, shoot one arrow at your hunting distance, and walk to the target. That single arrow tells you what your bow does in real conditions. If it lands four inches off, your warm groups were lying to you and you need to revisit either your form or your setup.
Common Sight-In Mistakes That Wreck Accuracy
The most common ones are also the most preventable. Wind: sighting in on a gusty day will pull every group two inches left and the pin will end up corrected for a wind that does not exist on the morning of your hunt. Wait for a still afternoon. Rain: a wet string flings arrows a foot low at 40 yards — not a sight problem, a physics problem. Don’t sight in wet.
Grip torque is a quieter killer. If you palm the riser with a tight grip, your hand is twisting the bow a few degrees at the release and your impact point will wander between sessions. Open your hand, let the wrist sling carry the bow, and your groups will tighten before you adjust a single screw. The other big one is broadhead-versus-field-point error — broadheads do not fly to the same point as field points unless your bow is well tuned. Sight in with field points to a tight group, then verify with broadheads at 20 and 30 yards. If they hit differently, the bow itself needs tuning, not the sight.
![]()
When to Re-Sight In Your Bow
A sighted-in bow does not stay sighted in forever. Strings stretch, accessories shift, and arrows get replaced. Plan to re-verify your pins under these conditions: every new string or cable set, every time you swap arrow weight or spine, after any significant accessory change (rest, stabilizer, peep), after a hard fall in the field, and at least once a month during heavy practice cycles.
The full process only takes 15 minutes once the pins are close. Shoot a group at 20, confirm or correct, then check 40 and 60. If those line up, you are done. If 20 is fine but 60 has drifted, your cam timing is probably shifting under load — see our cam timing guide before you keep adjusting pins on a bow that is fighting you.

Watch: A 5-Step Sight-In Demonstration
If you prefer to see the process before you walk to the range, the video below walks through a full sight-in from a 10-yard start through 50-yard confirmation. Pay attention to how the archer adjusts after groups, not single arrows.
Final Pin Check Before You Hunt
A bow that prints three inches at 40 yards in your backyard will print six in cold weather, on uneven ground, in hunting clothes, after a half-mile pack-in. The fix is not more tuning — it is more reps in the conditions you will hunt in. Shoot from a knee. Shoot wearing your hunting jacket. Shoot at sunset when your pins glow differently. The bow is a tool that will tell you the truth as soon as you stop changing the variables. Sight it in once, confirm it under pressure, then put more arrows downrange than you adjust screws.
If your sight itself is the limiting factor, the deeper bow sight setup guide covers mounting and calibration from the moment you unbox the housing. Pair a well-set sight with a tuned bow and most archers gain two inches of accuracy at 40 yards in a single session — not from new gear, but from a sight-in process they finally did all the way through.
Sources
- Outdoor Life — How to Sight In a Compound Bow — step-by-step sighting guide with adjustment principles
- GearJunkie — How To Sight In A Compound Bow — practical walk-through with photos
- Field & Stream — Sight In and Shoot a Compound Bow — recommended tools and starting tips
- Bowhunting.com — Sighting In Your Compound Bow: Bowhunting 101 — multi-pin gap and third-axis leveling reference