Archery Blog
Compound Bow Tuning | Step-by-Step Guide for Accurate Shooting
Mar
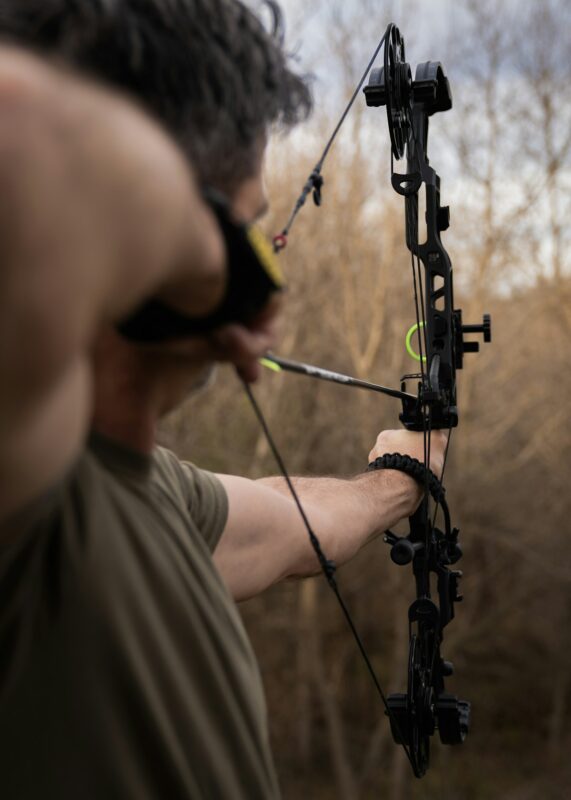
You’ve got a solid compound bow, decent arrows, and a sharp broadhead or field point on the front end. You’ve been shooting for a while, and things feel okay — but your groups aren’t as tight as they should be. Arrows drift left when they should fly straight. Your broadheads hit a different spot than your field points. Something is off, and no amount of practice will fix it if the root cause is a bow that’s out of tune.
Compound bow tuning is the process of adjusting your bow’s components — the rest, nocking point, cam timing, and more — so that the arrow leaves the string cleanly and flies perfectly straight to the target. A tuned bow forgives small mistakes in form. An untuned bow amplifies them. The difference between a 3-inch group at 40 yards and a 6-inch scatter often comes down to tuning, not skill.
This guide walks you through every major tuning method, from the simplest beginner checks to advanced broadhead tuning. Whether you’re setting up a brand-new bow or troubleshooting one that’s been shooting poorly, you’ll find what you need here.
Why Compound Bow Tuning Matters
Modern compound bows are engineering marvels. Binary cams, let-off systems, and parallel limb designs all work together to store energy efficiently and deliver it consistently. But that precision works against you when something is misaligned. A rest that’s 1/16 of an inch off center creates lateral arrow oscillation that grows worse with distance. A nocking point that’s too high produces a downward tail kick that separates broadhead and field point impact. These aren’t problems you can see with the naked eye — they show up on paper or at extended range.
According to USA Archery’s tuning guide, world champion compound shooters like Jesse Broadwater spend more time tuning than most recreational archers spend shooting. That’s not obsessive — it’s strategic. A perfectly tuned bow requires less effort to shoot accurately, reduces fatigue during long tournament rounds, and gives you confidence that every miss is your fault, not the equipment’s.
Before You Start: Essential Pre-Tuning Checks
Tuning a bow that has underlying mechanical issues is a waste of time. Before you start adjusting anything, run through these basic inspections.
Inspect Your Strings and Cables
Look for fraying, serving separation, and peep rotation. Worn strings change brace height and cam timing unpredictably. If your strings have more than two seasons on them (or around 5,000 shots), replace them before tuning. Fresh strings from a reputable builder like Winner’s Choice or America’s Best Bowstrings settle in faster and hold tune longer.
Check Your Cam Timing
Draw the bow slowly with a draw board or have a friend watch the cams as you draw. Both cams should reach their stops at the same time. If one cam hits the stop before the other, your timing is off. Most manufacturers provide specific timing marks on the cam — refer to your bow’s manual for the exact spec. On Mathews bows, look for the draw stop hitting the cable simultaneously on both sides. Hoyt uses reference lines etched on the cam.
Verify Center Shot
Nock an arrow and look down the string from behind the bow. The arrow tip should be just barely visible on the left side of the string (for a right-handed shooter). Most compound bows shoot best with the arrow resting 13/16 to 7/8 of an inch from the riser. Your bow’s manual will list the recommended center shot measurement — start there.
Set Your Nocking Point
A good starting position places the nocking point so the arrow sits roughly 1/8 inch above perfectly level when measured from the rest. This slight upward angle compensates for the downward pressure that the string’s path creates during the power stroke. Use a bow square clipped to the string and the rest to measure this precisely.
Paper Tuning Your Compound Bow
Paper tuning is the most common starting point for compound bow tuning, and for good reason. It gives you immediate, visual feedback on how the arrow leaves the bow. The idea is simple: shoot an arrow through a sheet of paper stretched over a frame, then read the tear pattern. A perfect bullet hole — just the shaft diameter plus the vanes — means the arrow is flying straight. Any tail tear tells you exactly what needs adjusting.
Setting Up the Paper Frame
You’ll need a frame (PVC pipe works well) with a sheet of wrapping paper, newspaper, or craft paper stretched taut across it. Position it about 6 feet from your shooting position with a target behind it to catch the arrow. Six feet is the sweet spot — close enough that the arrow hasn’t corrected itself through natural stabilization, but far enough that the vanes have cleared.
Reading the Tear
Right tear (nock hole is to the right of the point hole): The rest needs to move to the right, or your arrow spine is too stiff. Left tear: Move the rest left, or your arrow spine is too weak. High tear: Lower the nocking point or raise the rest. Low tear: Raise the nocking point or lower the rest. Combined tears (like high-right): Address the vertical first, then horizontal.
Make small adjustments — 1/32 of an inch at a time on the rest, or a half twist on the yoke cable for cam lean issues. Shoot three arrows after each adjustment to confirm the change. A single shot can lie; a group tells the truth.
Walk-Back Tuning for Horizontal Precision
Paper tuning gets you close, but walk-back tuning dials in your horizontal alignment with surgical accuracy. This method reveals whether your rest is perfectly centered — something paper tuning can mask when arrow spine and bow hand torque compensate for each other.
How to Walk-Back Tune
Pin your sight at 20 yards and confirm you’re hitting dead center. Without adjusting your sight, move back to 30 yards and shoot one arrow. Move back to 40 yards, then 50. You’re not adjusting your sight — every shot uses the 20-yard pin. The arrows will hit progressively lower, which is expected. What you’re watching is the horizontal drift. If the arrows track straight down in a vertical line, your rest position is perfect. If they drift left or right as distance increases, your center shot needs a nudge.
Arrows drifting right as distance increases means the rest needs to move slightly left (for a right-handed shooter). The opposite for left drift. Adjust in tiny increments — 1/64 of an inch matters at this stage — and repeat until the arrow pattern falls in a perfectly vertical line.
French Tuning (Vertical Walk-Back)
French tuning is the vertical counterpart to walk-back tuning. Instead of checking horizontal alignment, you’re verifying that your nocking point height produces clean vertical arrow flight.
Shoot at a single spot from 10 yards, then 20, 30, and 40 yards — each time adjusting your sight to aim at the exact same spot. If your arrows cluster above or below each other in an inconsistent pattern, your nocking point height is off. Arrows hitting high at close range but dead-on at distance (or vice versa) indicate the nock needs adjustment.
This method is especially useful after you’ve completed paper tuning and walk-back tuning. It catches the vertical issues that other methods may not fully resolve. World Archery’s compound tuning guide recommends French tuning as a final verification step before moving to broadhead tuning.
Broadhead Tuning: When Field Points and Broadheads Don’t Agree
Here’s where things get real for bowhunters. You’ve paper tuned, walk-back tuned, and your field point groups are stacking dimes at 40 yards. Then you screw on a fixed-blade broadhead and the arrow hits 4 inches left. This is frustrating but completely normal — and fixable.
Fixed-blade broadheads act like steering fins. Even tiny imperfections in arrow flight that field points forgive get magnified by those exposed blades catching air. The broadhead steers the arrow wherever the fletching was trying to correct.
The Broadhead Tuning Method
Shoot one field-point arrow and one broadhead arrow at the same target from 20 yards. Note where each hits. The direction the broadhead impacts relative to the field point tells you which way to adjust your rest — move the rest toward the broadhead’s impact point. If the broadhead hits right, move the rest right. If it hits low, lower the rest or raise the nocking point slightly.
Make adjustments of 1/32 inch and reshoot. When the broadhead and field point hit the same spot at 20 yards, extend to 30, then 40. True broadhead-to-field-point consistency at 40+ yards means your bow is dialed. For bowhunters, this is the tuning step that matters most — your broadhead hitting where your pin sits could be the difference between a clean harvest and a wounded animal.
Arrow Spine and Its Role in Tuning
No amount of rest adjustment will fix an arrow that’s the wrong spine for your setup. Arrow spine — the stiffness of the shaft — must match your bow’s draw weight, draw length, and the weight of your point. Too stiff and the arrow kicks right out of the bow (for a right-handed shooter). Too weak and it kicks left.
Every arrow manufacturer publishes a spine chart. Easton, Gold Tip, and Carbon Express all provide detailed selectors on their websites. Input your draw weight, draw length, and point weight, and they’ll recommend the correct spine. If you’re between spine ratings, go stiffer — it’s easier to weaken an arrow by adding point weight than to stiffen one after the fact.
Arrow length also affects dynamic spine. A shorter arrow acts stiffer. Cutting a 400-spine arrow from 30 inches to 28.5 inches effectively makes it behave like a 380-spine shaft. Keep this in mind if you’re cutting arrows to length after purchase — you may need to add point weight to restore proper flex.
Cam Lean and Yoke Tuning
Cam lean is one of the trickiest tuning issues because it’s hard to see without the right tools. When a cam leans to one side at full draw, it pushes the string laterally, which introduces a horizontal torque on the arrow at launch. The result? Inconsistent grouping that doesn’t respond to rest adjustments.
To check cam lean, draw the bow on a draw board and look at the cam from behind. The string should track straight through the center of the cam groove. If it leans to one side, you need to adjust the yoke — the Y-shaped cable that splits and attaches to each side of the limb tip. Adding twists to one leg of the yoke and removing twists from the other tilts the cam back to center.
Modern bows from Bowtech, Mathews, and Hoyt use different systems to address this. Bowtech’s Deadlock system uses a worm screw on the cam axle for tool-free cam lean adjustment. Mathews uses shims. Hoyt uses adjustable cable yokes. Check your manufacturer’s specifications before making changes — the wrong adjustment on a binary cam system can create more problems than it solves. The goHUNT definitive tuning guide has detailed visuals for each manufacturer’s system.
Timing Adjustments and Let-Off
Cam timing directly affects how the bow stores and releases energy. When both cams are synchronized, the bow reaches peak weight at the same point in the draw cycle, and the valley (the low-weight zone at full draw) is consistent. When timing is off, you’ll feel it — the draw cycle might feel gritty, the valley might be narrow on one side, or the bow might creep forward unexpectedly.
To adjust timing, add or remove twists from the control cable (not the string) to speed up or slow down one cam relative to the other. A half twist is usually enough to make a visible difference. After each adjustment, check the timing marks and draw the bow to verify the feel has improved.
Timing issues also affect let-off. If one cam is reaching its stop before the other, you won’t achieve the advertised let-off percentage. On an 85% let-off bow set to 70 pounds, mismatched timing might leave you holding 13 or 14 pounds at the wall instead of the expected 10.5 pounds. Over a full tournament round of 72 arrows, those extra pounds add up to significant fatigue.
The Tuning Order That Saves You Time
Experienced bow technicians follow a specific sequence because each step builds on the previous one. Skipping ahead or working out of order means you’ll end up re-doing work. Here’s the efficient order, from a proper form foundation:
- Inspect and replace worn components (strings, cables, rest)
- Set cam timing using manufacturer specs
- Set center shot to manufacturer’s recommendation
- Set nocking point at 1/8 inch above level
- Paper tune at 6 feet — fix major tears
- Walk-back tune to perfect horizontal alignment
- French tune to verify vertical consistency
- Broadhead tune if you’re a bowhunter
- Micro-adjust and group test at your maximum range
Most tuning sessions take 1-2 hours if you work methodically. Rush it and you’ll spend three times as long chasing issues. If you’re new to compound bow tuning, refer to our guide on essential archery gear for beginners to make sure your equipment is up to the task before you start.
Common Tuning Mistakes to Avoid
Adjusting too many things at once. Change one variable, shoot three arrows, read the results. If you move the rest AND adjust the nocking point simultaneously, you won’t know which change helped or hurt.
Tuning with inconsistent form. If your anchor point drifts, your grip changes, or you punch the trigger, no tuning method will give you reliable data. Shoot with a back-tension release or hinge if you struggle with trigger panic — it forces cleaner execution. Your form needs to be fundamentally sound before tuning results mean anything.
Ignoring arrow spine. You can paper tune all day and never get a bullet hole if your arrows are the wrong spine. Always verify spine selection before blaming the bow.
Tuning in the wind. Outdoor tuning sessions should happen on calm days. Even a 5 mph crosswind will push arrows sideways and give you false readings during walk-back tests. Early morning, before thermals kick up, is ideal.
Skipping broadhead tuning. “My field points are perfect, so my broadheads should be too.” They won’t be. Fixed blades especially will expose every tiny flaw that field points hide. Budget 20-30 minutes for broadhead tuning after your field points group well.
When to Take It to a Pro Shop
Not every tuning issue can be solved at home. If you’ve worked through every method above and still can’t get consistent groups, consider these scenarios where a pro shop’s equipment and expertise can help.
Bow presses are necessary for string and cable work, yoke adjustments, and cam changes. Unless you own one, any tuning that requires the bow to be pressed means a shop visit. Bow presses are not cheap, and using one incorrectly can damage limbs or cams — this isn’t a tool to improvise with.
Chronographs measure arrow speed precisely. If your bow isn’t hitting the advertised FPS within 10-15 feet per second, something structural might be off — timing, limb tiller, or cam issues that go beyond rest and nock adjustments. A pro shop can diagnose these with tools you likely don’t have at home.
Draw boards with built-in cameras let you see cam lean and timing at full draw from angles impossible to check otherwise. Many shops will do a quick tuning check for free or a small fee, especially if you purchased the bow from them.
Keep Your Bow in Tune All Season
Tuning isn’t a one-and-done task. Temperature changes affect limb performance and string length. A bow tuned perfectly in your air-conditioned garage may shoot differently in 95-degree heat or 20-degree cold. Strings stretch over time, especially in the first few hundred shots. Bumping your bow in a case or during transport can shift your rest or peep. Plan to re-verify your tune every 500-1,000 shots, at the start of each season, and any time you change a component — even something as small as a D-loop.
A tuned compound bow is a beautiful thing. It does exactly what you tell it to — no more, no less. Every arrow flies the same path, every broadhead hits where you aim, and every shot builds confidence. Put in the time upfront, follow the steps in order, and your groups will thank you for it.