Archery Blog
Backyard Archery Range | DIY Setup Guide for Home Practice
Mar

There’s nothing quite like stepping into your own backyard, nocking an arrow, and sending it downrange without fighting traffic, paying lane fees, or waiting for the guy three stalls over to finish his selfie session. A backyard archery range puts practice on your schedule — early morning sessions before work, twilight shooting after dinner, or a quick twenty arrows during a lunch break.
The good news? You don’t need an estate-sized property or a contractor’s budget. Archers across the country are building functional, safe home ranges in spaces as small as 30 feet deep. This guide walks through everything from planning and legality to backstop construction and target selection so you can start building yours this weekend.
Check Local Laws Before You Break Ground
Before you buy a single target, you need to know whether shooting in your yard is legal. Ordinances vary wildly — some counties welcome backyard archery while others classify bows alongside firearms for discharge purposes.
Start with your city or county clerk’s website and search for “discharge of weapons” or “archery” in municipal code. Homeowner’s association bylaws are another hurdle. Even if your city allows it, an HOA covenant might prohibit projectile sports entirely.
A few things to look into:
- Minimum property setbacks — Some jurisdictions require arrows to land at least 50 feet from any property line.
- Zoning classification — Residential zones may have different rules than agricultural or rural zones.
- Noise and nuisance codes — Unlikely to be an issue with archery, but worth confirming.
- Liability insurance — Your homeowner’s policy may or may not cover archery-related incidents. Call your agent.
AMO range guidelines are a solid reference point for spacing, backstop requirements, and general range design standards used by clubs nationwide.

Picking the Right Spot in Your Yard
You’re looking for the longest unobstructed line you can carve out. Twenty yards is workable for most target archers. Bowhunters benefit from 30 to 40 yards if the property allows it. Even 10 yards is enough for form work and close-range tuning drills.
Orient your shooting lane so you’re facing away from neighbors, roads, and foot traffic. North-facing lanes avoid shooting into a rising or setting sun. If your yard slopes, shoot uphill — a missed arrow buries itself in dirt rather than sailing over a fence.
Walk the entire lane at different times of day. Notice where kids play, where dogs roam, where delivery drivers walk. Your range exists within a shared environment, and every arrow you release needs a safe path and a safe landing zone behind the target.
Minimum Space Requirements
- 10 yards (30 ft) — Form practice, paper tuning, close-range drills
- 20 yards (60 ft) — Standard target archery, sight tapes, groups
- 30-40 yards (90-120 ft) — Hunting simulation, long-range accuracy
- Side clearance — At least 10 feet on each side of the target
- Behind the target — Minimum 30 feet of safe overshoot zone

Building a Backstop That Actually Stops Arrows
The backstop is the single most important safety feature of your range. A missed target shouldn’t mean a lost arrow or, worse, an arrow that leaves your property. There are several proven backstop designs that work at every budget.
Stacked Hay Bales
The cheapest and most traditional option. Stack straw bales (not hay — straw is denser and cheaper) at least three deep behind your target. Two bales wide on each side gives you a generous catch zone. At around $4 to $8 per bale from local feed stores, you can build a decent wall for under $50. The downside: straw degrades in rain and needs replacing every season.
Horse Stall Mats
Hang three-quarter-inch rubber stall mats from a frame behind the target. Arrows punch through just enough to stop but don’t pass through. These last for years, handle all weather, and you can find them at farm supply stores for around $40 each. Two or three mats stacked vertically cover a generous area.
Carpet or Fabric Backstop
Old carpet scraps — especially dense, commercial-grade carpet — make surprisingly effective arrow stops. Hang multiple layers from a horizontal beam and let them drape loosely. The loose fabric absorbs kinetic energy and brings the arrow to a stop. Free or near-free if you check with local carpet installers.
Dirt Berm
If you have the space and equipment, a dirt berm three to four feet high behind the target zone is the gold standard. It stops anything you throw at it, lasts forever, and costs nothing if you can source fill dirt. It’s also the option used by most permanent outdoor archery clubs.

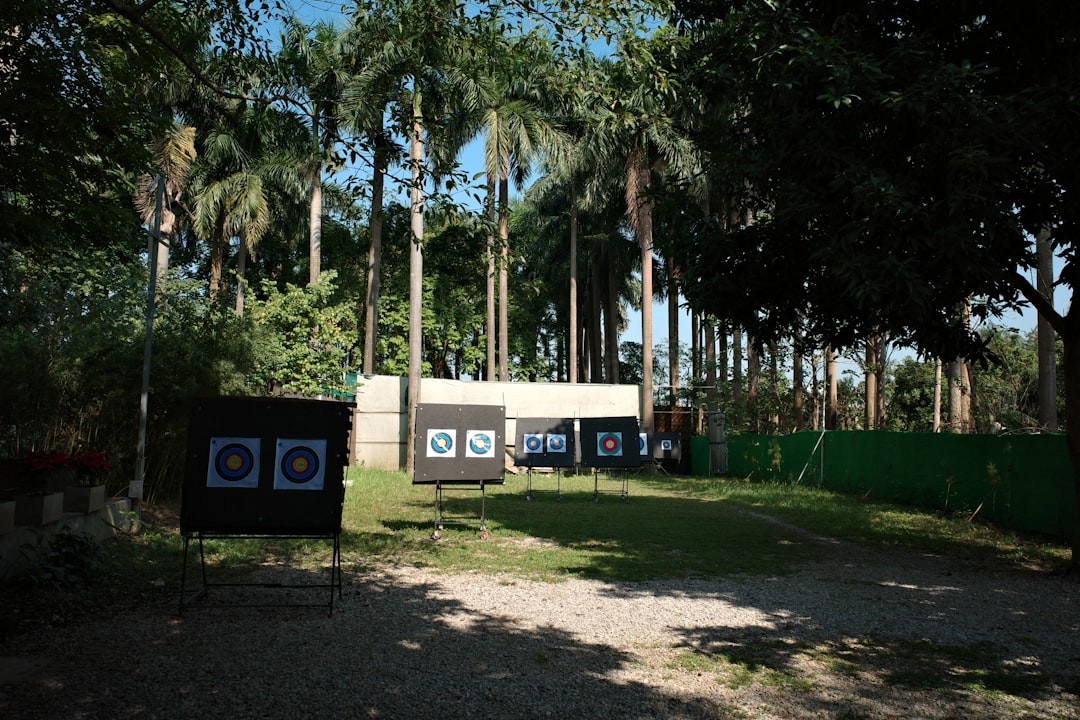
Choosing Targets for Your Home Range
Your target setup depends on what you’re training for. A target archer running a recurve needs different gear than a compound shooter preparing for 3D tournaments. Here’s a breakdown of what’s out there.
Bag Targets
These are the workhorse of backyard ranges. Bag targets are filled with synthetic fiber, stop arrows reliably, and are easy to move. They’re affordable (most run between $30 and $80), work well with field points, and last a couple of seasons with moderate use. Bag targets on Amazon come in dozens of configurations from small portables to full-size range models.
Recommended: The Morrell Yellow Jacket bag target is a favorite among home range shooters for its stopping power and durability. Worth every dollar if you shoot regularly.
Block/Foam Targets
Layered or compressed foam targets offer easy arrow removal and long life. They’re slightly more expensive than bags but handle broadheads better. The Rinehart 18-1 is a popular choice — eighteen shootable sides means you rotate through faces and extend the target’s life significantly.
3D Targets
If you’re a bowhunter, a 3D deer or elk target adds realism to your practice. These are pricier ($100 to $400) but train you to pick a spot on an animal rather than aim at a colored ring. Place them at varied distances and angles to simulate field conditions.

Setting Up the Shooting Line
Mark a consistent shooting line so every practice session starts from the same position. A few stakes with a rope or a painted line on the grass works fine. If you plan to shoot from multiple distances, set markers at 10, 20, and 30 yards using a laser rangefinder or a long tape measure.
Some archers pour a small concrete pad or lay down rubber mats for a stable footing area. This is especially useful in wet climates where grass gets muddy after rain. A level, firm shooting platform improves consistency and keeps you from slipping at full draw.
Pro tip: place a small table or shelf near the shooting line to hold arrows, releases, arm guards, and a water bottle. Having everything within arm’s reach keeps your practice sessions flowing.
Backstop Netting and Side Barriers
Even with a solid backstop behind your target, netting on the sides and above catches arrows that stray wide or high. Archery-specific netting is available, but heavy-duty sports netting from baseball or golf supply companies works just as well at a fraction of the cost.
Hang netting at least two feet wider than your backstop on each side and high enough to catch an arrow launched at maximum trajectory. Netting Pros offers custom-sized barrier nets rated for arrow speeds.
For side barriers, privacy fencing, thick hedgerows, or even a parked trailer can serve double duty. The goal is containment — every arrow stays within your defined range footprint.

Lighting for Evening Sessions
One of the biggest perks of a home range is shooting whenever you want, including after dark. A couple of LED floodlights pointed at the target area extend your range time by two or three hours in the fall and winter months.
Mount lights on poles or fence posts behind the shooting line, angled toward the targets. You want the target face well-lit without glare bouncing back at the shooter. Avoid lights that cast your shadow on the target — offset them to the sides.
Solar-powered LED floods are a low-cost, no-wiring option. Many produce enough lumens to illuminate a target face at 20 yards. Pair them with a motion sensor so they activate when you walk to the shooting line and shut off automatically.
Watch: Building a Backyard Archery Range Step by Step
This walkthrough covers the full build process from start to finish, including backstop construction and target placement.
Range Maintenance and Upkeep
A backyard range needs periodic attention to stay safe and functional. Here’s a maintenance schedule that keeps things running:
Weekly:
- Inspect backstop for wear, holes, or loose material
- Check netting for tears or sagging
- Clear the range lane of debris, toys, or fallen branches
- Rotate target faces to distribute wear evenly
Monthly:
- Replace straw bales showing significant breakdown
- Tighten backstop frame bolts and anchors
- Mow and maintain the shooting lane
- Inspect all arrows for cracks or damaged nocks
Seasonally:
- Apply weather treatment to wooden backstop frames
- Replace targets that no longer stop arrows reliably
- Reassess range layout if yard use has changed

Safety Rules for Your Home Range
Running your own range means you’re the range officer. Post rules where everyone can see them and enforce them without exception.
- Never shoot when anyone is downrange. This is non-negotiable. Establish a clear system — verbal commands, a flag, a whistle — to signal when it’s safe to shoot and when it’s safe to retrieve.
- Always know what’s beyond your target. Even with a backstop, be aware of what lies past your range boundary.
- Inspect arrows before every session. A cracked arrow can shatter on release and send carbon splinters into your hand or arm.
- No dry firing. Drawing and releasing without an arrow damages the bow and can injure the shooter.
- Secure the range when not in use. Remove arrows, cover targets, and consider locking access to prevent unauthorized shooting — especially if kids are around.
For a complete breakdown of archery safety essentials, read our archery safety rules guide.

Budgeting Your Backyard Range Build
You can build a functional backyard range for under $150 or spend over $1,000 on a premium setup. Here’s a rough budget breakdown:
Budget Build (~$100-150):
- Straw bale backstop: $30-50
- Bag target: $35-60
- Stakes and rope for shooting line: $10-15
- Basic netting (optional): $25-40
Mid-Range Build (~$300-500):
- Horse stall mat backstop: $80-120
- Block target: $80-120
- Wooden frame for backstop: $50-80
- Barrier netting: $50-80
- LED target lights: $30-60
Premium Build (~$800-1,200+):
- Dirt berm (rented mini excavator): $200-400
- Multiple targets (bag + 3D): $200-350
- Professional netting system: $150-250
- Concrete shooting pad: $100-200
- Lighting and covered shooting station: $150-300
Looking to gear up your range? The target selection at Lancaster Archery Supply covers everything from basic bag targets to competition-grade foam blocks.
Make It Your Own
The best part of a backyard range is that it evolves with your shooting. Start simple — a single target and a straw backstop — and add elements as your skill grows. Hang a wind sock to train for drift. Add a 3D target tucked behind a bush for elevated-angle practice. Build a covered shooting shelter so rain doesn’t cancel your sessions.
If you’re still dialing in your equipment, our guides on essential archery gear for beginners and basic archery form pair well with home range practice.
A personal range isn’t just convenient — it’s a training multiplier. Fifteen minutes of focused shooting three or four times a week adds up faster than a single hour-long session at a public range every two weeks. The archers who improve fastest are the ones who shoot most often, and nothing removes friction like walking out your back door and picking up your bow.
Build the range. Shoot the arrows. Watch your groups tighten.